A Humla Journey
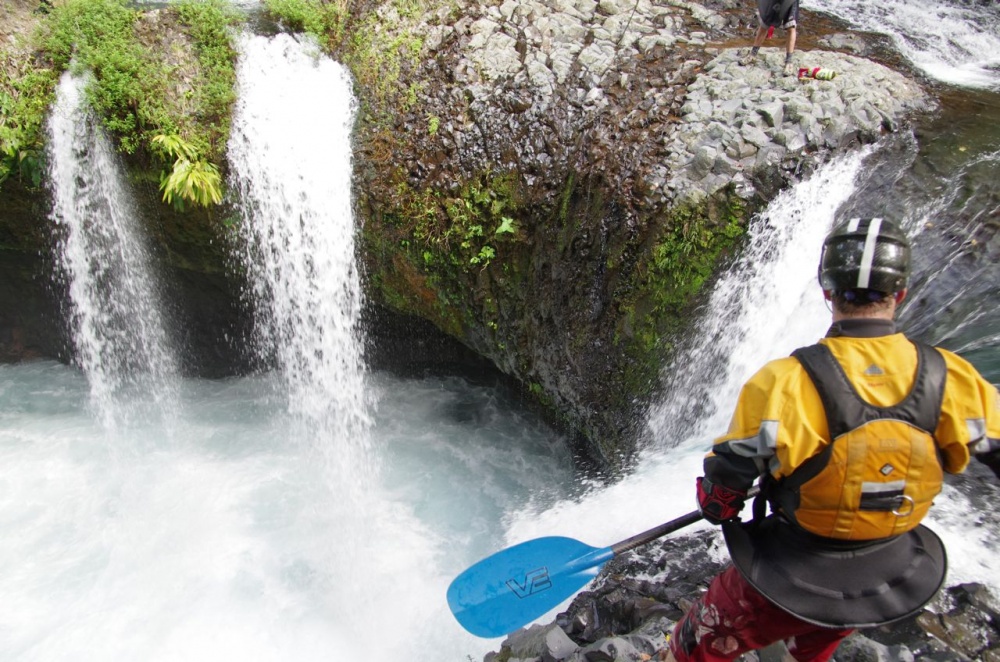
In 2013 three of us headed over to Nepal to try our luck on the Humla. It turned out to be a very successful trip and one I wont forget in a hurry. Here is a video I knocked up from the trip. Enjoy.


![]()
![]()
![]()
In 2013 three of us headed over to Nepal to try our luck on the Humla. It turned out to be a very successful trip and one I wont forget in a hurry. Here is a video I knocked up from the trip. Enjoy.
So you have done your safety briefing, showed your group a paddle and even told them how to use it. You launch them on the water and then undoubtedly they start to spin in circles. Fast forward 10 mins and they are still weaving around, struggling to make any forward progress, with the only difference being, they are now totally dishearten that they cant do, what is in their mind the easiest skill; going forwards!
I can still remember my first day in a kayak, I had been on the river for all of 1 minute, when our instructor said to the group “O.K, follow me” and then continued to paddle up the flow in an effortless style, boat staying dead straight. So like perfect students we followed on in one straight line. Well, that is for the first 2 meters! I remember thinking, my boat must be broken, it wont go straight. So I nagged my instructor, who kindly gave me the advice to keep paddling on the same side until it comes straight again. So for the next hour I stuck to this advice and proceeded to paddle as hard as I could on one side, so that the boat would hopefully come back straight again. This had 2 outcomes, the first was that no matter how hard I paddled on that side, the boat would still spin out. The other was after lotʼs of effort the boat would temporarily come straight. How strong my instructor must be I pondered?
Itʼs really important that we give our students a good start in our sport, other wise who knows what kayaking prodigies we could be putting off? So the following article is a study on teaching our beginners how to paddle in a straight(ish!) line in whitewater/club kayaks. As coaches we know that forward paddling is a really difficult technique to fully master, and top athletes spend years honing their technique. However our beginners don’t have to be masters, they just need to get from A – B and enjoy themselves, we can save the really nitty gritty for a later time in their kayaking careers.
So first thingʼs first letʼs look at why the kayaks we often put our beginners in spin so easily. Imagine sitting on the bottom of a clear lake, looking up to the surface. On the surface are two kayaks and a beach ball, one of the kayaks is a racing K1 and the other is a typical club boat. The K1 would look like a long thin shape, where as the club boat looks like a much wider rectangle. Now think about that beach ball with itʼs round shape. A beach ball will turn with complete ease, but try to push it forwards and it wont go very far! How ever a K1 wont turn eaisly, but give it a push and it will go a mile! So our club boats sit somewhere between this, but in somewayʼs is very similar to the beach ball, the slightest push and they want to start spinning.
The first thing I do when I get my students on the water is to positively encourage them to spin their kayaks in both directions. This is for three reasons, the first is group control. If they are spinning then they are staying near by. The second is because itʼs something I know they will be able to do, so they are getting instant success which in turn leads into motivation to want to do more. The third is because in a few minutes when we start looking at moving forwards its going to be really, really useful!
Progressing on from spinning is usually paddling forwards, and by the fact that they can already turn in both directions we would have thought that going in a straight line would just be a balance between this? But it never quite seems to work out like that. Often we watch a beginner paddling forwards, and we will see that their boat starts to uncontrollably wonder off in one direction or another. Our beginner then tryʼs to counteract that by eitherpaddling on the same side over and over (where the boat usually wins which usually results in the tail spinning out) or they put a back stroke in and waist their hard earned momentum.
So something is different when we paddle forwards compared with when we are static. Something that causes a beginners kayak to get a mind of itʼs own and turn off line.
Think back to the times where you have been paddling forwards, then stopped paddling and allowed your boat to just drift. It never just carries on straight, it will always want to turn off in one direction or another. Several things cause this to happen, the first is that more than likely your last stroke has encouraged your boat to start turning. Another might be a current, or the wind. However, even in dead still conditions, with you trying your hardest to leave the boat balanced, it will still eventually spin out. This is also true to when we are paddling forwards we are in a constant balancing act, making small adjustments with our paddles to keep us going straight.
The explanation to why this happens is relatively complex with several effecting factors. Imagine paddling forwards, the bow is the part cutting through the water, whereas the stern is just following. As a result of this, the bow is quite well anchored, whereas the stern is a lot more free to slide about, that is the first part of the puzzle. The next is that when our boat is static, the turning point or pivot point is usually under our bum, which is also where the bulk of our mass is. However, when we start to paddle forwards the turning point also moves forwards, but our mass stays in the same place. As a result of this when we stop paddling our mass (us) wants to keep going and the easiest way for it to go is one side or the other of the pivot point. When this happens the back end of the boat pushes to one side and skids out. You can hear and see this happening at the tail of the boat (a whoooshing noise and bubbles), but you may also notice that the front of the boat is not skidding its still pushing through the water. Thatʼs the point when our mass over takes the pivot point.
As a little class room example try pulling a pencil by its end along a desk. You should find that the pencil just follows. Now try pushing it by its end along the desk. Harder? So as we get better at kayaking we learn to pull our kayak along with good forward strokes and any chance of our body mass over taking the pivot point is soon fixed with a tweaked forwards stroke.
Going back to teaching our beginners, we are all familiar with the ʻSweep strokeʼ technique, which is undoubtedly a good technique for turning kayaks in a static setting. How about a technique for turning a kayak on the move? Or even better yet, a technique for correcting a kayaks direction on the move? A sweep stroke sort of does this, but what we really need is a refined version that is tailored to do the job, and is easily accessible to someone with the most basic of skill sets.
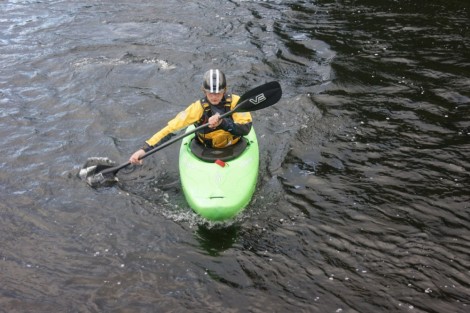
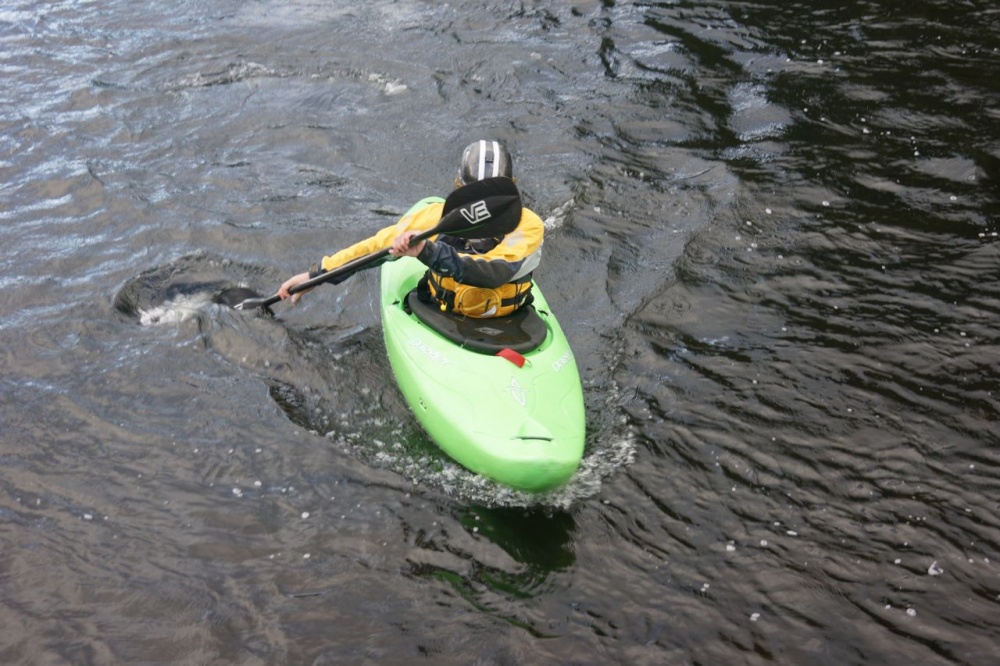
So going back to that paddle briefing at the start of the day I like to show beginners two areas on the kayak. The power area and the turning area. The power area is located from as far forward as they can reach, to about mid thigh. Whereas the turning area is located from their hips to as near the stern (tail) of the kayak as they can reach. If they want to use the power area then the paddle is near vertical, and if they want to use the turning area, then they need to flatten the paddle and sweep as much water as they can and squeeze this into the stern of the kayak, in a rainbow/arc like shape. Another way of explaining this could be to sweep as much water under the stern as they can. The important bit is that the paddle ends up as far back as they can reach (while maintaining a normal posture), this is where the turning really happens.
This should be followed with a good example of the skill in use, both in power mode, and then demonstrating the turning mode in context. e.g when the kayak starts to go off line.
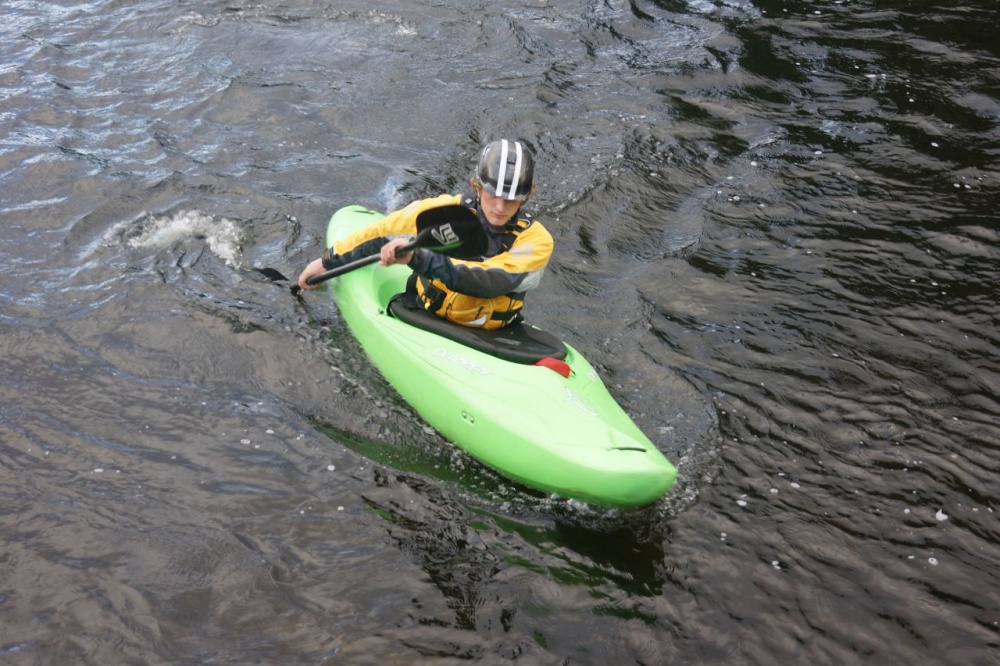
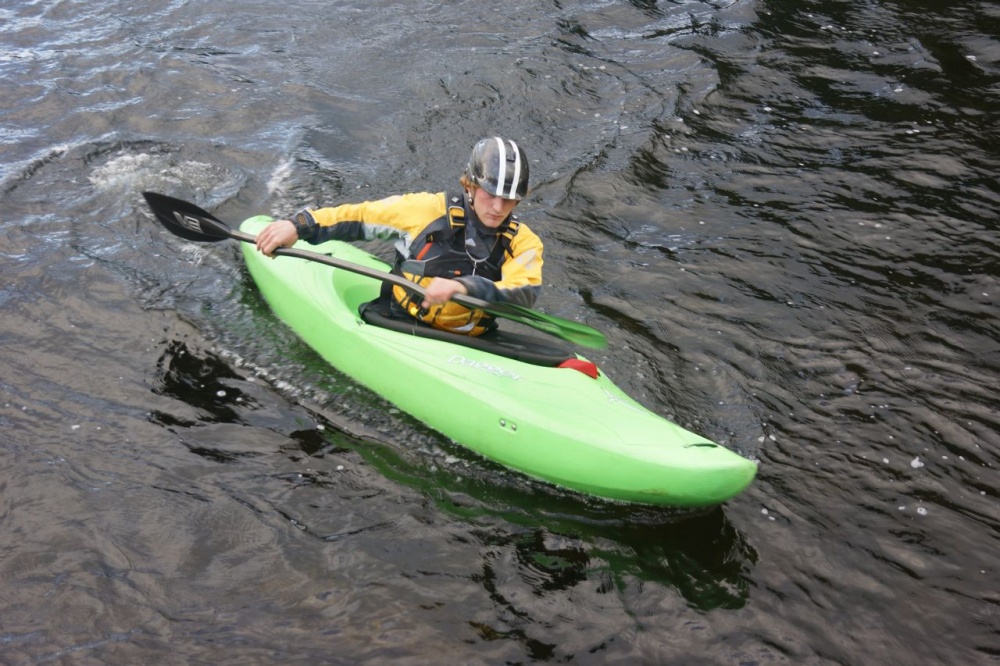
The bellow photos show the ʻTurning modeʼ in use. Notice the arm closets the water is fairly straight to give the arc shape good reach. Once the paddle has swept the water under the back of the boat it is then removed, the idea is not to then use it as a rudder. At this point we can either repeat the stroke to turn more, or if the direction is correct then forwards paddling can continue.
Head on Demo
A good question to ask your beginners could be “Where is a sailing boat is steered from?” This will hopefully get them thinking about the rudder being at the back of the boat, and will help them to visualize the correct kind of images.
Now that the learners have an awareness of the two areas of the kayak, and how they can be used, we need to create an environment that they can practice and succeed within. At this point there are many different excises or challenges that could be set, and the only limitation is your imagination. To get the ball rolling here are a few ideas:
Follow the leader - Good for the more visual learner as they get to see more demonstrations.
Kill the Spin – Have your group spinning in circles, and on your command they are to kill the spin with the above talked about stroke – make sure they are not using a backwards stroke as this could later be used in their forward paddling.
Slalom course – Save your milk floats and gather some string! By setting a fairly liner slalom course that weaves its way up your lake/river your beginners will haveto make subtle adjustments to their direction, but principally keep themselves going forwards. You can hang back, observe, give feed back and answer any questions.
Open practice – Give your leaners some time to go work it out and experiment. This suits self motivated groups.
A – B – A simple paddle from this side to the other, could be enough for your learners to start experimenting, and getting the hang of that straight(ish) line.
To conclude the article, remember the two zones of the boat, the power zone and the turning zone, get your group to understand these and how they can access them. Hopefully you have found it useful and will take something ʻforwardʼ from it, so that the next time your out teaching some novices, you will have them paddling in straight(ish) lines in no time.
Cheers,
Jake
Pushing your self to paddle harder rivers and rapids is not always easy. Before you make that decision to put on, there are so many different pressures and questions; Will I make all the necessary moves? Am I ready for this? Where will that water push me? Why do I even want to paddle this? Is that stopper flushing enough? Will I get hurt? What if I go over?
Most of the time when I’m confronted with a harder rapid, these kind of questions start to race through my head. To be honest I would be worried if they didn’t. After all, fear is mainly formed by the unknown or negative past experiences. To paddle a rapid well I find my mind needs to be 100% clear, focused and committed. But with all those questions whizzing around, it can be hard to achieve.
Somewhere between scouting that rapid, and dropping in I usually manage to settle the nerves and get myself into that clear state of mind. Over the past few years, I have developed a technique that helps me to do this. So I thought I would share & discuss it, in the hope that it may be useful to others. It’s very possible its something you already do, if this is the case perhaps this article will draw some attention to the skill, and help you develop it.
To get us started the skill I’m going to be talking about is commonly known as visualization; put in simple terms, imagining. Think back to a rapid that you have paddled multiple times. I’m guessing the more times you paddle it, the better you get at it (excluding the odd unlucky mess up) There are many reason we usually paddle stuff better after a few attempts but in essence the main reasons are because we start to get a feeling for what the water is going to do to us and when we need to place our strokes to get us down in good style. Provided you can agree with the above sentence, you will hopefully kind of agree with the next one. If we can get good enough at visualizing our selves paddling a rapid, then we have effectively paddled it, and have therefore already practiced it. So when we ‘actually’ paddle said rapid, we should be better off than if we had not visualized it.
An exercise for you; Imagine you are at the top of one of the more challenging rapids you have ever undertaken. You have scouted the rapid, safety is all set up and your boat is waiting at the top, now it’s all up to you. Can you imagine yourself paddling the line? If so, how vividly? Is your image in colour? Are you imagining your self in first person or third person? Can you make out every single move? Are you styling the line or do you see yourself messing up? Can you hear the water? Is it in real time, slow motion or fast forward? Can you sense what it feels like?
If you can answer some of these questions then you already possess the skill’s to visualize. Which I’m fairly sure everyone can do to some extent or another? However like all skills, they can be improved with good practice.
Unwrapping the skill of visualizing our selves paddle a rapid also expose’s other skills which we need to master. One of which is reading the terrain (white water/rapids). If we cant read the terrain, then we are not going to be able to work out where we need to go and if we cant do that, then we cant visualize our route through the rapid. If your new to white water, try to ask better paddlers about rapids, find out about the different features and how the river works. Reading the river is a skill and I think we can always improve it throughout our kayaking careers.
Once you are able to read the terrain and pick a path, you need to have a good idea of how you are going to get your boat to follow that route. Here is where we need to understand both the tactics (e.g lateral momentum etc) and the hard skills (e.g paddle waggling, edging etc) of white water kayaking.
With these two major components in place we are free to see the best route though a rapid, and know how to command the boat to follow that path. From that point on successful visualization becomes a lot easier. The reason it becomes successful visualization is because we are now creating an image of what should in theory be a positive out come e.g we style the rapid because we have picked a good line and rehearsed the correct moves.
I think it’s important to point out that picking a line, is not the same as actually imagining your self paddle it.
Going back to that first exercise, you can hopefully see that there is a sliding scale of creating an imaginary event. At the simplest end we might just be able to see ourselves from a third person point of view, but the images is hazzy and we cant work out how every move might look. And at the other end, we can create an image so intense it feels real.
My theory is that the more realistic an image (or perhaps brain video?) We can create, the more useful it’s going to be to us.
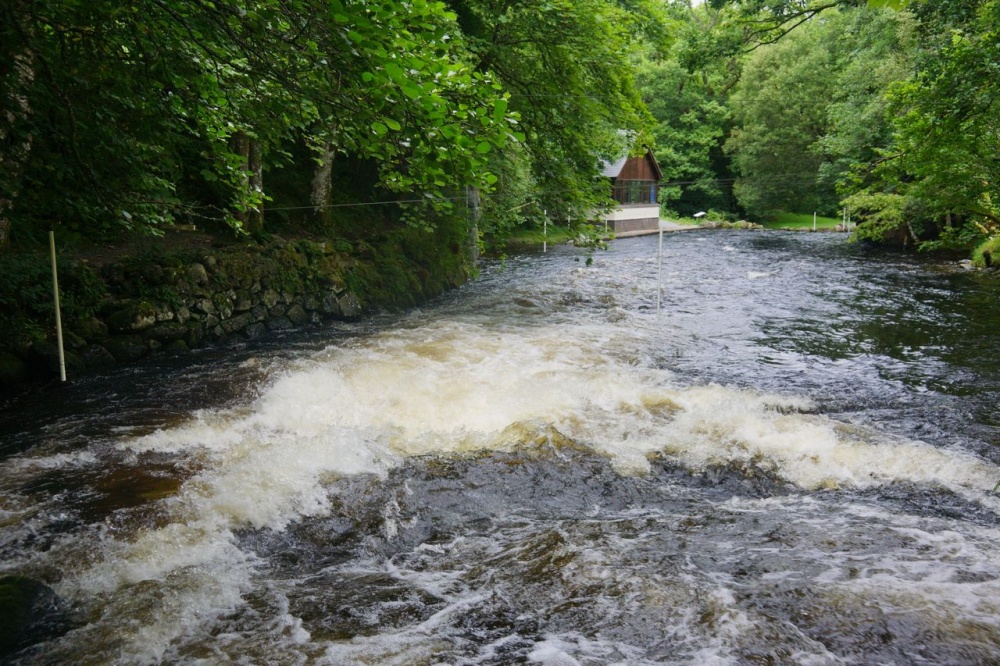
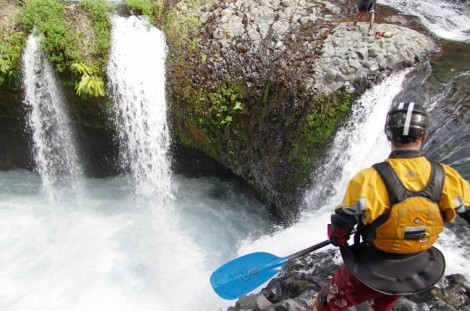
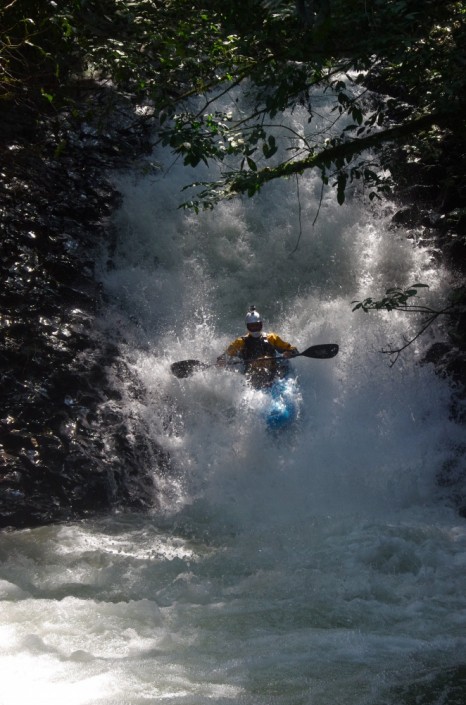
Second Exercise: Look at the photos bellow of the same rapid. Your challenge is to pick a line, and then to see if you can visualize yourself paddle it. Can you create these pictures into a brain video of yourself paddling the rapid?
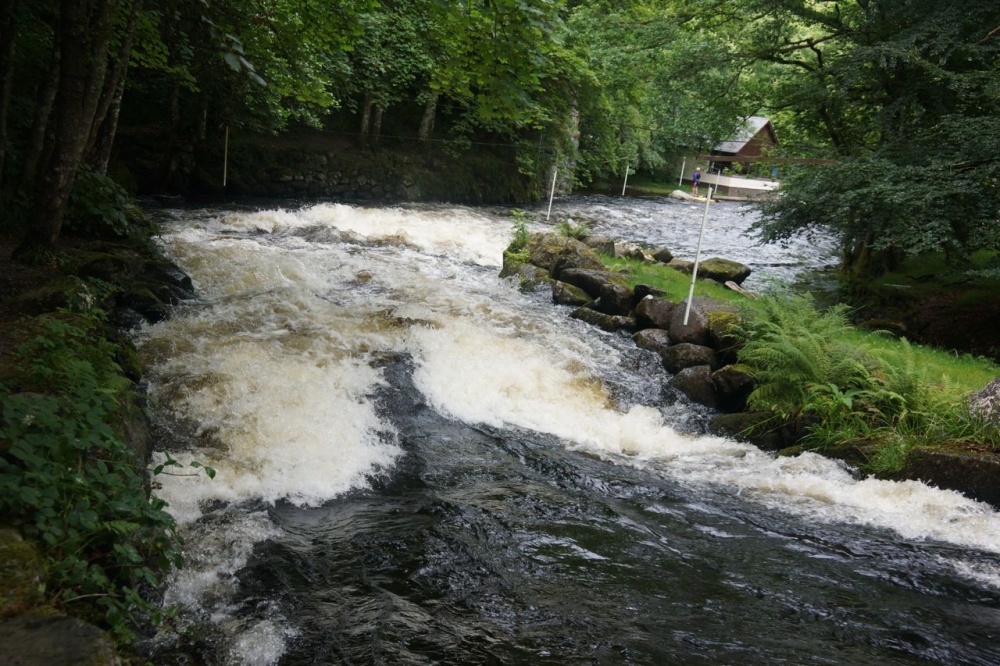
Top view
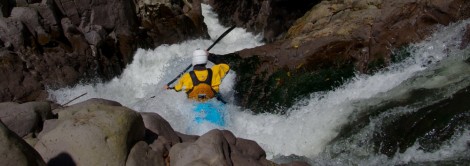
Bottom stopper

Bottom View
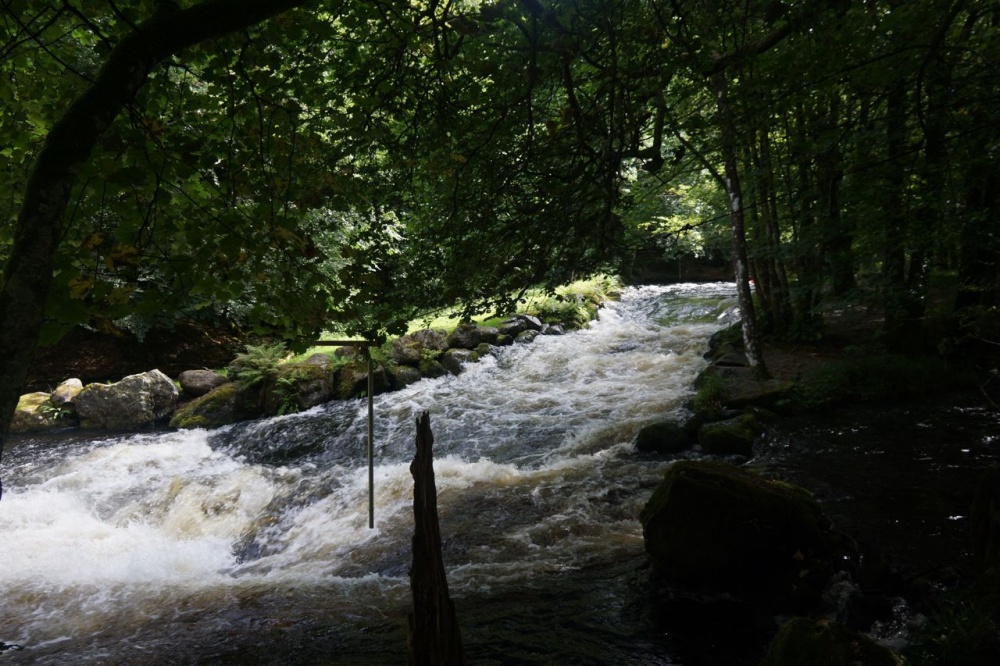
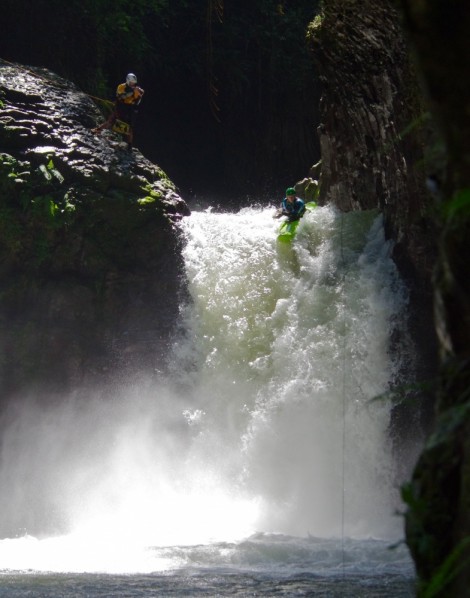
Side View
If you can, it’s probably because you have paddled a similar rapid before. If you have never paddled anything like this, then it may be very difficult to picture. The reason behind this is because of Engrams.
When learning a new paddle stroke, our motion is often inaccurate and jerky. This is because all of our muscles are having to be monitored through various kinesthetic sensors that are then analyzed by the brain, which in turn sends signals back to our muscles. If we continue to try to learn that stroke, our brain starts to write an Engram. This is a file stored by our brain, with an instruction manual on how to do that movement. Not only is it an instructional file on how to do that skill, it is also an effective short cut which allows us to reproduce the skill with a lot less effort. With an Engram in place our brain in no longer having to monitor thousands of conscious signals, which allows it to concentrate on other things.
To put this in context, the larger the range of rapids we paddle, the bigger the selection of engrams available to us. When we arrive at a rapid that looks/feels similar to something we have done in the past, our brain is able to access old engrams and use it to help us. Hence the masters of visualization will be the people who are very experienced in their sport. They will have an engram for almost any situation, so like a jig saw puzzle they’re able to put the pieces together to create an image for every part of the rapid. Whereas a less experience paddler may be able to look at a rapid, visualize breaking in, paddling over the waves, but then get stuck when it comes to getting over/around the final stopper, this is because they have never been over a drop and as such do not know how it looks or feels. But the more experienced paddler would have an engram for that drop and as such would be able to picture it and know how to apply the skill.
So the type of Visualization we have talked about so far is all aimed at creating a vision of yourself paddling a chosen rapid. This is very useful for learning where to go, and what moves to put in. In fact it has been shown by research (scanners) that by visualizing a task, your brain is firing all same signals as if it were when doing the actual task.
For the purpose of this article I would like to call this ‘factual visualization’. You are trying to create what will hopefully become an event. You are using the visualization technique to help you perform better.
To a large extent ‘Factual Visualization’ will only help us control our anxieties if we believe that in doing it, it will make our upcoming performance better. There is also one other type of Visualization technique that I would like to talk about. For the sake of the article I will call it ‘Motivational Visualization’ this is where we perhaps need to boost our confidence and get ourselves all fired up and ready to go. How to go about this? Well, I think its simple, picture some of the more positive moments you have had down challenging white water in the past. Remind your self of what you have done in the past, and how capable you are of doing it. It will be most useful if you can picture a similar style of rapid. But if not, don’t worry, just keep the positive flow’s coming, picture your self as strong and capable and ready to style!
Think of a game of tennis, so much of it is mental, when one player gets on a high the other may be on a low. Now think about how there performances differ. All we are trying to create with Motivational Visualization is the mind set of the winning tennis player.
Some top tips for practicing:
The great thing about visualization is that it can be practiced in most day to day tasks. Try simple exercises like putting an object on the floor (such as a ball) then stand back a few meters, visualize picking up the object, then shut your eyes and see if you can do it.
Like all new skills in kayaking, try it out on terrain you already feel quite confident in before trying it out on bigger rapids.
Try closing your eyes, to help you focus.
Use your hand to draw the shape of your chosen line, this could be a helpful prop and allow you to learn the line in a learning style perhaps more suited to you.
Do some air paddling. It may look a little odd, but by practicing the sequence of stroke’s on the river bank you will start to build up an idea as to how it should feel. To do this in the most effective way visualize your route down the rapid whilst doing the strokes.
The next time your out on the river, have a go at visualizing some lines (factual visualization), as well as conjuring up some strong positive images (Motivational visualization). Once you can see yourself getting all the way down, and hitting every move, see if you feel calmer. If you cant see it or you can only see your self not making the line, then perhaps your not ready for that rapid?
I hope its been a helpful read, its mainly my own thoughts on the matter, combined with some previous reading on the subject.
Cheers,
Jake
Mexico: A place famed for its white sunny beaches, ancient Mayan ruins and steep creeks! This guide is aimed as a helpful information pack, which I hope might make planning your trip a little easier.
When to come: We arrived on the 10th of October and left on the 13th of November, before this is the rainy season and following this is a drier period. It seems like October/November is a popular time of year, as there were plenty of other kayakers.
Over the time we were their we saw fairly low water levels, it only really rained twice, but their was still plenty to paddle.
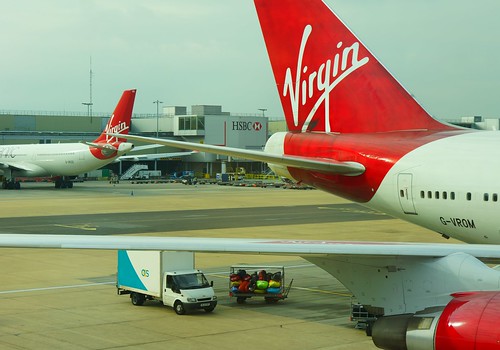
How to get here: After much research on flights it was decided we would fly with Virgin as they take kayaks for free. The negative side of this plan was that they only fly into Cancun, which is a 3 day drive up to Tlapacoyan (where the bulk of kayaking is)
It must be said that Virgin were great to fly with and very helpful with the kayaks.
It cost us roughly £700 for direct flights from the UK. If you fly into Mexico City its only a 5 hour drive to Tlapacoyan.
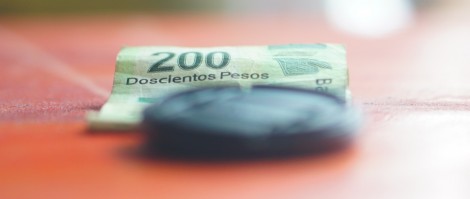
Currency: The Mexican Peso. In 2012 it was 20 Peso’s to £1. This definitely made the British Pound feel like a strong currency.
Language: Everyone speaks Spanish, and only a few speak English. But speaking fluent Spanish is not essential, as we proved! It always seems to work out somehow or another.
Living expenses: We traveled around allot, and found that living expenses varied quite a bit. In general if you are in a city it willbe more expensive than in a smaller town. On average I probably spent about £7 a day on food and £4 on accommodation.
Accommodation: In big cites such as Cancun you can expect to pay about £20 – £30 for a three person room, however when you get into smaller towns prices drop to more like £10 – £15 for a three person room.
In Tlapacoyan we stayed with Aventurec, who are a family run raft company with accommodation set amongst their beautiful sight. They have three different options: camping, a bunk style hostel and several different size Cabanas. We hired one of their larger Cabanas which slept 9 of us (£3 per night per person, amazing value). They can provide awesome breakfasts and dinners for a reasonable price. They are able to provide transport from and too the river, as well a hiring out a modern fleet of boats – this makes it possible to fly into Mexico city without boats or having to hire a car and Aventurec can provide the rest – http://www.aventurec.com/

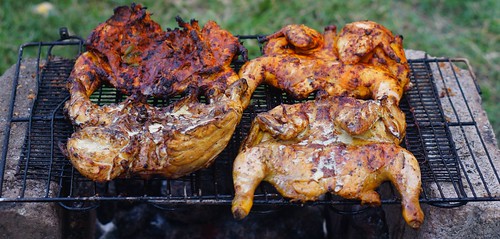
Food: Tacos, Tacos and more Tacos! Possibly not as you imagine. The Mexican taco’s back home in the UK are a bit of a lie! In reality when you order Tacos you usually get 5 small taco wraps, usually fried often with a kebab type meat on top, finished with some chopped vegetables and chili sauce. These definitely became our stable, some of us loved them, others, myself included were not so fussed. One of my favorites was the BBQ chicken experience – you see a few of these about and its all about finding the right one! When by the sea, make sure you try some fresh fish, you will often see the Fishermen brining in a healthy haul each morning.
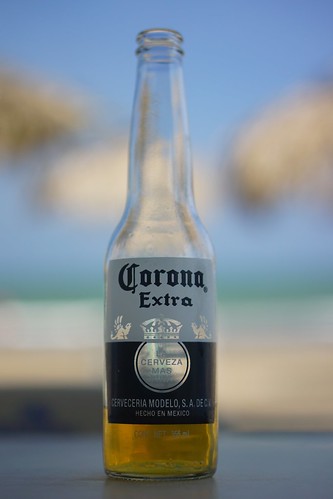
Beer: Of course this is an important substance on any kayaking holiday, expect to pay 10 -15 Peso’s (50p – 80p) per bottle.
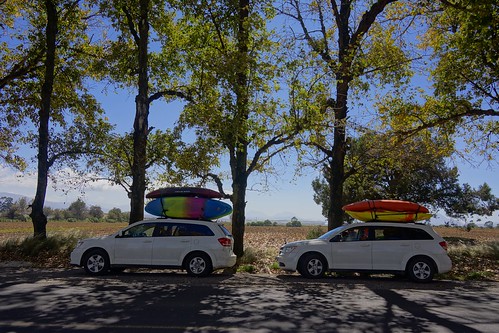
Getting Around: We hired two cars to get about in, which worked out as £1350 per car for 5 weeks. The cars we had were Dodge Journeys, a very comfortable 2 wheel drive SUV. These did the job very well, they were capable of taking 5 people, with all our kit and kayaks. A 4 by 4 is not really necessary but some of the put in & take out roads can be interesting!
Before leaving people had told me that driving around Mexico was dangerous, we did not really find this to be the case. There is a well developed road system across Mexico. For the longer drives I would recommend using the toll roads, these tend to be in good condition and allow you to comfortably drive at 70MPH. They do charge, but I think they are worth while and are definitely safer to drive on. The free roads (Libre) do the job around towns, and for getting to places which do not have a toll road. Beware of the speed bumps, they jump out of nowhere and will send you and your mates through the roof!
Police: Its worth knowing a little about the ‘Long arm of the Law’ In 5 weeks we were stopped countless times by different road blocks (set up to stop drug trafficking) Have your passport, drivers license, rental documents and passenger passports to hand. They may ask to check around the car, this usually did not take long. Some are serviced by army personnel and others by police, the army tended to be less corrupt and more friendly, but have bigger guns! We ended up paying three bribes; one because the Police were being naughty, one because I was being naughty (I ran a red) and the other because we were in Mexico City with the wrong type of number plate.
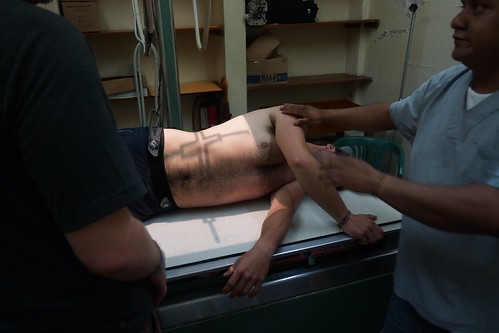
Hospitals: No trip seems to be complete without a visit to the hospital, on this trip we had to deal with a broken back. The hospital care seemed OK, but nothing to advanced. We also had a trip to the dentist with a broken tooth, he did he a good job fixing it for a tenth of the UK price – Any fillings get them done out here!
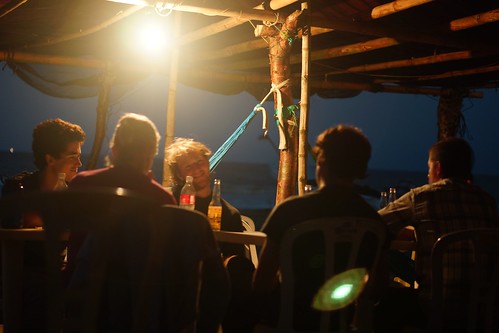
Night Life: The classic tourist nightlife is in Cancun, as for the rest of Mexico, its how you find it and what you make of it. Locals always seemed friendly towards us, even when walking about some of the dingier parts of town.
Rivers: The following is not intended to be a river guide, just some helpful information on the rivers that we paddled. Many of the following rivers are quite steep and technical, and as such are filled with horizon lines, Mexico has its fair share of clean drops and slides, but also its fair share of the bad and ugly, so don’t be lazy, get out and scout!
Tlapacoyan area
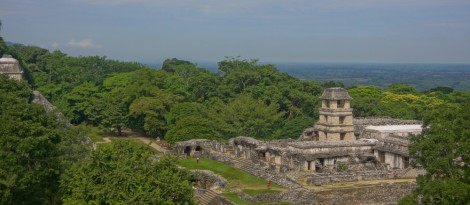
Filobobos ruins section (class 2 – 3+): A good off the plane warm up run. This section takes you down cliff lined jungle on fun boulder garden rapids. It is used as one of the local raft runs. For added perks there is a Mayan temple hidden within this section, although I must confess we never found it
Rio Alseseca Is one of the main rivers in Tlapacoyan, here are a few different sections:
Road side section (class 4 – 4+): A classic creek. Bed rock fun that just keeps giving in a pool drop style. This is a great run for most abilities, everything here can be scouted with ease, and portaged if necessary. The first third of the run is filled with fun drops and slides which will bring you down to S-Bend, the main event. S-bend is an impressively long, steep slide (portage left if you don’t fancy it) Some ways after this you will go under a small concrete bridge, which is a possible take out. Other wise carry on down to the main road bridge and take out on the left.
Photographer: Jeff Colgrove
Big Banana section (Class 4 – 5): Wow. This run is a definite step up from roadside and it holds some amazing white water. This is a run not to be taken lightly, the put in is hard to find and it can take quite some time to paddle your way down the river on your first time (it took us 6 hours) so best to find someone to show you the way. In this section you will find some classic drops such as Silencio (40 foot boof), Meat locker (a double drop affair) and many other fun drops. Towards the end of the run you find your self in the Pesmar section, and then take out at the road bridge before Tomata one.
Photographer: Jeff Colgrove
Pesmar section (class 3-4): A shorter but fun section. From Tomata falls carry on driving up the hill for roughly 2km, on a tight left hand bend you will see a turn off for a camp ground. Drive down here and put on for a shorter section back to the main road bridge. The main event in here is a fun double drop.
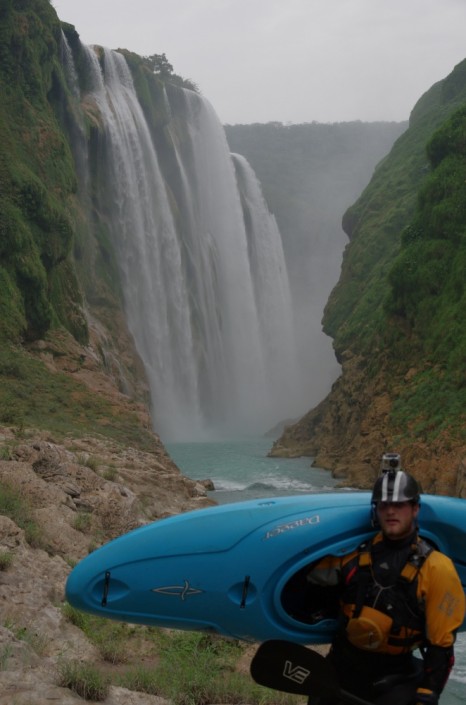
Tomata 1 (20m Water fall): Its big, and scary, but its flat above and flat bellow! There are two lines one on river left, and one that is right of centre. When we were there I opted for the right of center line, which has a harder lip, but bigger boil. The important thing to realize is that Tomata 2 lurks just bellow! Once you have run it, paddle the next small drop, and take out immediately in the small pool on river right. From here traverse along the river bank for 30 meters or so (in a downstream direction), then climb out, and pull the boats up with throw bags afterwards.

Photographer: Jeff Colgrove
Upper Jalacingo (class 4-5): Another jungle filled event. It has a few magical drops such as Bukaki, which is a steep, twisting slide straight into a 20 footer it looks like nothing else! The rest of the run is a mix with the good, bad and ugly, so don’t be to surprised when you are walking yet another rapid! Again this is the kind of run which would be sped up massively with someone knowing the lines, and showing you where to portage. There is a longer portage near the beginning of the river around a nasty 50 footer. Its also worth noting that the put in and take out tracks are quite steep and bumpy.
Photographer: Jeff Colgrove
North of Tlapacoyan
Cascada Micos (Class fun?): The Rio Micos is a playground for kayaks. Located a few miles west of Ciudad Valles is the rafting company called ‘Aldea Huasteca’. They have several beautiful Cabanas located at the get off for the Micos. Accommodation worked out at about £6 per person per night. Its a brilliant clean camp, surrounded by mountains with nice facilities.
The Rio Micos has an intriguing geography to it, Its formed by episodic deposition of Calcite which comes from the high mineral content in the water. The accumulation of these minerals over the steep gradient of the river bed forms dams, which form water falls for us to paddle on. The Calcite in the water is also responsible for the funky blue colour of the water.
To find the put-in, drive from the camp ground on river right for approximately 3 – 4 km. You will come to a lay by with locked metal gates. Walk down from here to find a large bore water pipe, follow the steps down to a big pool below a 70 foot water fall.
The Micos is a completely different kayaking experience and is the very definition of ‘Pool drop’ Each pool is separated by a river wide horizon line, simply pull up to a shallower part of the lip, peer over the edge, and spot your line, brilliant! The main event is a very clean 30 foot fall on the right, or a slide into a 20 foot drop on the left. We lapped this one 10 times in one run.
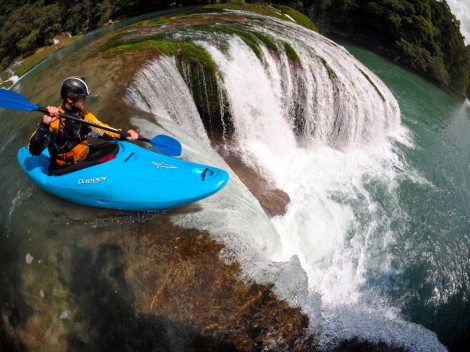
Photographer: Tim Hunt
Salta(class 3 – 4): The Salta is the upper section to the Micos. Put in on the small road bridge over the Dam canal, be careful of the first small drop – a fast shoot with a cave on the right. Following this is a fun 15 footer. The rest of the river is filled with shallow ledge drops, which reminded me of a garden water feature. Take out river left above the very large cascade, you can get a beer in the bar that over looks it.
Río Santa María: We paddled the section above the Cascada de Tamul. I would not recommend it to anyone, there are many long flat sections which link the gorges and they are filled with horrendous Sieves – Don’t do it!
South of Tlapacoyan
Agua azul: We had seen some amazing photos published in Kayak session showing off vivid blue water dropping over waterfalls. As it was on our way back to Cancun we thought we might stop in. The Agua azul, is located in the state of Chiapas, 60km from Palenque. When we arrived we were not particularly inspired by what we found – heaps of low volume falls and slides, most of which were a no go. Instead we spent our time swimming in the pools. Perhaps with more time and energy you might find the goods?!
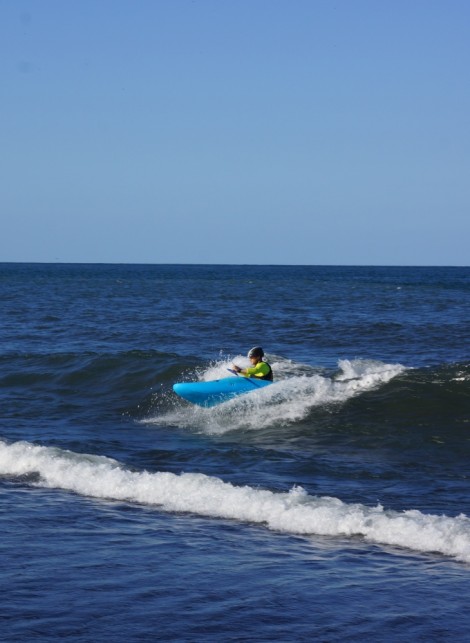
The Oro: The Rio Oro is a rare beast, crystal blue water carves it’s way down through glorious dark basalt gorges, pool drop rapids await at each corner until she finally gives way to the much warmer Gulf Of Mexico.
You need to drive to the small village of Punta Roca Partida, ask for a man named El Flaco. This sounds mad, but its what we did and it worked! On arrival we found El Flaco, who hooked us up with accommodation, food and showed us the put on to the river! To put in you have to walk for about an hour across various farmers fields, so you will need his help. Once on the river you will paddle a few fun class 3’s that lead you down into a couple of meaty pour overs. Its worth setting up safety here as they can hold boats.
Follow the river down to a big horizon, here you will find a sweet looking 30 footer – we had an epic here, one of our group broke his back, which resulted in a 6 hour rescue. The lesson learned, don’t boof this one! If you decided to run this first fall you will be locked into the gorge, the only easy way out of here is to run the next 30 footer, which has a delicious rolling lip. If you don’t fancy these you can portage river right, and walk down to the bottom of the second drop.
From here follow the river down through easier water to where it meets the sea, enjoy surf, beer and food!
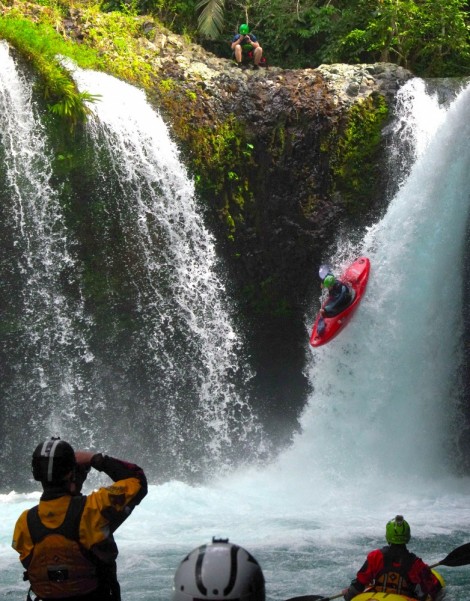
Photographer: Jeff Colgrove
Summary: Mexico as a kayaking location lends itself more to the advance paddler, with plenty of harder runs, and relatively few easy sections. So if your looking for a place to kayak countless waterfalls and steep slides in an exotic setting, this is a definite contender.
Hope this helps – Jake
![]()