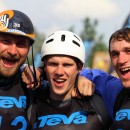
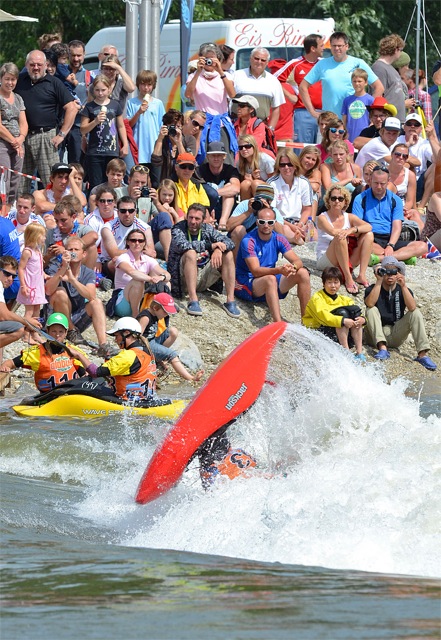
After having a pretty turbulent June attending three big events I just want to give a short update about this years edition of the Teva Extreme Outdoor Games in Ivrea.
It was the third year the Games were hosted during the second weekend of June in the new location.
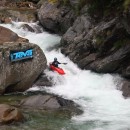
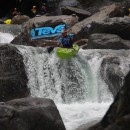
The long distance down river race was hold up in Valchiusella and won by Mike Dawson (NZL) and Martina Wegman (NED). It acted as qualification for the famous “King of the Falls” race. While lots of the full time slalom racers were to scared about running the “King of the Falls” section it was Ron Fischer (CH) who took home the crown winning one of the hardest whitewater races in Europe – well done!
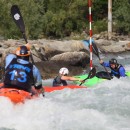
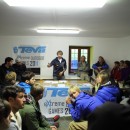
After having the team race down the Chiusella river the crowd moved down the hills into the lovely little north Italian town Ivrea. New this year was the “team night sprint” which caused heaps of fun for all competitors and spectators.
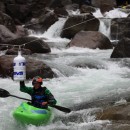
As usual during the next days all athletes were busy competing in individual sprit, individual slalom, boater X, team slalom and having original Italian ice-cream, pizza and pasta in between.
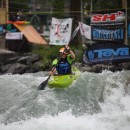
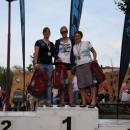
I didn´t found really into racing this year, so I ended up second behind Martina Wegman (NED) who seems to be in good race shape this year. Katerina Migdaouva from the Czech Republic was following in third position. The mens race was won by Mike Dawson (NZL) followed by Sam Sutton (NZL) and Michele Ramazza (ITA). It was the German team who took home the gold medal in the Kayak Freeride World Championships 2011. Congrats to Jakobus Stenglein, Paul Böckelmann and Lukas Kalkbrenner! Find all results below…
The forecast for the weekend wasn’t looking very good when we set off at lunch time Friday. It was supposed to be very windy, big messy surf and raining.
After a couple of hours driving some very dark clouds appeared in front of us and as we got up towards Bristol it started raining. At first it wasn’t very heavy but the showers were quite long and as we approached Swansea it started raining very hard. After several missed turnings because of bad visibility we finally made it to Llangennith camp site at about 9:30 where we found some other kayakers that we knew had arrived earlier and gone out for a surf. During the night it carried on raining and the wind didn’t drop, but thankfully it stopped raining at about 7-7:30am.
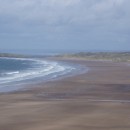
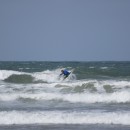
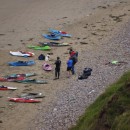
After breakfast we were told that the competition had been moved along the beach to Rhossili so we set off leaving the tent to be picked up when we’d finished. When we got there the surf was just as bad as the forecast said it would be – pretty big, messy and blown out. After the introductory speech we all got kitted up and carried our boats down the cliff path to the beach. The path was very long and zigzagged down the cliff with several gates and lots of steps.
Finally, down on the beach, the first heat started and I was judging. My first heat was the third of the day which was the men’s open long final. It went straight to the final as only four of us entered.
Next was the junior short final which was very interesting. I was using a new paddle for the first time which was a mistake. It was the same as my old one just shorter so I thought it would be all right.
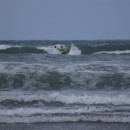
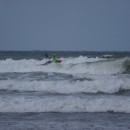
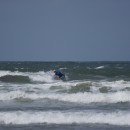
I wasn’t placing the blade in the water at the right angle so I didn’t turn when I wanted to. I was getting used to it by the end of the heat but I still wasn’t comfortable with it. I had to wait for the sets to come through to get any good rides and then sometimes they got dumpy so it was hard to find a good one, though I was able to practice my exit moves!
Next was the Junior long final. It was getting bigger by then as the tide went out and it was a struggle to get out back. When the sets came through I found it a bit too dumpy so I stayed inside and caught several smaller ones.
We finished at about 12:30 and had lunch and then we had the prize giving. I came second in the Junior Long, third in the Junior Short and as expected fourth out of four in the Men’s Long.
Then we set off home and thankfully it didn’t really rain which made the trip nicer. JTG
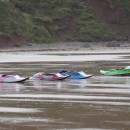
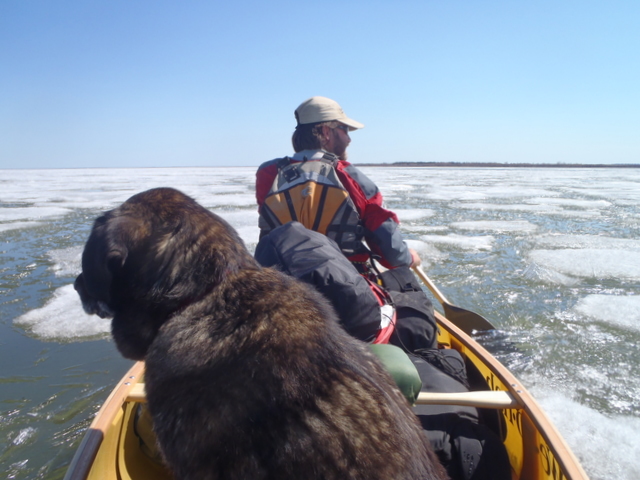
It turns out that the end of May is a little too early to start paddling on Great Slave Lake in the Northwest Territories. Ice stretched to the horizon and much of our time was spent wading and dragging the canoe through shallow open water and pushing, prying, and breaking our way through the candle ice. It was sort of fun for a few days, but mostly it was a lot of work.
On Earth Day (April 22) of 2010 Dave Freeman and I began a three year, 11,700 mile journey across North America by kayak, canoe and dog sled. Our goals are to increase awareness and promote conservation of North America’s waterways and wild places while actively engaging over 100,000 elementary and middle school students in the journey though our website and live school assemblies.
The odyssey began by kayak on the Pacific Coast studying temperate rainforests and marine life of the Pacific Northwest, but this was just the first in a series of six stages on their quest to highlight North America’s wildest places.
After kayaking 1,400 miles from Seattle, Washington to Skagway, Alaska, we progressed over the history-studded mountains in the footsteps of the Klondike Gold Rush, to the Mackenzie River delta. From there, we dog sledded south and are currently canoeing from Great Slave Lake toward Ontario. Then we will kayak through the Great Lakes and follow the annual whale migration past the salt marshes and sea turtles of the Atlantic Coast, finishing in the mangroves and coral reefs of the Florida Keys.
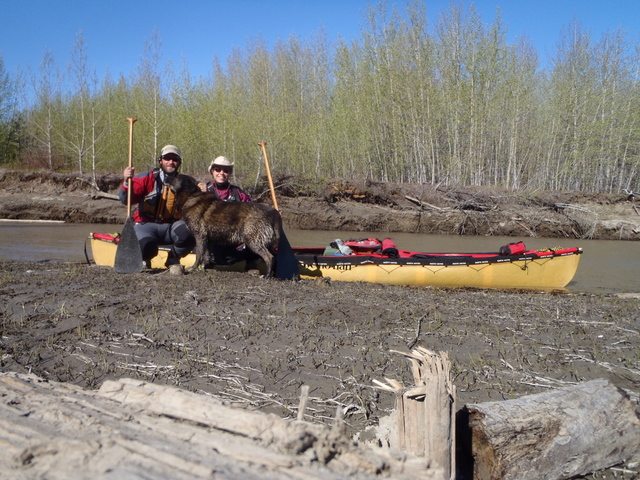
As you read this, we are somewhere in central Canada, working our way south and east in our canoe with our travel companion and favorite sled dog Fennel. To follow our progress and virtually immerse yourself in the expedition, check out www.NorthAmericanOdyssey.com. We are very excited to join the Palm Equipment Team and we will post regular updates on the blog.
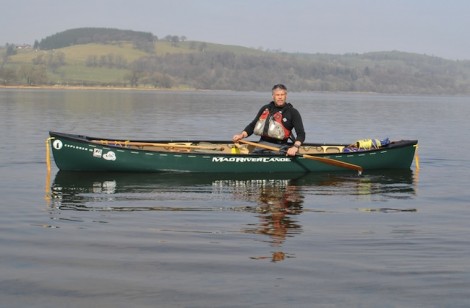
Outfitting your Open Canoe and giving it that personal touch is what truly gives it an identity and really makes it your own. This can however appear quite a daunting task and a mini adventure in its self, especially when starting from scratch and when a new boat is involved. So after having recently fitted my latest boat, I thought I would share my experiences and offer some of my thoughts and guidance.
My first tip would be to spend some time planning it, considering how and what you are intending to use your boat for. Are you going to use your boat solo or tandem, on open or white water, for short trips or expeditions? All of these have certain common elements but also have very different needs. Have a look around at other boats you may have seen or used, and see what others have done, then ask yourself if it will suit your intended use. Remember just because it works for one person doesn’t necessarily mean it will work for you!
There is no quick fix for outfitting your boat so be prepared to put in some hours, in order to achieve the best results and maximum satisfaction from all your hard work. Time well spent fitting your boat out initially, will hopefully lead to many hours of enjoyment rather than having to make lots of alterations and adjustments.
I have fitted out a number of boats over the years and have what I feel is good set up for the type of paddling I enjoy. I paddle both open and white water and a lot of solo expeditioning or journeying, so the style of outfitting I choose reflects this. There is no single right or wrong way of doing this; the most important thing is that it works for you.
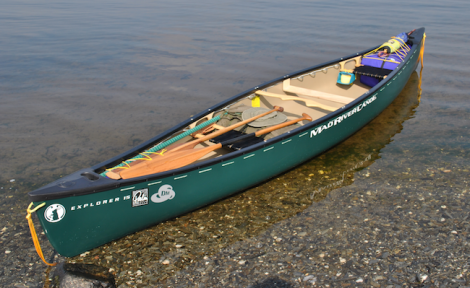
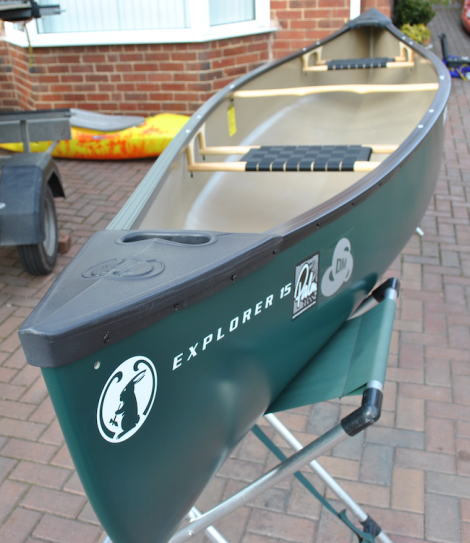
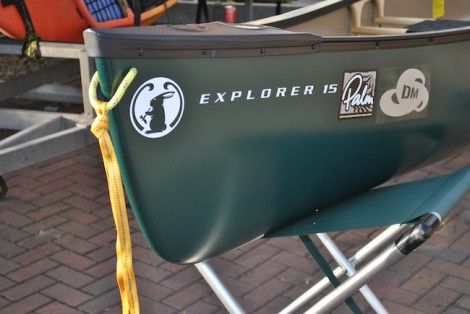
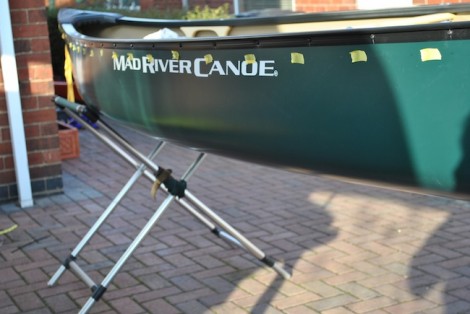
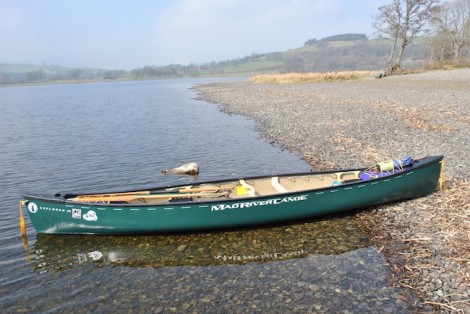
In this instance I have chosen a Mad River Explorer 15 in Royalex. Originally designed by Jim Hendry this is a good all-rounder, with its shallow “V” hull giving good tracking performance, and is stable with a dry ride in various challenging conditions even when loaded for a trip.
What you might need.
Next stage is to gather everything you need for the task ahead. For my outfitting I used the following:
10m of 5mm cord Rope cutter
5m of 4mm cord Electric drill & drill bits
5m of 4mm shock cord Spanners
2m of 10mm Kermantle rope Phillips screwdriver
Zip ties Pliers
5m of 5mm plastic tubing Sand paper
2 X 32” air bags Set square
1 X kneeling thwart kit Ruler
2 X 2” D-rings Pencil
Vinyl bond glue
Vinyl mast foot
Mast bracket
Ok so you have decided on your set up and you’ve got your tools and every thing else you may need, next stage is to get started.
Grab loops.
A good starting point is with the grab loops. These will form a secure attachment point for painters, swim lines etc and therefore need to be strong. A common error I see quite often is the practice of attaching things such as painters to the boats deck plates, this is not a good idea as they are not designed to take a load and will pop off when you least want them to. For mine I have used some 10mm Kermantle rope.
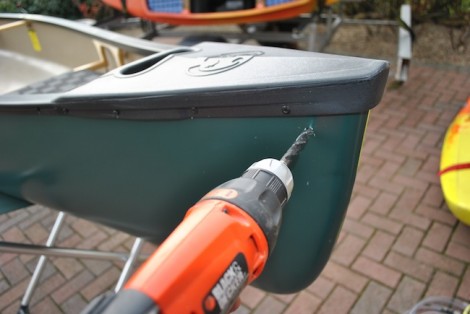
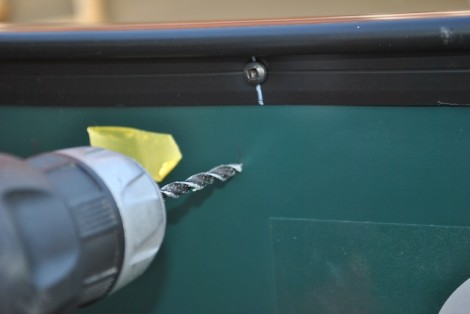
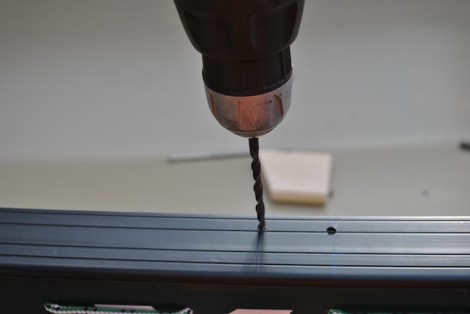
Take a deep breadth and drill!!
Start by drilling a hole just large enough for your rope on either side at both the bow and stern. I have chosen to drill my holes around 6-8 cm back from the bow and 6cm down from the top of the deck plate. At this point remember the old adage, measure twice, drill once! Or in my case measure, measure, measure and then measure some more before taking a deep breath and drilling!
Once drilled and cleaned out, thread your rope through so that both ends of the rope end up inside of the bow and below the deck plate.
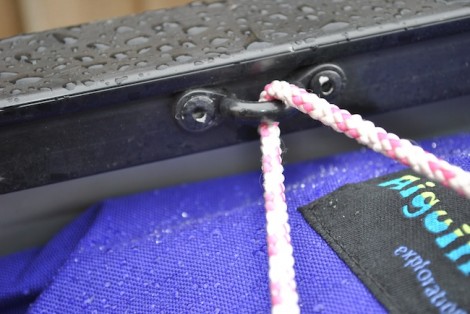
At this point I make sure that the loop on the outside is snug to the hull before tying a overhand knot on the bight close up to the inside.
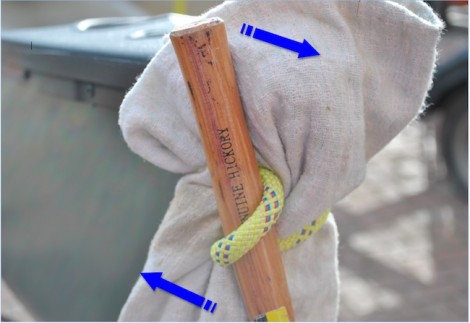
I now turn my attention the loop on the outside, which is at the moment flush to the hull. Taking a cloth to protect my boat I take the handle from my hammer and ease it between the boat and the loop. It will take some levering and time, but be patient. Once the handle is in the loop I then twist it around as in the picture above. The result of this little challenge is that loop should become slightly larger whilst the knot inside pulls tight up against itself. The idea being to create a loop just big enough to take painters etc, and not being too big i.e. big enough to get your hand through as it could become and entrapment hazard. Not only that, but from experience large loops have a habit of getting caught and snagged up on trees, branches and anything else that presents itself. Now re-visit the knot on the inside and use a couple of zip ties to secure the ends.
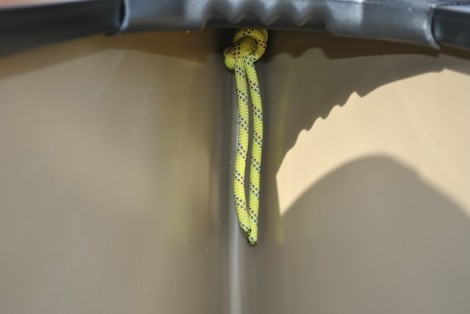
To finish off with I tie a short length of webbing tape (just long enough to reach the water) through the loop to act as swim tails. I find these have a number of uses including as a quick grab for self rescues, carrying and should I have to approach a casualty in the water, I would rather that they grabbed these than the gunwhales as they do not have such a capsizing effect as someone pulling down on the sides.
Finally secure the remaining ends with a couple of zip ties.
The finished article above with the swim tail fitted. Note the small size of the grab loop. If you are going to attach painters remember that they go through this loop, and can be either permanently attached or removable for transporting. As for length then it is again very much down to personal choice and how/where you will be using your boat. I would suggest as a minimum, a boats length of floating rope. If you choose longer then consider how you will manage and store the line in the boat when it is not being used, as ropes and water are not a good combination with a possible risk of entanglement or entrapment. Now simply repeat this process at the other end of the boat.
Floatation/Buoyancy
Irrelevant of what type of paddling you are intending to take part in, some form of floatation is critical. As it is says this will aide the boats buoyancy should it become swamped or in the event of a capsize.
Floatation or buoyancy can take a number of forms ranging from solid (polystyrene) to inflatable air bags and are normally fitted in both the bow and stern and sometimes in the centre. Solid blocks although initially more expensive are more robust, certainly wont burst and require less maintenance. However as they are solid they don’t always fit perfectly to the shape of the hull, leaving voids around them, which can fill with water and may there fore require some shaping to ensure a better fit. Air bags however, although cheaper do run the risk of being punctured and at £30 -£50 per bag can be a costly option. They can however be protected with foam matting or by using protective bag covers. Also because they are inflatable they will fit the contours of the hull better, leaving little if any of the surrounding area unfilled. Do remember however to let some air out of them when storing them or if they are in the sun for a period of time.
Solid blocks tend to be limited to around 32”; airbags however come in a wider range of sizes meaning that for a solo paddler who would not normally use the area in front on the bow seat they could choose a longer air bag up to the seat adding more floatation. If they then decide to use the bow seat for tandem paddling, then simply deflate the bag a little and roll up the spare out of the way. Just measure from either end of your boat up to where you want the air bag to end and then get a bag that fits closest to your needs.
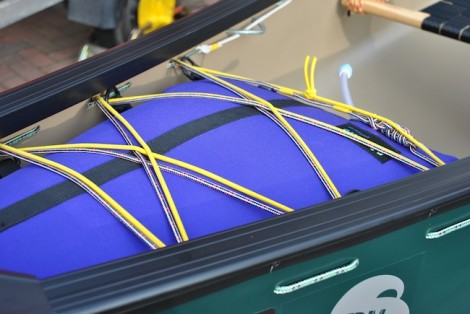
How you attach your buoyancy is important, as you don’t want it to pop out when swamped or capsized. The best way to achieve this is with a criss-cross cord lashing over the bag/block to the gunwales together with some form of strap that goes over the top of it and secures into the bottom of the boat.
I have chosen 32” air bags bow and stern as most of my paddling is solo, however I may require the option of tandem. As previously mentioned I choose to use protective fabric bag covers, which I think are an excellent addition and are available from Aiguille Alpine.
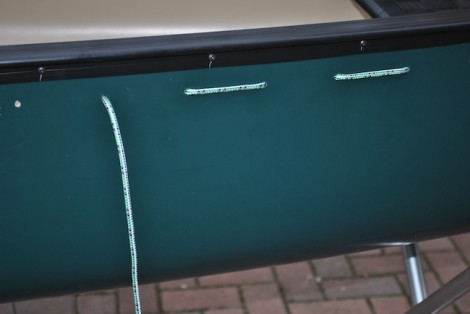
In order to lash my bags in I have two options. Either to drill into the gunwales and attach some form of P-clip system along the length of where the air bag sits or alternatively drill a number of holes through the side of my boat just below the gunwale , then thread cord through making lashing points (drill & lace). I prefer the later as I find this stronger and I can continue the lacing throughout the length of the boat giving me lots of options for lashing and attaching equipment etc.
Above an example of a P-clip with cord lashing and a protective air bag cover visible.
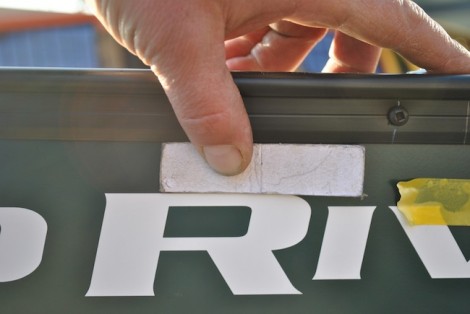
Using a piece of card as a template
I make a start by firstly deciding on the spacing between the holes, and how far below the gunwales they should be. I normally use a spacing of around 8cm between holes and about 2 cm below the bottom of the gunwale. Next I make a small card template to help with the job of marking it all out.
Holes marked and spacing with tape
As I intend to lace the entire length of the boat I start at the center of the boat marking holes either side of the ends of the Yoke. I then continue this process down both sides of the boat and to each end marking where the cord loops will be on the outside with yellow tape. Remember to make sure that the end of the cord should end up inside the boat at the last hole.
Once happy I drill the holes, remembering measure twice, drill once!!
View of the lacing from the outside
I used a 5mm drill bit so that the cord (also 5mm) is a snug fit. With the holes drilled I start at one end, and secure with a knot on the inside then begin to lace down the sides of the boat using 5mm cord. I personally would not use anything less than 5mm cord for the lacing as it could slice through the plastic like a cheese wire.
Inside view of lacing with plastic tubing to make clip in points
On the inside I use short lengths of 5mm plastic tubing, slid over the cord to provide convenient loops for attachment. I find these a lot easier to clip and tie into than when the cord is fitted flush to the boat. I don’t fit these throughout, only where I think they will be of most use for lashing and securing kit. To help slide the tubing over the cord I soak them first in boiling water to soften them and then use a piece of very thin cord/twine to pull the thicker cord through. You may need to remove the seats to allow threading of the cord/lacing and replace once completed. I make sure the cord is pulled tight as I go and finish at the ends on the inside again with an overhand knot.
View of lacing with shock cord also threaded through
Once I’ve completed both sides I use 5mm shock cord and weave this through the loops on the inside, as in the photo above. This adds a convenient and secure way for storing things that I may want to access quickly like my sponge or the grip on a paddle.
Note also the floating line secured on the side of the seat. This is my bridle for tracking and lining. These are pre-measured and a knot tied in the centre. One side is permanently attached, when I need to use it I simply unwrap it from the seat and pass it under the boat before securing the other end onto the opposite side of the seat. The result being that the knot ends up under the boat and exactly in the centre without all the fiddling and adjusting that can be associated with attaching a bridle.
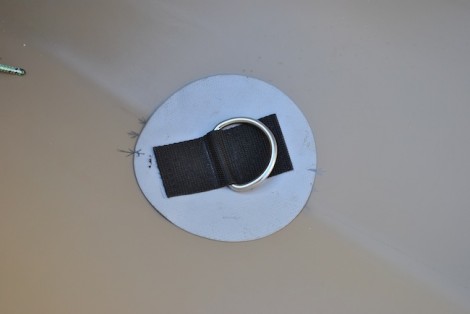
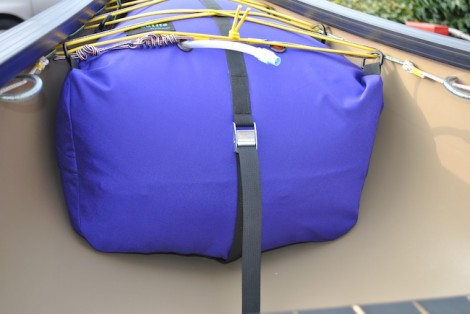
Next I glue in some D-rings to the bottom of the boat in order to secure the strap, which will pass over the top of my airbag ensuring a secure fitting. The airbag covers I have chosen have a strap built in. If you don’t have these then a roof rack strap will do the same job. Remember to pass the strap through the grab loop on the inside of the boat before passing over the bag and securing.
The D-rings should be positioned underneath your bags or blocks rather than in front of them. This will ensure any tension on the D-ring will have a forward pull rather than an upward one, which could lead to the ring being pulled out.
I use my inflated air bags to work out exactly where I want the rings and draw round them. I have used large 2” rings for this job. Note the angle I have had to set the rings at in order to accommodate the shallow ‘V’ of the hull.
Next I use sandpaper to roughen the surface of the hull where the D-ring will be glued and also the back of the ring. I then clean both surfaces with meths and allow to dry prior to applying the glue. I have used Vina (Mondo bond & River bond similar products) bond and apply this to both surfaces then leave until touch dry.
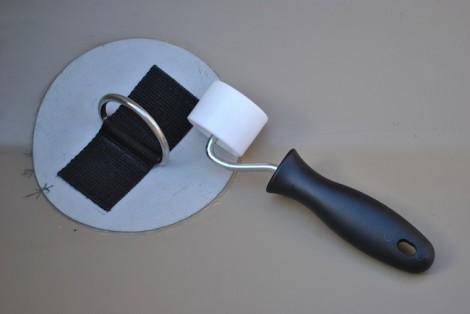
As above once dry to the touch I carefully position the ring in the pre-prepared area and use to small hand roller to remove any air bubbles and ensure that the ring is firmly pressed down, paying attention to the center area around the ring and the edges of the patch.
I must point out that in this article I am referring to the guleing of D-rings etc into a boat made of Royalex and provided I use the technique mentioned I have not had any issues with them sticking or falling out. If however you have a non Royalex boat then you may encounter some issues with regards the glueing of items. I have had some success using Evostick but the surface really does have to be well prepared and in some cases some gentle heat is applied in an attempt to de-polarize the plastic and aid adhesion. Remember to test a small area with the glue first. You don’t want to melt a hole in your prized possession! Any doubts contact the manufacturer.
Once the rings are dry I put the air bags back in place and thread the strap through, then finish off by using a criss cross lashing of 4mm cord over the bags and through the cord loops on the inside of the boat.
Air bag fully lashed and shock cord added
I have also added some shock cord over the bags for tucking a spare paddle and swim lines etc under. Note I don’t recommend using only shock cord to secure your airbags as this will allow too much movement in the bags, possibly resulting in the air bag being popped out when swamped.
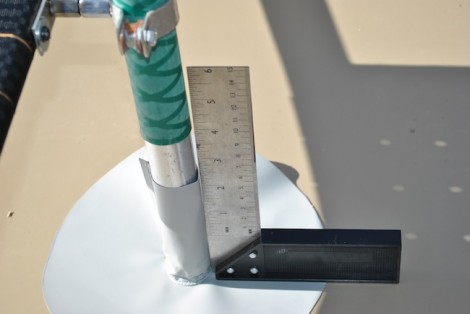
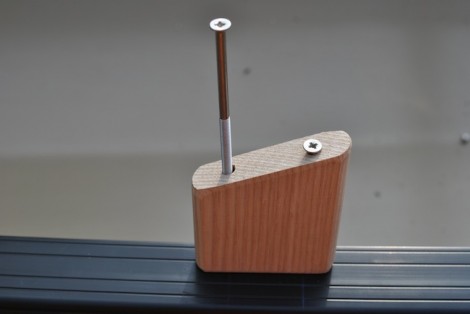
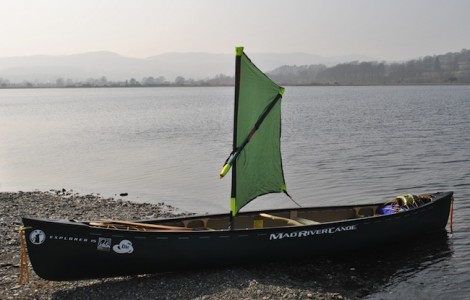
As I will be using the boat for some solo sailing I use the same gluing technique to fix a vinyl mast foot into the bottom of the boat.
Using a set-square to ensure mast, mast foot and clamp are all aligned
I particularly like the vinyl mast foot as it folds flat when loaded with kit or when the seat area is being used. Generally I position the mast foot etc in the area to the rear of the front seat. Note the removable bracket I have used on the seat to hold the mast securely and the set-square I have used to ensure everything is square.
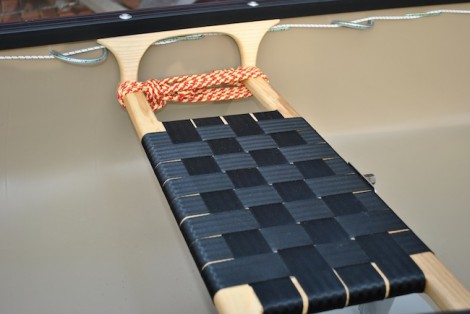
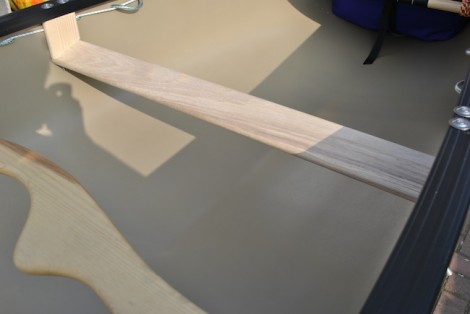
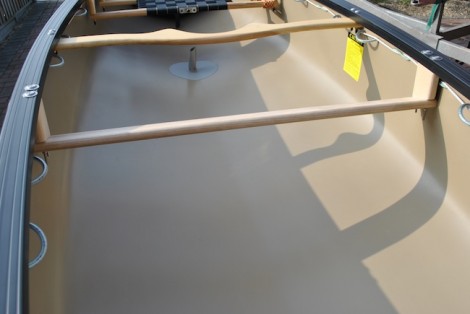
Kneeling thwart
For some this may be as far as your outfitting goes and your boat is now ready for paddling tandem. If however you intend paddling your boat solo then you may want to consider fitting a kneeling thwart. This will greatly aid your connectivity with your boat leading to better stability, control and overall performance. For some the idea of having your feet and lower legs slid underneath a wooden bar may give the feeling of being trapped and take people out of their comfort zone. If this is the case then maybe consider using some form of closed cell foam saddle, that could either be loose so as to move it either around or from boat to boat, or secured in some way.
Deciding where to place your thwart is down to personal choice but generally they are fitted as near to the centre of the boat as possible (i.e the yoke), as this will then form the pivot point around which the boat will turn. This really highlights safety concerns so it is really important that you ensure you have enough room to move and escape if needed should a capsize occur.
Another consideration is how you want your boat to be trimmed. For me personally I look for my boat to be slightly bow light when un-laden, then when I paddle with my kit bag I can achieve a more neutral trim very easily if required. One way to achieve this is to move around in the boat and have someone provide you with feedback as to how the trim looks. Better still have someone armed with a camera who can take pictures of you in the boat, then you too can actually see the effect of your positioning. You will need to have the bar from your thwart with you to enable you to identify its planned position in relation you.
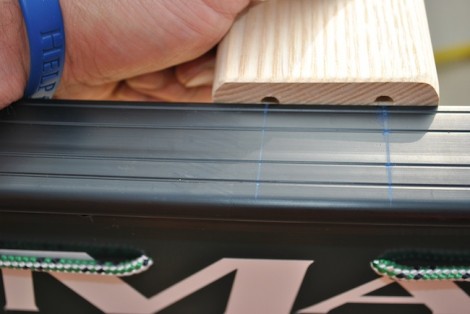
Decision made its now time to fit your thwart. I use the riser blocks to start marking out where I need to drill my gunwales. By offering up the riser block to the gunwale I can mark the distance between the holes, then using my set square mark across the gunwale. Noting the exact position in relation the bolts on the yoke I mark out the opposite gunwale as well.
Marking out using a set-square
Using a riser block to check the location of holes.
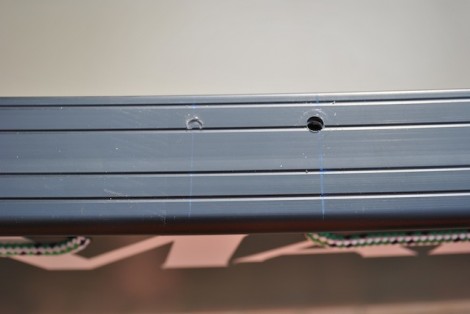
Now using the riser block again, but upside down and making sure it is flush with the inside of the gunwale, I start to screw the supplied bolts in. When I then remove the blocks I will have the position of the holes marked and ready for drilling.
In the picture above a drilled hole can be clearly seen along side the mark created by screwing the bolt through the riser.
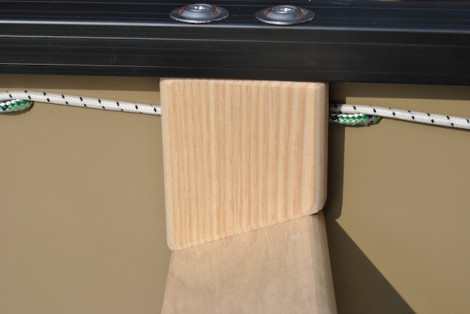
Remembering to measure twice and drill once repeat the procedure on the opposite side. Once completed fit your riser blocks in position, up the correct way and with the longest edge towards the front. This will allow you to check their position and help you with determining the correct length to cut the bar.
You now need to determine the length of the cross bar, remembering to take your measurement from the bottom of the riser blocks, allowing for some excess on either end and then cut to length. Using the same technique mentioned above mark out the location of the holes in the cross bar. When drilling the holes remember that they will need to be at an angle (appprox 15-20 degrees) to allow for the bolts to pass through the angled cross bar.
Before finally assembling your thwart it is a good idea to give all the wooden parts, especially where you have trimmed them a good couple of coats of Boiled Linseed oil. For this I use a 50/50 mix of Boiled Linseed and White Spirit. Leave each coat to soak in and then buff vigorously with a cloth before completely dry in order to remove any excess. The heat generated by the rubbing will also help the oil soak in.
Be careful not to over tighten the bolts, and use the correct size screwdriver so as not to damage or strip out the heads of the bolts as the stainless is quite soft.
Again going back to safety concerns it is a good idea now to try the thwart and make sure that you can get your feet in and out from under it safely. If not, trim 1 cm at a time from the top of the riser blocks on both sides until you are happy. This can be revisited at later date and more adjustments for comfort or safety can again be made.
With your boat now fitted out, you can head off on your adventures and look forward to many hours of happy paddling.
This was never meant to be the definitive guide to outfitting a canoe. It is merely some of my thoughts and advice I would like to share with you and hopefully it will help you with your outfitting.
Remember there are lots of ways of doing this and I have only covered some of them. Just because it works for me doesn’t mean it will work for you!
Big thank you to the guys at Palm and Desperate Measures for their help and support in my ventures.
This article is available todownload and print out as a PDF document to help you with your outfitting. Good luck and I hope you find this of use.
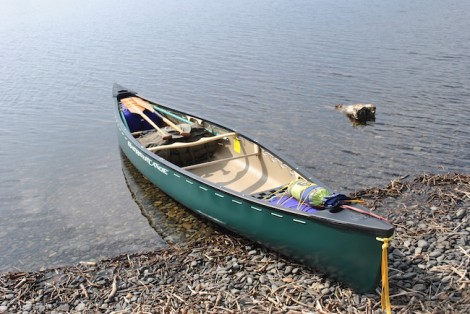
I would like to leave you with some pictures of my newly out fitted boat.
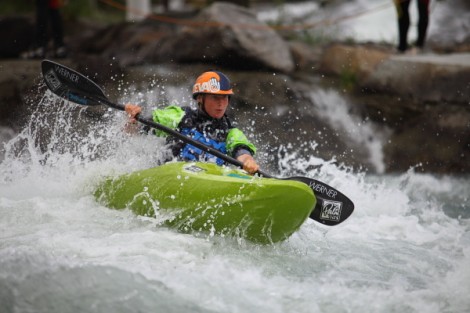
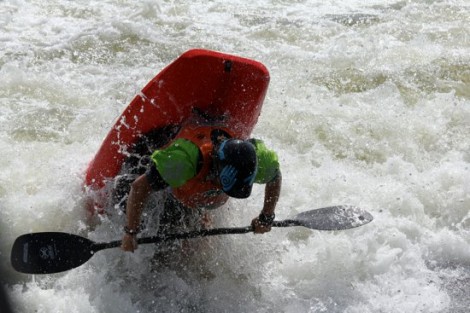
So after Pringles gold medal in Kayak Freestyle Worlds 2011 in Plattling it´s hard for me to come up with some great news…
Beeing more a creek boater I made my way from the Teva Mountain Games in Vail (Colorado) to the Teva Extreme Outdoor Games in Ivrea (Italy) and then to Plattling.
Working for the organizing team during the day I tried to get in some practice rides late in the evening or at night.
Though Prelims didn´t go very well for me I made the cut to quarterfinals placing 18th. In the Quarterfinals I had three good rides and improved my ranking to the 9th place, so I made the top ten and went into Semifinals the next morning.
After I started playboating only two years ago I am more than happy to end up on the 10th place in the world of freestyle kayaking!
Congratulations to Palms Katya Kulkova placing 7th and James “Pringle” Bebbington for his awesome 1st place becoming Kayak Freestyle World Champion 2011!
All pics by Michael Neumann and Johannes Schmidt – thanks!
The World Championships for me had a pretty dream ending, taking home the Gold Medal in Mens K1!!!
Throughout the event i’d not really paddled at the level I knew I could. I knew I was being too relaxed, not aggressive enough. For the finals I focused on pumping myself up as hard as I could and getting ready to have the fight of my life.
First ride didn’t go my way but I was feeling more myself for sure. 2nd ride I just gave it everything I had and got 1020 pts. The leading score at that point but definately not unbeatable, so 3rd ride i went even harder. I didn’t go as big as my 2nd ride but squeezed in a few extra moves to get 1053 points.
Then i had to watch as 4 great kayakers, Gerd, Nick, Stephen and Peter all went and gave it their all trying to beat my score. They all paddled great and Peter, who is a deadly competitor and amazing kayaker, very nearly got me. Finally though, luck and timing went my way and I took the win!!!
I never felt so good as when the results came out and I could see everyones faces. All my friends, family, Katya and many of the people who helped and supported me over the years all around enjoying the moment. And then all the GB team piling on top of me and sinking me. Seeing how happy and emotional Terry Best (friend and supporter for years) was was so so nice. Then seeing Guigui’s face after finally one of his amazing designs the Easymix 2008 got to the top!
The whole experience was one of the best moments in my life!
Watch the video below to find out how James trained
his body and mind for the event – ed
Standing on the podium it was exactly how it looked when i visualized it
The whole event was such a fun time. Always something going on, great people, perfect water levels. Robson, the ICF and the judging team did a great job pulling it off!
Big props should also go out to GB’s Claire O’hara who won Gold in Squirt and Womens K1 and Palm’s Bren Orton who took the Bronze in the Junior Mens!
Below are the videos of my final rides:-
Photos of all the various Finals:-
On off day we had on Friday they had a some additional events like King of the Wave and an SUP race as well as the Teva Big air comp. Katya kills it in this and took the joint win with huge Airloops and Godzilla’s ahead of all the boys tied only to team Germany who did a loop with 3 Kayaks tied together all at once!!!! check the photos:-
The journey I took to this point is pretty unusual. I loved kayaking since i was 12 and loved to freestyle kayak almost as long. After competing for most of my junior years i’d had a few successes but lost my way a bit about 4 years ago when I got a bit distracted by the party scene. I had a great time then but forgot what it was that i really wanted to do with my life.
I was working as a video kayaker on the Nile with NRE working for Davey O’hara with my buddy Anton and I was having a great time there. On the river every day, partying every night but at the same time i felt not truly happy.
I was missing something. About 3 months after i moved to Uganda I met Katya and together we at first went harder than ever in the bar but she also was so fired up on Freestyle that I began to find my fire for it again. Gradually my focus went off the bar and back onto being in my boat; surfing, catching air and throwing tricks. At this point i saw how Peter Csonka was training hard and kicking ass and I really admired his focus and determination. It was then I decided I was going to be a World Champion one day.
So we left Uganda and started to compete and train hard. Over time we got more and more successful in our competing and this last two years have been amazing. A win at last year’s World Cup, 2nd in the Europeans and now the World Champs Gold. It really has been the best couple of years.
We train hard and have done lots of work to get to this point and Katya has been the best coach you could have.
She also introduced me to many new ideas and approaches to life, we eat only raw fruit and vegetables for a start, we hardly drink any more and we meditate daily. All these aspects she introduced me to have had a profound effect on my happiness and kayaking. Life is for enjoying and improving yourself, this is what makes it so fun.
My next goals are to keep improving as a person, get my wave kayaking to the same level as my hole kayaking, keep competing on the highest levels, help Katya to get her goals, see more new places and to keep pushing ourselves and our kayaking as far as we can!
I have so many people to thank for getting me to this point: Shep, Sneaky, Terry and the whole Best family, Pete Caterall, Hippy Dave, Tim Ward, Jacko, Pete Astles, Sam Ward and Dennis Newton, Matt Chadder and Dickie. Wigan Canoeing Groups Eric Bradbury, Bob Andrews and Will Potts. Elton, Tim, Simon and Sophie from Reaseheath College.
All the Uganda/ NRE crew particularly Davey and Timmy.
My friends who made this year so good and fun, Aniol and Gerd Serrasolses, Martin Koll, Emily Wall, Bartosz, Irish Tom, Mathieu, Sam Ward and Anton Immler & everyone who was at the WW GP event.
Guigui for making the best freestyle Kayaks out there!
EJ, Mathieu Dumoulin, Peter Csonka, Rush Sturges, Pat Camblin and all the Tribe athletes and GB / Palm’s Cheesy for giving me continued inspiration and ambition.
My Sponsors Mark Burch at Brookbank Canoe Stores, Cheesy and everyone at Palm Equipment for the amazing kit and Arnd and everyone at Teva Shoes. Thanks to them all for giving me the opportunity to train full time in pursuit of my goals!
The biggest thanks though go to my Mum, Dad & Katya. They’re the ones who have shaped my life the way it is and are my biggest supporters!
For some reason the levels and weather in Plattling this last two years have been pretty wild, either 30degrees and no water for months at a time or the opposite; big storms & flooding all of a sudden.
So far we’ve avoided the floods at this event but it’s always looked like its on the cards since a few storms before the event brought the level upto a good high level just in time.
With the forecast of imminent flooding due this Friday the Worlds has been ran at a super tight schedule and after only 2.5 days of competition were pretty much done apart form finals.
Day One:- Tuesday 21st – Women’s, Squirt & C1 Prelims
Women’s kicked the competition off the field needed to be cut down to the top 20.
Prelims are always the toughest round mentally as you get 2 rides with both counting. The score you needed to make the cut was 233 which is quite high for the women’s quarter finals:- the top score was over 1000. Women really took a step up this Worlds!
Katya scored 520 with Loops, Felix’s and Mc’nasties & Palm’s Anna Hubner also made the cut with 288 & all the GB girls made it too.
Top 3 in Squirt were:- Jamie Austin 1st, Dane Jackson 2nd, Colin Kemp 3rd
Top 3 in C1 were:- Dane Jackson 1st, Philip Hitzigrath 2nd, Igor Juanikorena 3rd
Full Results for all classes:- http://icf-freestyle.de/results.php5
Day Two:- Wednesday 22nd – Mens & Juniors Prelims/ Men’s & Women’s Quarter Finals
Organizers managed to do the impossible schedule today starting at 7am with the mens Prelims of 81 men cut down to the top 25 by 12:30 in afternoon, then was Junior boys and girls prelims followed by Quarter Finals of Women at 18:30 then Mens Quarter finals began at 20:30 and finished in darkness at almost midnight.
As a competitor it was a full on mammoth of a day. In the prelims I managed to get pretty good rides scoring 1436 and placing 3rd with EJ in 2nd and Stephen Wright 1st. All the GB men made it too.
In the Junior Boys Palm’s Bren Orton has been paddling great in practice and managed to make the cut to 10 in 8th place along with GB’s James Benn’s in 9th.
In the Women’s Quarter final (cutting to 10) Katya did consistently good rides to place 5th with 656points! An the women’s scores in general were very high with 3 women getting over 1000. Palm’s Anna Huebner also made the cut in 10th. 1st was Ruth Gordon Ebens, 2nd Clairo O’hara & 3rd Emily Wall.
The Mens Quarter final started for me being in the last heat at 22:30! I had pretty good rides a bit better than in the prelims and bumped up to 2nd place with 1703, 3rd was Dustin Urban and 1st was Peter Csonka with 1763 who had just made the prelims cut in 25th place…! Pretty good jump back up. The big suprise was Ej getting knocked out in 11th.
Day Three:- Semi Finals Day
All semi finals today was finished by 1 in afternoon because in the evening flood was expected, but hasn’t come in just yet.
Palm’s Bren Orton made it into Junior Mens Final in 5th place. Boy has some real talent and I think if he shows his best in the final he has some good chances.
In Women’s Katya had a consistent ride but missed final by 17points…landing her last huge space godzilla just out of time. She finished up 7th. I feel she did well but still has a lot left to show everyone in competition. 1st was Emily Jackson, 2nd Claire O’hara, 3rd Ruth Gordon Ebens.
In the Mens I had great starts to my first ride then missed my fonix’s so for my second ride i felt quite a bit of pressure knowing i needed to score higher if i wanted to make it. I did better than the first ride but still a long way from my best. I managed to make 5th place with 733 points…very relieved. 1st was Peter Csonka, 2nd Nick Troutman, 3rd Stephen Wright.
For full results on all classes and the live video feed check out the event website:-http://icf-freestyle.de/
We now have friday off before finals on Saturday, wish me luck,
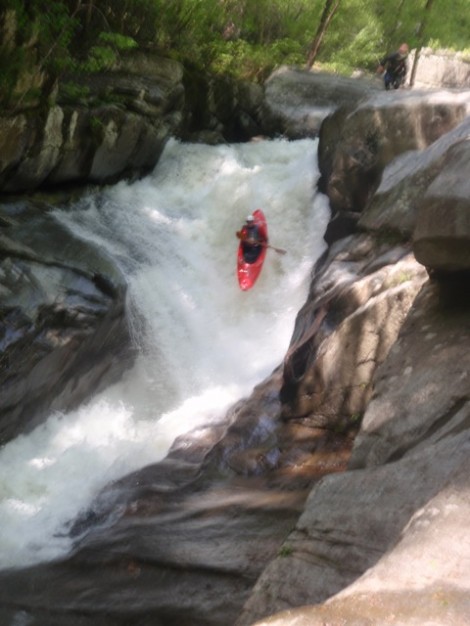
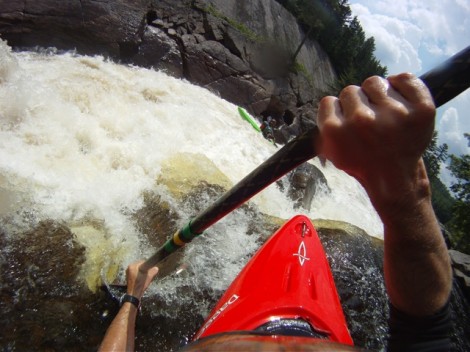
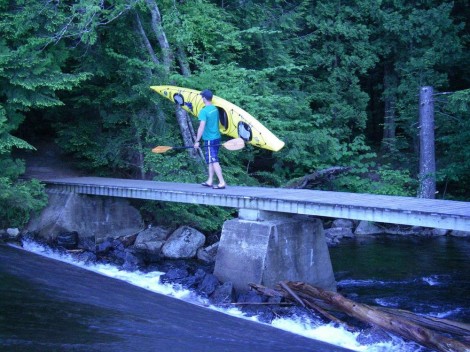
This marks the first summer I haven’t traveled out west in a long time. The west coast gets all the glory for summertime paddling in the US and rightly so as California, the Pacific Northwest, Idaho, Montana and Colorado are all at their prime right now. However it doesn’t mean that you can fully overlook the right side of the country as there are plenty of quality options! Also as I’m still in the process of healing a herniated disc the East Coast offers me some great summertime paddling close to home and a chance to get to some places I haven’t been in a while.
The best part about kayaking in the East in the summer is the heat, and that means day after day in a shortie! It’s pretty good to be on a creek run without a dry suit and a bunch of fleece. Many folks think that the water goes away here with the end of spring, not so. Summer time thunder storms, some timely dam releases, and just plain big rivers lend themselves to great paddling all the way through the dog days of August.
This year with the start of the first heat wave I packed up the van and headed North for my first paddling trip since finding out I had a herniated disc. It’s been really good to be back on the water and traveling, two of my favorite things in life. Enjoy the pictures!
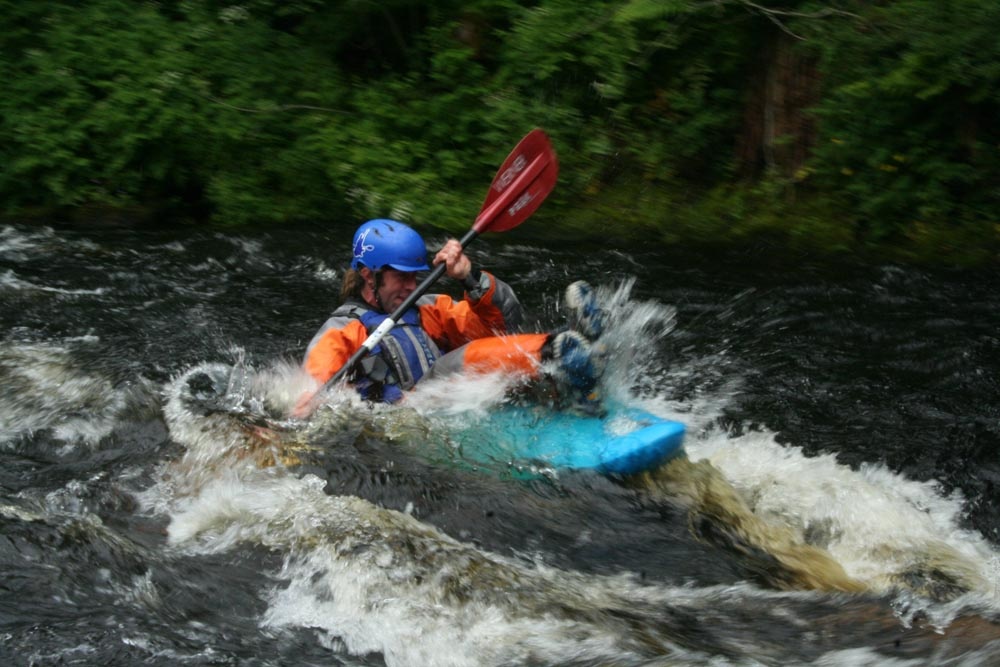
Wouldn’t be complete without a little Green River action in here. The Green is one of the best rivers ever in the summertime, lots of releases, good drops, and warm temperatures. Shane and I at the put-in on retro day.
Rolling over Gorilla on Retro Day, good to be back in a boat and stomping this rapid. A 90 degree offset….well that was a little more challenging!
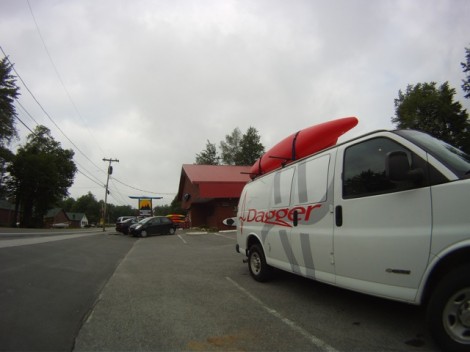
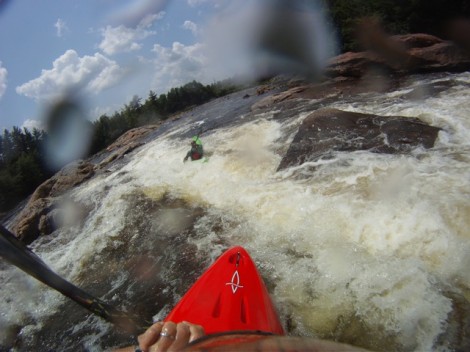
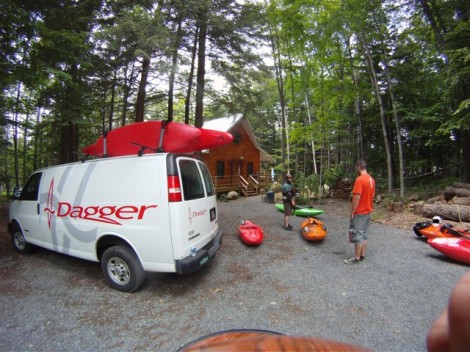
The van outside Moutain Man Outdoor Supply Company in Old Forge, New York home to the Moose River. Due to a lucky lightening strike the power plant was releasing water into the Bottom Moose which allowed me to get my first ever run on this iconic Adirondack river. It didn’t disappoint!
Lining up a boof on the Bottom Moose, I can’t believe it took me 20 years to get on this run. Glad I got to it I felt like I’d been doing the East Coast an injustice:)
Following Will Crimmins down Sure Form one of the great slides on the Bottom Moose
Another takeout after another great day on the water!
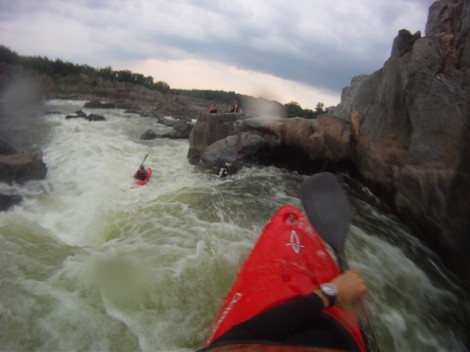
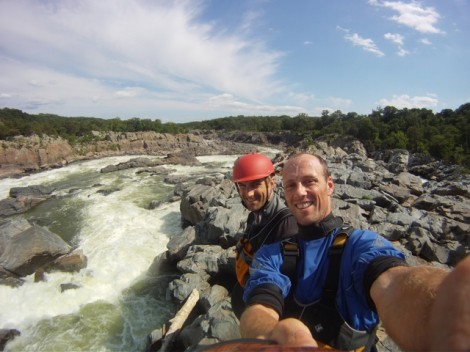
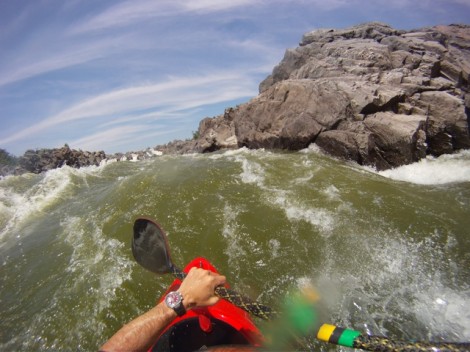
The view from Grace Under Pressure on Great Falls, Potomac River. Great Falls and the Potomac are one of the great urban jewels of East Coast kayaking. 20 miles downstream of this boof is the Whitehouse. It’s pretty cool kayaking resource as it has something for all levels of paddling right outside of Washington DC.
My cousin Ben and I at the Center Lines on Great Falls.
Shredding the O-deck waves in my Axiom! Great waves and great boat!
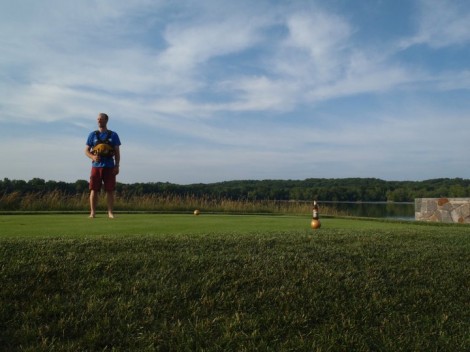
I think two of my favorite parts of a good road trip are the people you get to see and the random things you end up doing. It’s good to have a plan sometimes but sometimes you just gotta go with the flow….
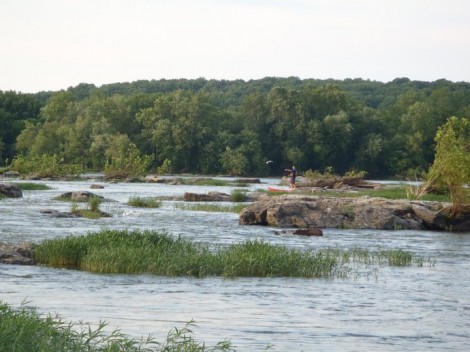
Stand up Paddle Boarding on an upper section of the Potomac
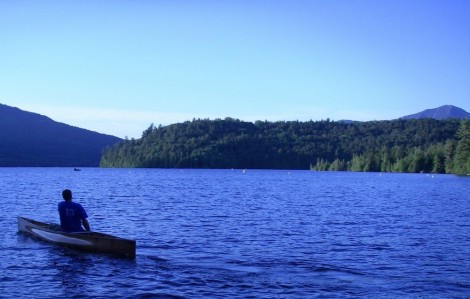
Evening on Lake Placid, New York. Can’t be afraid of some different craft, my friend Christian paddling home after drinks at the Lake Placid Lodge
Speaking of different craft to where am I going with this again?…..
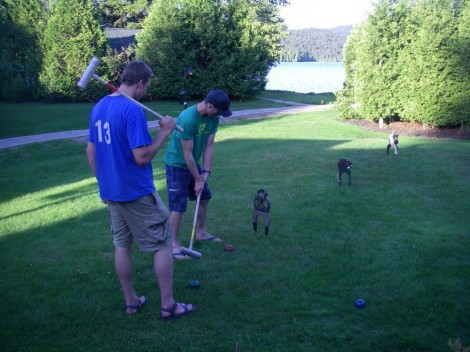
Never be afraid to take advantage of croquet
And above all never go anywhere without your PFD
Catch you next time and happy paddling on whatever craft this summer!
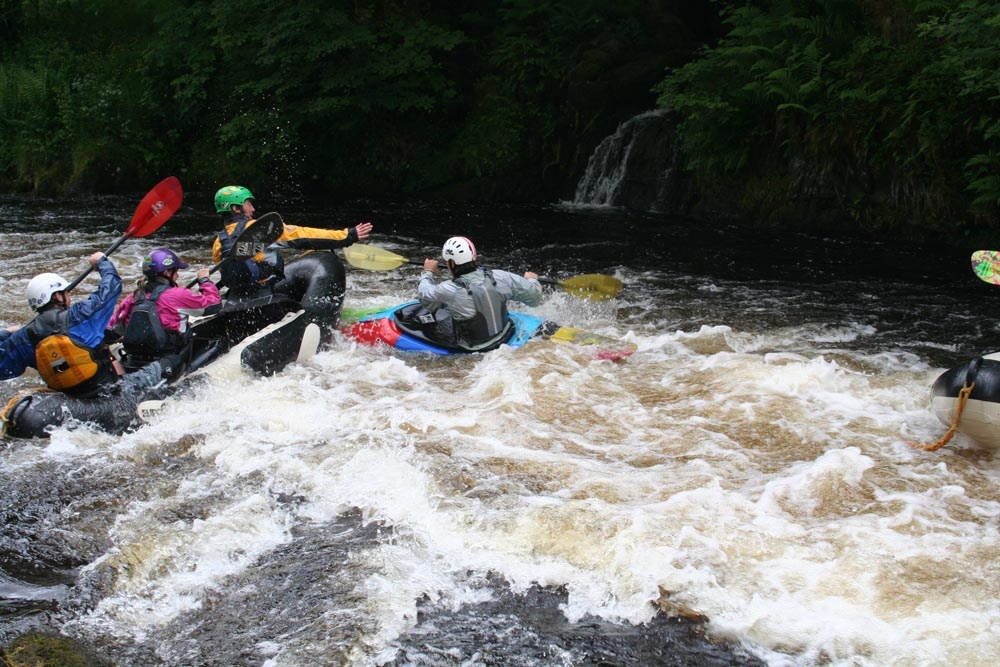
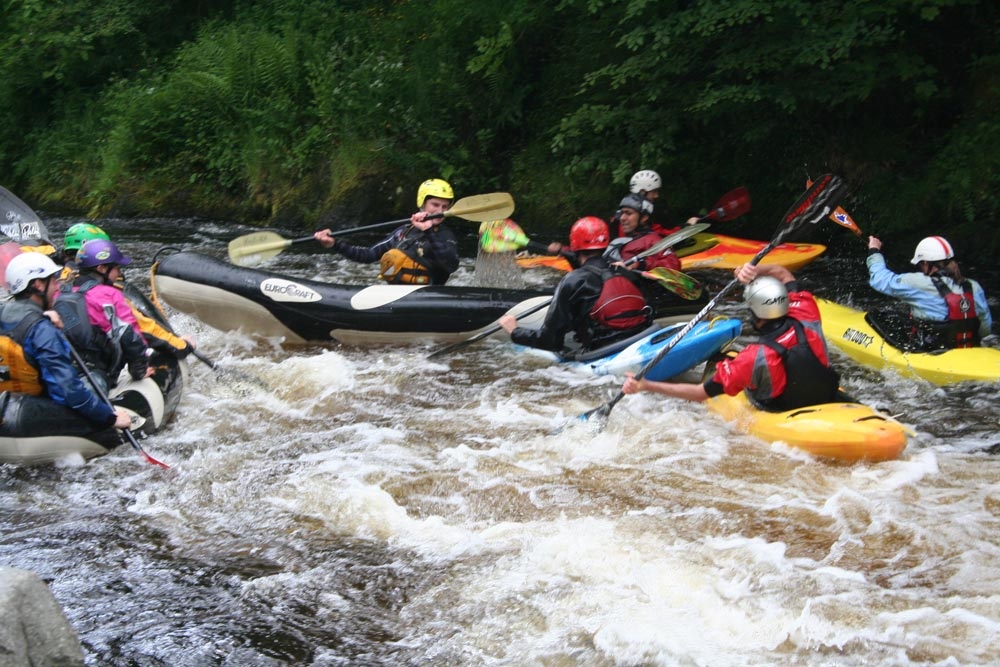
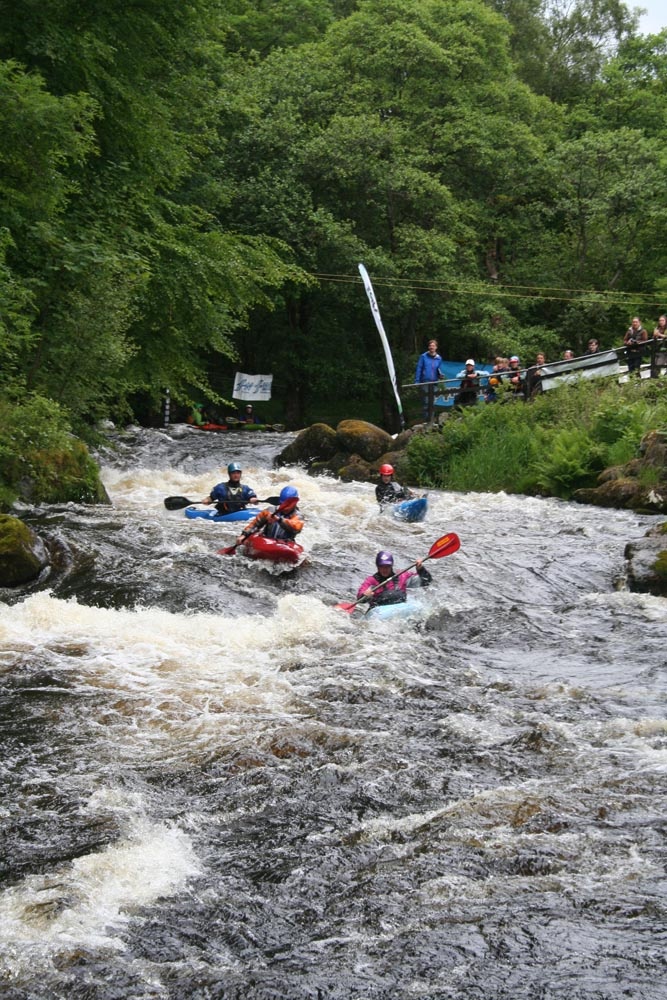
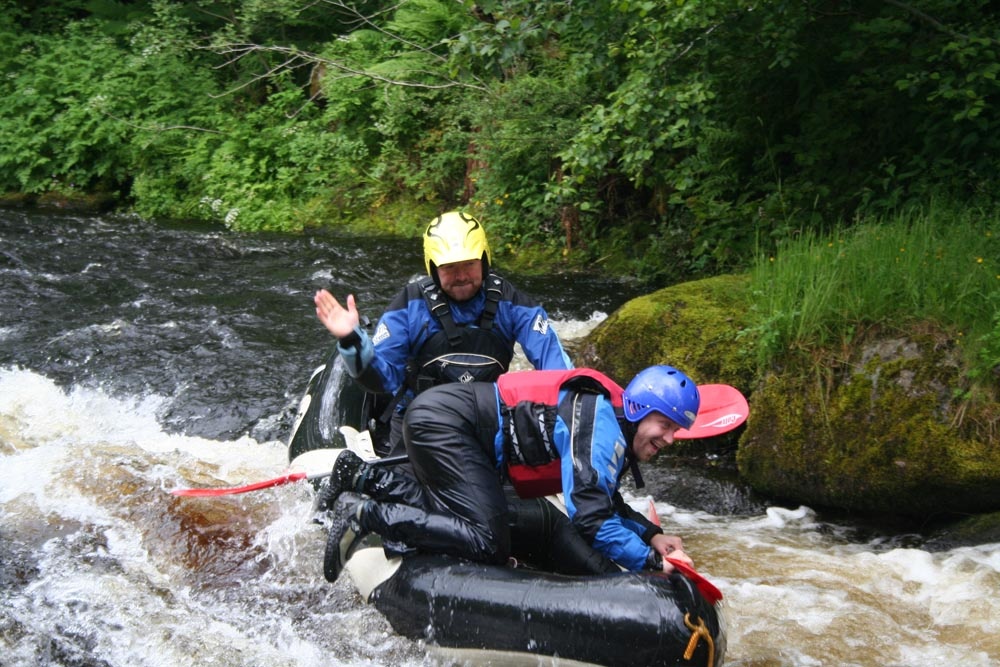
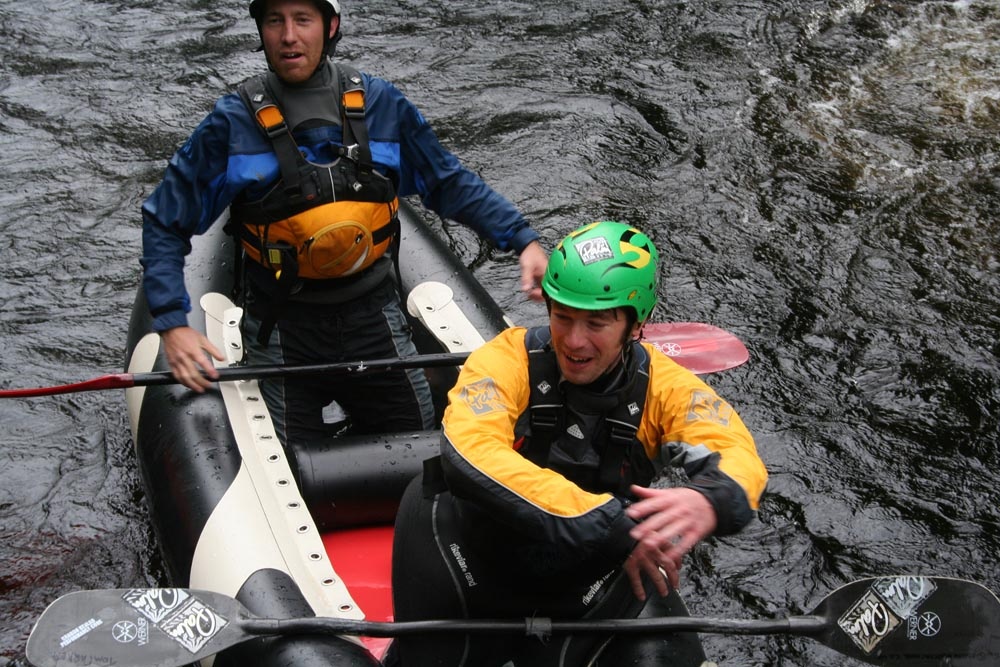
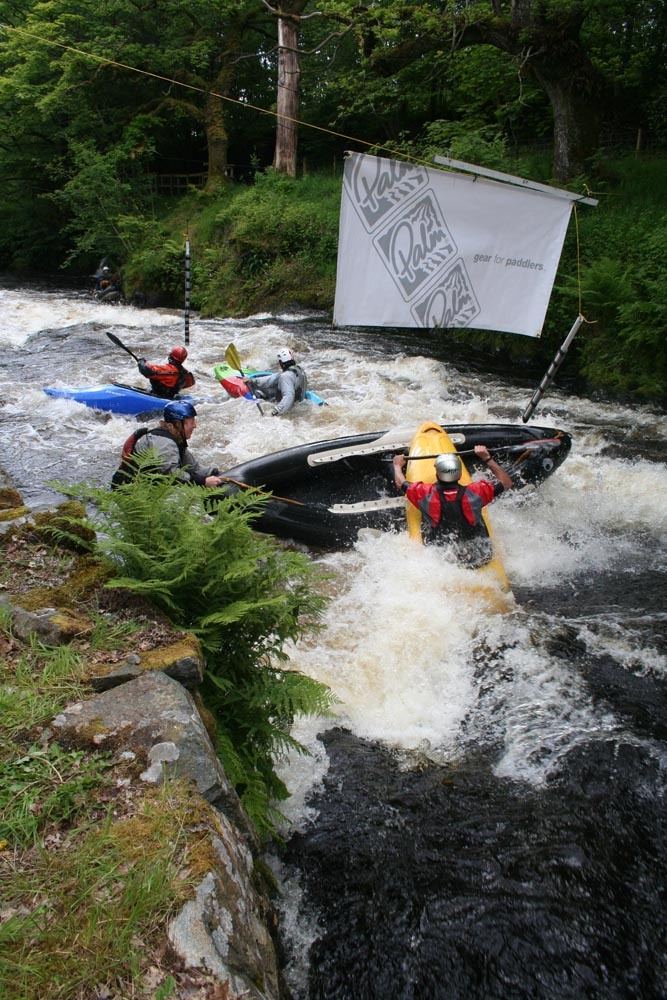
We’ve just got back from the Tryweryn Festival in North Wales. For now here are a few shots from the now legendary Palm 8-Ball Competition (boaterX, but with inflatable obstacles!)
Massive thanks to Bleddyn and all the guys at NWWC, and to all the coaches (especially Andy Turton and Lowri Davies) for working so hard over the weekend to make the festival a success.
It’s definetely one for the diary, we’ll let you know when next years’ dates are decided.