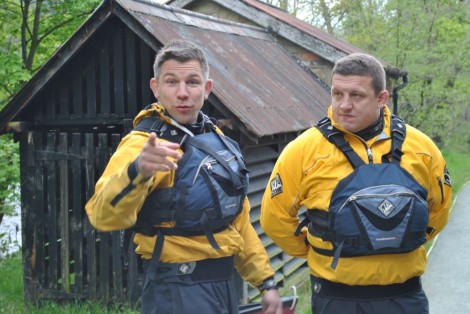
So let me get this right, your flying out to the far north of Canada to take part in one of the worlds toughest canoe races, paddling 450 miles, day and night, with little food or rest, with a team of Rugby coaches who aren’t paddlers, that you’ve only met once before and have never paddled together as a team?
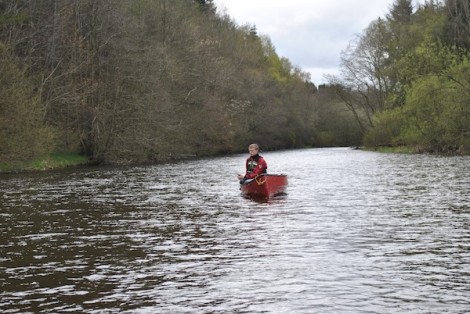
Yep, sure am!
Your mad, tapped, insane or simply stupid!
That along with a few other niceties or rather obscenities were the usual comments I received from people when I told them the challenge I was about to embark on.
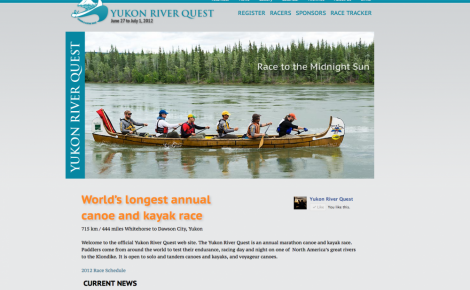
We were on our way to take part in this years Yukon River Quest, Race to the Midnight Sun which you can find out more about by reading THIS previous blog article.
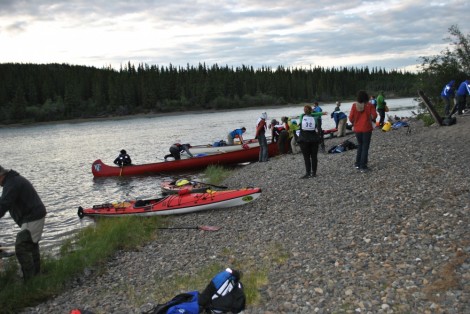
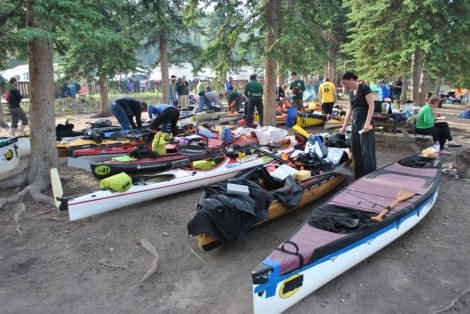
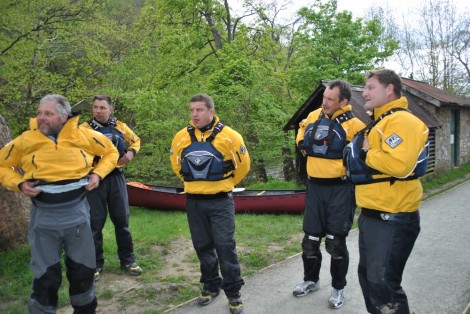
The team awaiting departure
Finally we arrived in Whitehorse, Yukon after a twelve hour flight delay, a night in a hotel at Vancouver airport and plenty of eating and drinking! The view from the aircraft window on its way in was stunning, flying over snow capped mountains and as we drew closer flying along the mighty Yukon itself.
As we were now a day late in arriving we set to work quickly identifying our boat at the local outfitters, Kanoe People and making any needed alterations or repairs to it. One thing thing in particular that did take some time and effort was the construction of some sort of spray deck in case we encountered choppy conditions during the Lake Laberge crossing or more likely to prevent swamping whilst negotiating Five Finger Rapids. Quite a daunting task producing a spray deck for a 30 ft Voyageur Canoe, never the less the team addressed it and were justifiably proud of their work. Meanwhile others busied themselves about town getting last minute bits of kit we needed and of course food and drink for the race. The Super stores in Whitehorse were quite interesting with everything from shower gel and toilet roll at one end of the store to bear decoys, semi automatic rifles and ammunition at the other end! Tesco you still have some way to go to match this !!
Team busy prepping our boat
The spray deck under construction, quite a task
Chatting to one of the locals
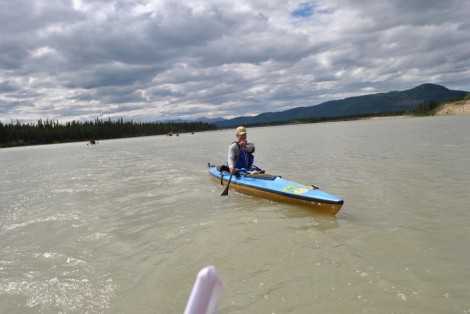
In between all the hustle and bustle of the race prep was also the opportunity to take our boats and paddles for a test drive. This came in the form of a few little trips in the local area. During these we practiced a number of scenarios including man overboard, should I slip off the boat leaving them without a steersman. I was hoping we wouldn’t need this for real as I ended up spending quite some time floating around as the boat and crew disappeared into the distance before making some valiant efforts to regain control and steer themselves in my direction! Another drill that was rehearsed lots was that of changing paddling sides. Might sound easy but when you have a boat full of rather large rugby boys moving around in a canoe at the same time then it’s bound to end in tears unless you have a plan. On one such occasion we were lucky to see the first of many bald eagles on our trip, on its nest with its young. The novelty of numerous eagle sightings soon faded for some.
One of the many Eagles we saw
All forward...ramming speed !!
Another important task was that of sorting out our food for the journey. Some of the team visited the local stores and others set about preparing some meals. During one such occasion members from the other team had taken over the support vehicle and turned it into some form of soup kitchen. We had all opted to source our own snacks etc and I had chosen various nuts, raisons, chocolate and jelly sweets together with some fruit and energy bars, all of which were hung from a thwart in front of me in plastic tubs. These tubs were provided or rather acquired courtesy of our hotel, where they were meant to be used for ice from the ice machine. Incidentally they made great on board toilets!
One of the luxury on board toilets !
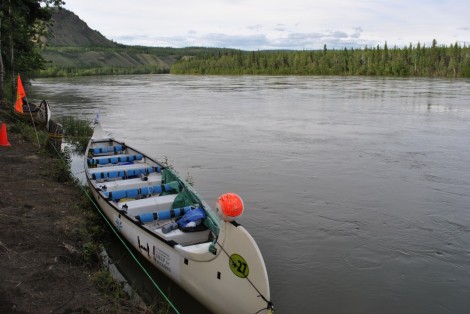
Team 1 & 2 with our boat and the Yukon behind
Team 2 A fine body of men
Time was soon upon us and it was the day before race day. Briefs had to be attended and the first of many kit checks took place. After having had our team details, entry form and insurance checked we acquired a number of ink stamps on my arm entitling us to a River Quest Race pack.
Having some of our kit checked by race officials
This contained among other things a YRQ-shirt, our race bibs with our all important team number printed on them and a couple of stickers for our boat. We were to be team 27. After we had all signed every bib on both the back and front it was off for an official team photo proudly wearing both our t-shirt and bib as requested by the officials. One half of this bib has to be returned either on completion or if you withdraw from the race as a way of accounting for everyone.
Signing the back & front of each bib
Pre-race photo wearing our signed bibs and YRQ shirts
That night it felt a bit like the last supper as we sat together as a team and ate a hearty meal. Then with race day looming the following morning it was off to bed to dream of the events to come, knowing that this would be our last chance for sleep for over 25 hours!
Race day
Our boat and our team had to be ready at the launch point for another kit check at 0730. At this point our official team mascot was added to our boat, which looked remarkably like the character Wilson from the film Castaway staring Tom Hanks.
Wilson !
Other Voyageur Canoes in our class
Teams 1 & 2 making some last minute tweaks
Once this was out of the way then it was off for some breakfast and a chill before the 1200 start.
Racers all started to converge from around 1100 at the start area. All the teams were announced and introduced, lots of good luck wishes exchanged and photos under the official start line taken. 4,3,2…1 the air horn sounded and we were off. We now had 14 hours to reach the end of the Lake, 35 hours to get to Carmacks, and 84 hours to get to Dawson. For some this truly was to become the year long day!
All teams jogged or walked their way down to their boats before launching, remembering that this was only 400m of 450 miles! The turn out by the locals was quite surprising with lots of cheers, whoops, whistles and shouts of “Yukon”and camera action.
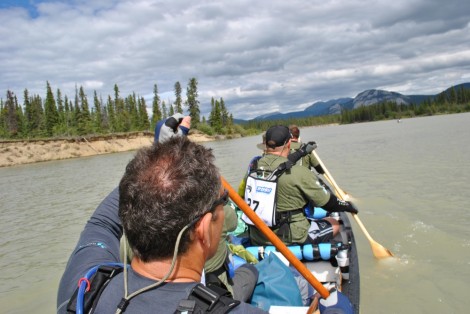
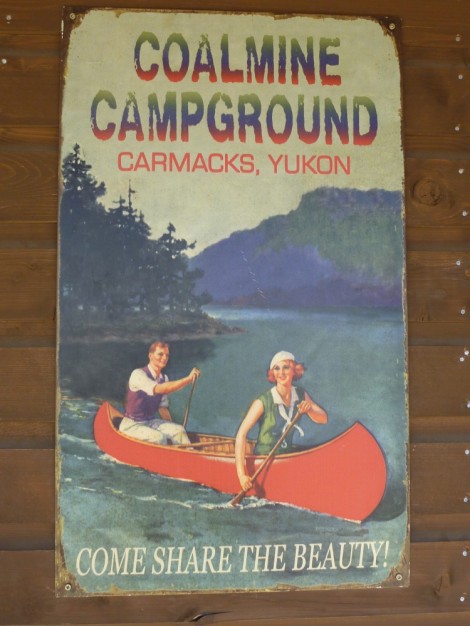
That was it we were on our way, next stop the old Coal mine camping ground at Carmacks which would be around 210 miles later and would hopefully take us about 24 hours. Conditions were the best they had seen in years with good weather and high river levels. After a couple of hours we seemed to loose all the hustle and bustle and settled down to a steady rhythm and just the odd couple of boats around us as we entered the start of Lake Laberege and passed the first of 5 check points before Carmacks. These CP’s are all manned and act as safety to give help when needed and also to record the times of racers before sending them on via sat phones to the Comms centre were they are updated and posted on the race website.
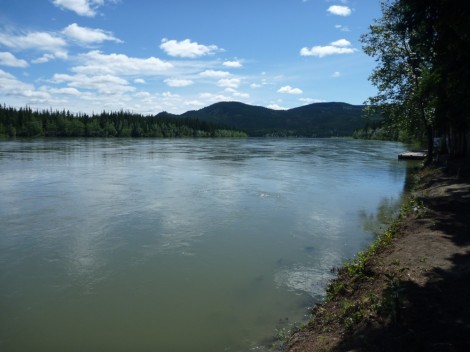
Typical of the Yukon scenery
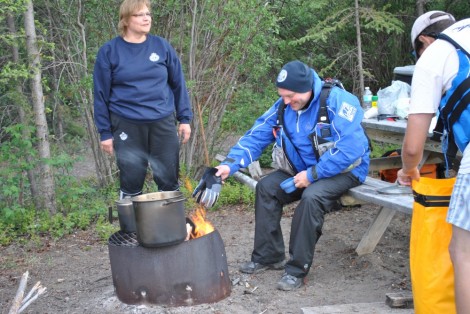
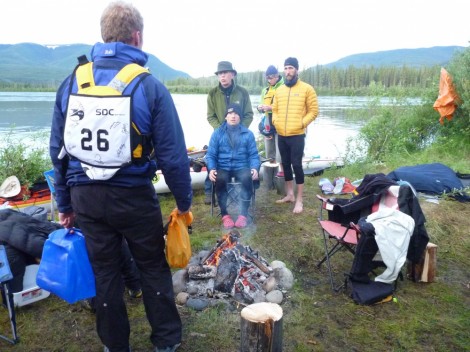
As well as these CP’s there are also a number of Safety Monitoring points or MP’s on route, which again are manned, they quite often have fires burning and hot drinks,for racers to warm up. There was to be 3 of these MP’s between us and Carmacks which proved very useful.
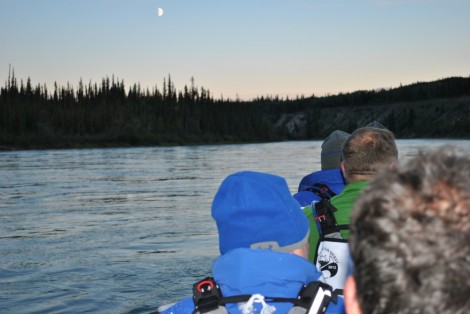
This view of the backs of my teams heads was something I was to get used to over the next 24 hours
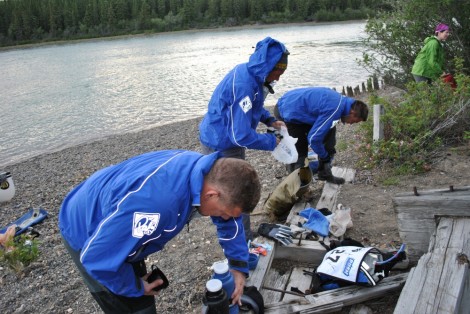
The crossing of the lake took us around 8 hours in excellent conditions meaning we arrived at CP3 Lower Laberge at around 2215 well ahead of the cut off time of 0200. As the temperature was quickly dropping with the sun low in the sky we made the decision to change from daytime light weight clothing into thermals, topped off with our brilliant Palm Aegean cags and Viper pants. Great combination, lots of room inside with freedom of movement and easy to get on and off quickly. After a quick warm up by the fire for a couple of the team and some food it was time to get paddling again.
CP3
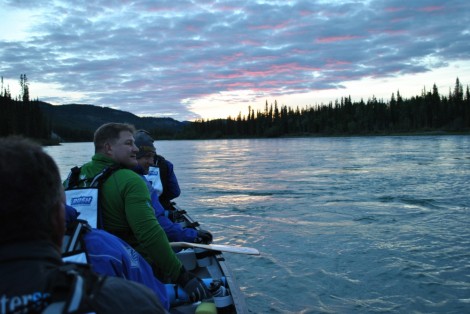
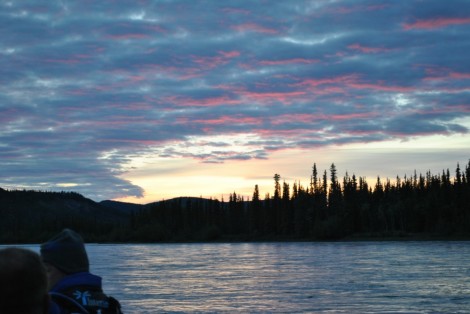
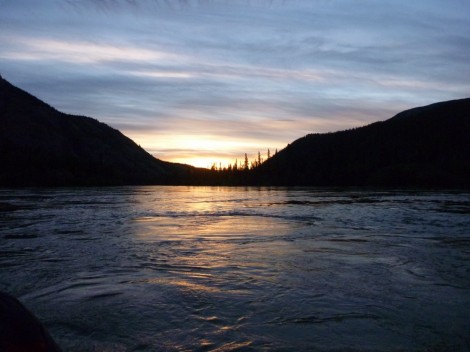
The temperature continued to drop as we paddled on down the section knows as The 30 Mile River. By now the light was fading but as the name says its the “Race to the midnight sun” and sure enough at midnight we were presented with a stunning sky.
The midnight sun
Our next point of interest was MP2 Lower 30 Mile which is around 40km after leaving the lake. The names of the locations we passed made me smile with such things as “Gold diggers point, Klondike Bend, Fish Eddy and Shipyard Island” The scenery by now was very much the same with little if any change from steep banks and pine trees. I was eagerly awaiting us passing the spot where the Teslin River would join us and hopefully give us a bit of a helping hand. The Teslin came and went with no apparent noticeable difference, the temperature dropped more, and we were reminded by a passing paddler “that coldest time yet to come would be around 0500”! Cosmic I thought, I cant wait for it!
Still very cold but the sun was on its way up as we paddled on
By the time we reached MP3 just down stream of where the Big Salmon River joined us, it was definitely daylight and still a tad cool. So we took the decision to stop here and spend sometime re-warming in front of the fire as a number of the crew were starting to feel the effects of cold together with a lack of food and sleep. It was here that Team 1 who were by now ahead of us had also stopped and gave first aid to a fellow racer who was suffering badly from exhaustion and hypothermia. We had been warned by officials at the race briefs that “hypothermia accounts for more than half of all crews that fail to finish, and that on cold years more than 50% of racers will suffer from hypothermia”.
A member of team 1 giving first aid to a fellow racer at MP3
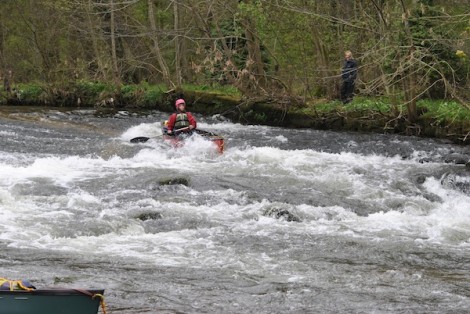
We set off once again and paddled our way down the river. For what seemed like an eternity at one point we paddled through what remained of a huge forest which had been burnt to the ground, it really was mind numbing. By being at the stern of the boat and having to concentrate on steering and keeping an eye on the navigation kept me more than occupied and definitely gave me a focus helping to pass the time, prevent boredom and ultimately the potential to fall asleep. As for wild life well we didn’t really see much aside from the odd eagle, however during the journey back to Whitehorse by vehicle there were moose, wolves and bears to name but a few. Apparently they use the highways just like us to get around.
At around 0900 after having been paddling for over 21 hours and a short distance after the Little Salmon joined form the right, we eventually passed our last check point before Carmacks. From here we knew had around a further 4-6 hours of paddling until will reached the sanctuary of Carmacks where we would have a compulsory 7 hour stop. A chance for a hot shower, some food and a well earn’t sleep before tackling the remainder of our Yukon Quest.
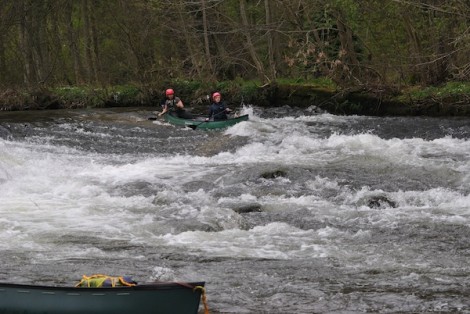
This last couple of hours leading up to our arrival at Carmacks proved to be a real challenge. Some of the team were now really starting to suffer and hallucinations had taken over with sightings of giant beetles, knights in armor, chimpanzees and goblins all on the river bank along side. On a number of occasions crew members even nodded of whilst still paddling. I was unaware of exactly how severe the situation had become, but I did know that I had to get the canoe and its crew safely to Carmacks.
The journey seemed to take for ever, as we turned a corner only to find yet another corner loomed ahead. With an hour or so to go I got out our sat phone and made a call to our support crew at Carmacks. I made a point of letting them know we where not far and that hot food was the order of the day for all of us as soon as we arrived. However un-be-known to my team was the fact that my signal had cut out after only 20 seconds and that I had decided to keep talking pretending to have communications so as not to unsettle them any further. Another memorable occasion was when a team member stated that “I’m sure we’ve been past this before, are you sure were going the right way?” I must say for moment he even cast doubt in mind and could have caused a mutiny. I did have a moment when I feared I may have been thrown over board.
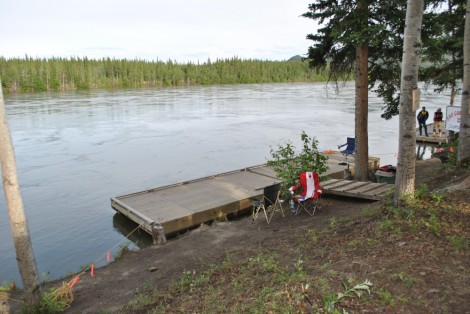
As we neared Carmacks the map and our race briefs clearly mentioned an overhead cable across the river which is approximately 2km from the campsite, and after which you are advised to keep far right so as to avoid missing the pontoon. After announcing in a very calm manner that we now had only a very short distance to the landing it again seemed to take an age. Moral was high with the thought of food and rest but to my horror as we turned yet another corner I was greeted with what I thought was another overhead cable! My heart sank as I reluctantly announced I had made a navigation error and in fact we still had 2 km to go, not a good feeling to have! But all to soon it became apparent that I was right the first time as the Old Coal mine camping ground rapidly approached. Officials were waiting our arrival and barking incoherent instructions at us. At around 1500 with a loud thud, a big wobble and after more than 27 hours of paddling we finally arrived at Carmacks.
The landing stage at Carmacks
Lots of busy people during their 7 hour stop at Carmacks
Our next problem was getting out of the boat as we were all somewhat wobbly form our adventure. As officials helped us from the boat it became apparent the toll it had taken on us. We all took some time to compose ourselves and get our thoughts whilst support crew and officials busied themselves helping those that needed it and giving us all a good check over.
A few minutes later some race officials called us together and announced that on the grounds of safety we were being “scratched”! Scratched is the YRQ term for being withdrawn. We were all deeply upset but fully understood the reasons behind their decision.
This really had felt like a year long day….
Alone and empty she had served us well but now the race for us was over
After some food and a hot shower and as we de-rigged our canoe team 1 surfaced from their slumber, had some breakfast, reloaded their boat and set off on the next phase of their adventure. Around 30 hours later they triumphantly crossed the finish line at Dawson in a time of 54 hours. A very well deserved congratulations to Team 1 for completing such a grueling event.
Team 1 leaving Carmacks on route for Dawson
The river now quiet and empty after the last boats have left
I am glad to say that we are all now back to fitness and going about life as normal. Not forgetting our overall aim of doing this challenge was to raise money for our chosen charity Help for Heroes, and I believe to date both teams together managed to meet their target and raise £100,000
Q: Did I enjoy it? A: Yes a fantastic experience
Q: Would I do it again? A: Next years race beckons to me and Im already looking at flights etc. After all I cant leave an unfinished chapter in my life. Bring on Yukon River Quest 2013!
A big thank you to my enduring companions on this trip, who were Toby Booth, Justin Bishop, Neil Hatley, Gavin Cleave and Tony Cilia and to Davis St John Claire who had the thankless task of being our support crew. Thanks also Interserve for making it happen.
Lastly a special thanks goes out to Palm Equipment, Desperate Measures, Rab and Outdoor Active for their help and support throughout.
Hasta la vista…. I’ll be back !!
See you on the water…
Jules
Bespoke Canoe Coaching, Guiding, Safety & Rescue training and BCU awards
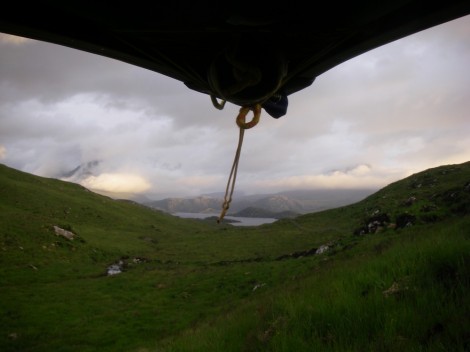
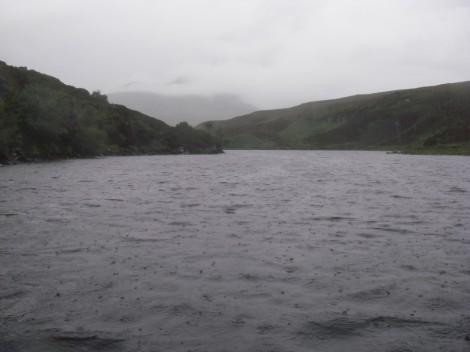
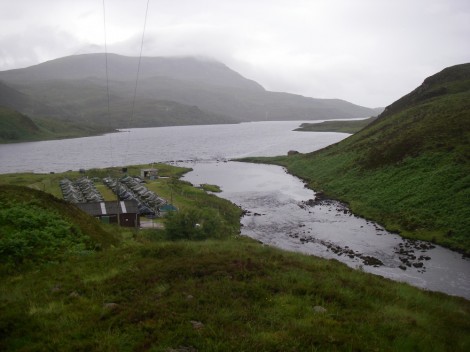
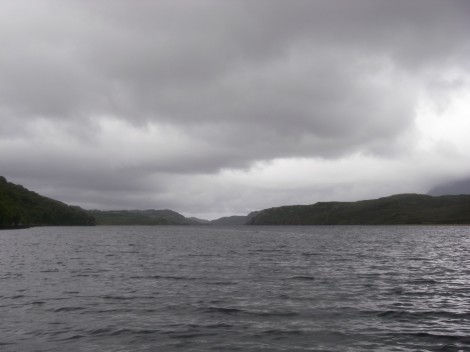
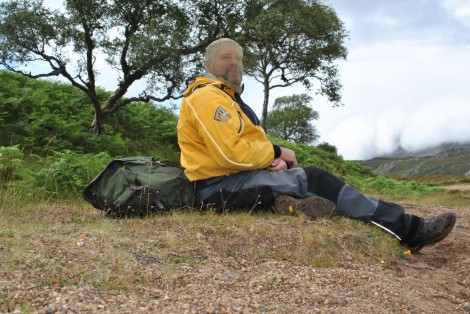
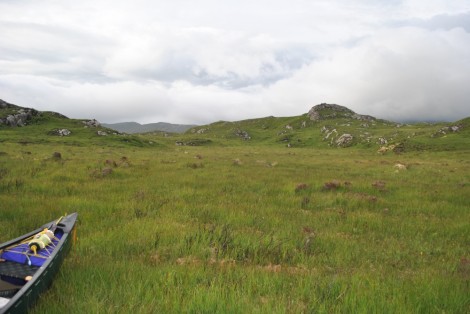
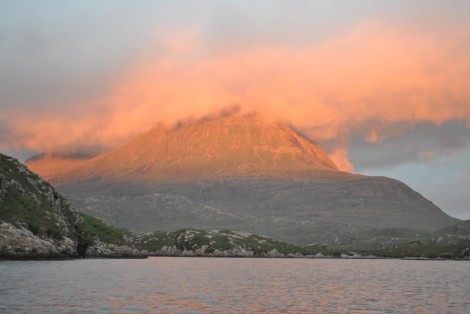
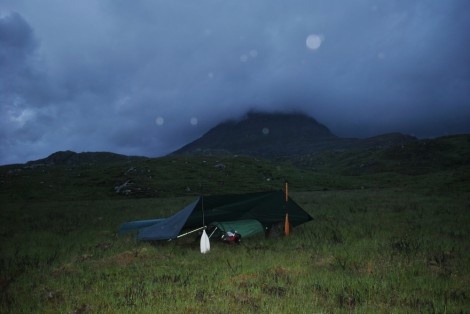
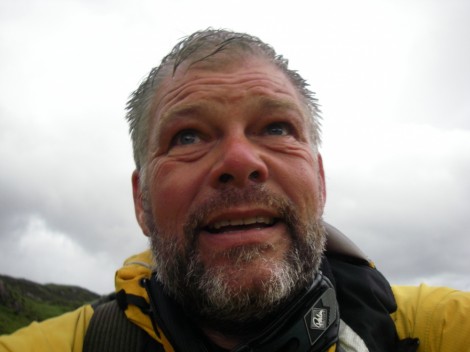
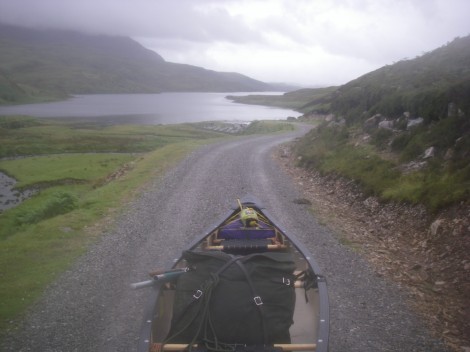
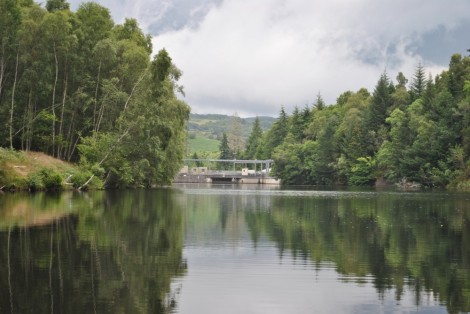
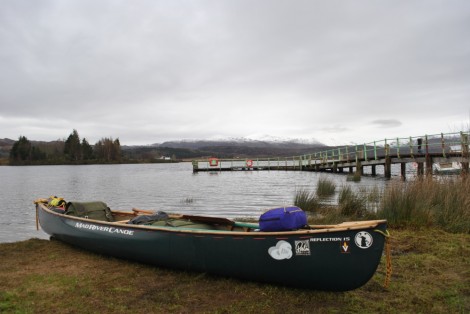
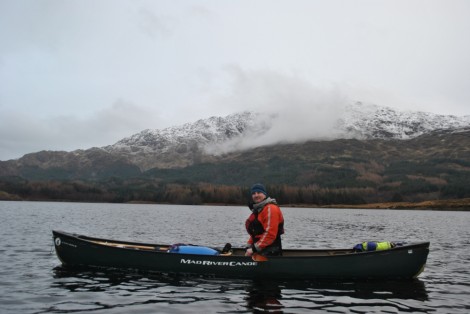
Finally as the sun was setting and after more than nine and a half hours of paddling, poling, portaging, grunting and groaning, and enduring everything from bright sunshine to wind and rain I was treated to my first glimpse of my planned destination. That location was Sionascaig, a beautifully wild and remote loch in the far north of the Scottish highlands surrounded by some spectacular mountains.
Looking down towards Sionascaig
I had been wanting to explore this area for a while after having spent some time researching it and pouring over maps thinking how interesting the area looked. When planning I’m always looking at how I can link up watersheds or how I can extend previous trips. Being that I’m not a particularly sociable beast and that I enjoy my own company, plus I really like the challenges presented by solo expedition paddling, I felt that this trip would lend its self well to this style of expedition. Careful consideration should be given to any solo ventures remembering the associated hazards, especially should something go wrong. I always leave details of my intended route with a friend together with details of what to do if they don’t hear from me at certain times. As a safety system I carry a GPS tracking device which allows people to track me but also has a built in message service allowing me to check in and let the world know I’m ok, plus alert the emergency services should I really need them. As best I can I make sure Im self sufficient and that Im not going to be putting anyone else at risk.
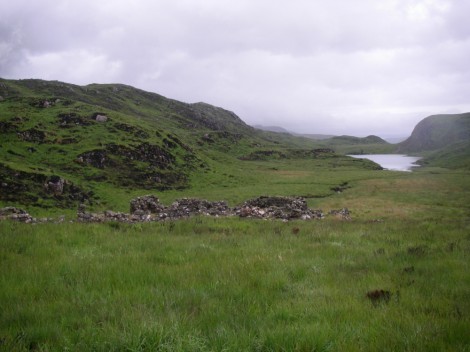
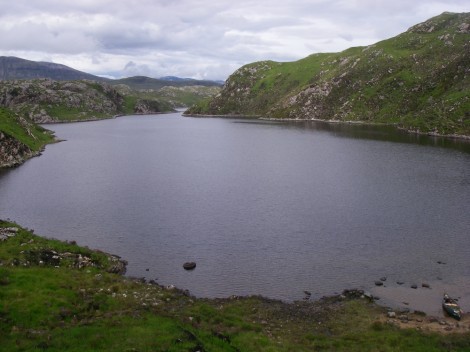
Sionascaig is a part of a series of lochs in the Inverpolly National Nature Reserve which lies to the North of Ullapool in the Scottish highlands. It is part of a system which includes Cam Loch, Loch Veyatie, Fionn Loch and Loch Sionascaig. The skyline to the north is dominated by the peaks of Suilven and Canisp whilst to the south are Cul Mor, Cul Beag and the classic ridge of Stac Polly.
You can view the area and my route in Google Maps HERE
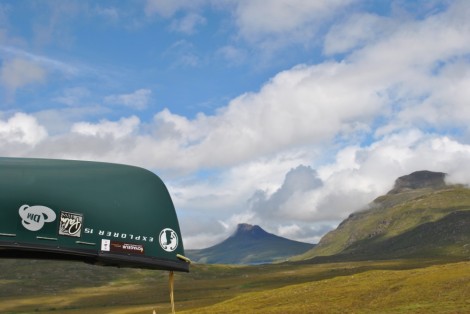
Blue sky and sunshine but the clouds were building!
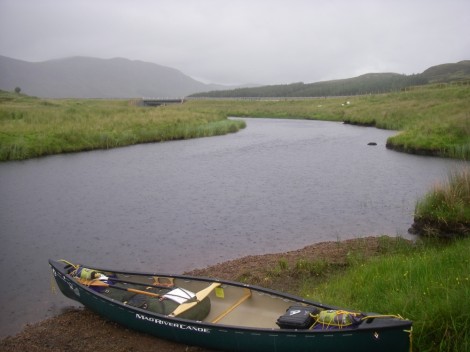
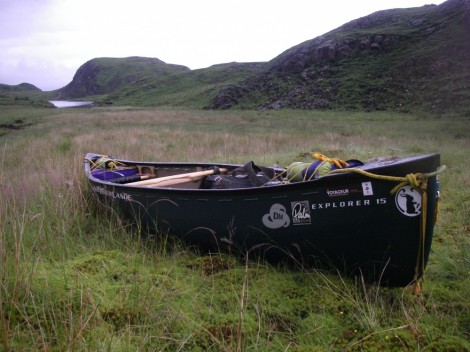
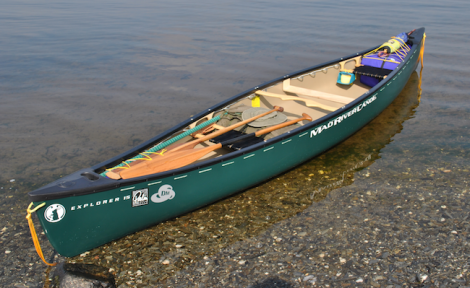
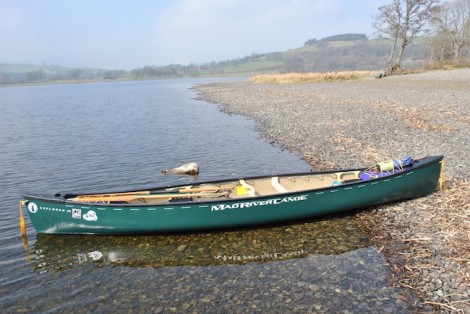
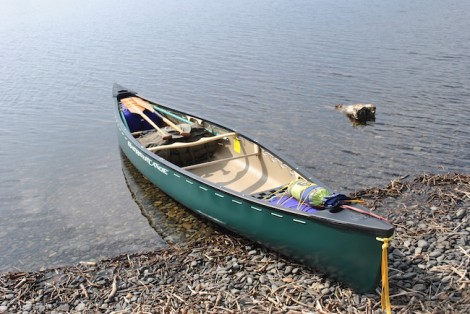
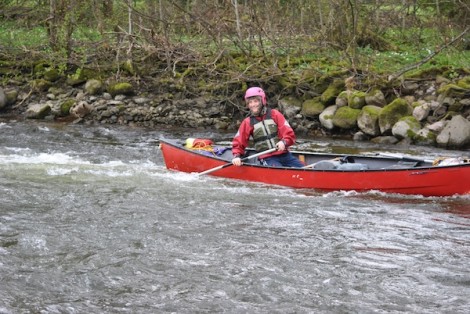
As I left Dingwall the sun was shining with blue skies, however as I headed north the cloud thickened and the inevitable wind and rain started! I passed the track leading down to the fish farm on Loch Veyatie and found a small pull in off the road with good access to a tributary flowing into Cam Loch, loaded my boat and launched. I had chosen my Mad River Explorer 15 as my boat. I love this as my expeditioning boat. With its shallow “V” hull it tracks well and is equally at home on moving and open water.
It wasn’t long before the rain arrived, closely followed by the wind!
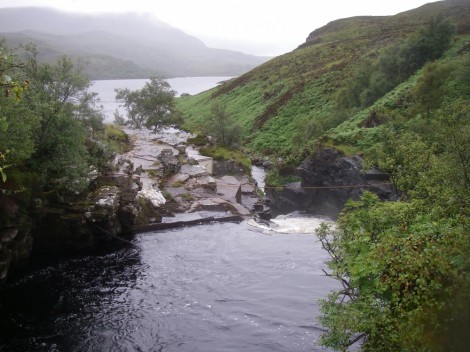
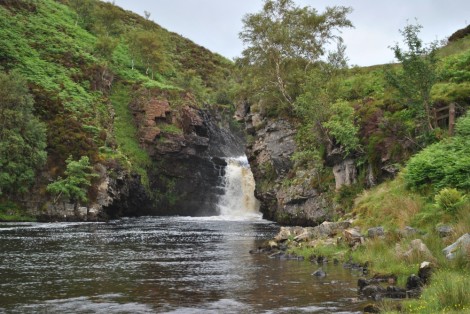
I spent a couple of hours exploring Cam Loch before heading to the South West corner in search of a waterfall leading to Loch Veyatie and the first of many portages on this trip.I was quite taken a back when I turned a corner in the narrowing loch, as the the water a short distance in front of me disappeared out of view! For some unknown reason I had been expecting the waterfall to be flowing towards me rather than away and into Veyatie.
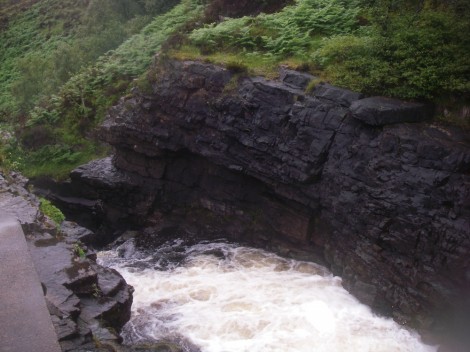
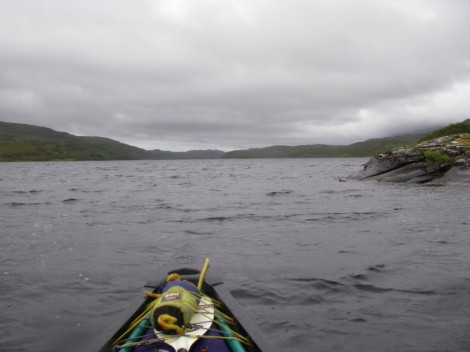
The waterfall itself is quite spectacular and the short portage around it rather interesting as it drops 12m in a very short distance. Portage complete and with my boat loaded Loch Veyatie was now stretching away northwards for 7km to my front.
The view from the top of the falls with Loch Veyatie stretching off into the distance
Looking back at the falls
Wasn't expecting to see some of these!
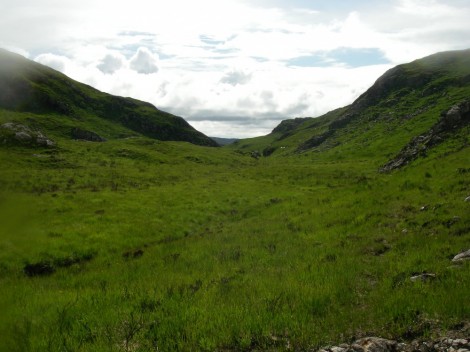
The way ahead
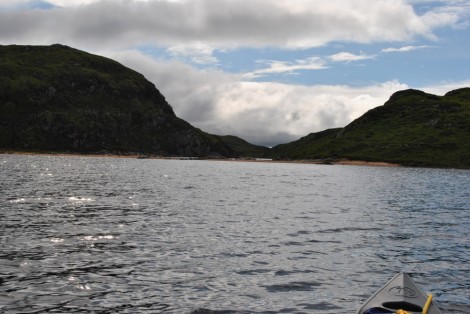
After some 5 km of paddling a large bay opens up on the western shore. This marks the point at which there is a portage between the Lochs Veyatie and Sionascaig and as this was the portage I intended to use on my return I thought I would check it out, and also take the opportunity for a break and some lunch.
The bay leading to the portage between Veyatie and Sionascaig
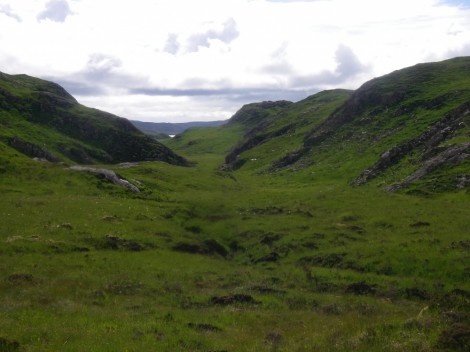
This was the view of my forthcoming portage between the Lochs as seen from the Loch Veyatie side with Sionascaig just visible in the distance. Challenging me thinks !!
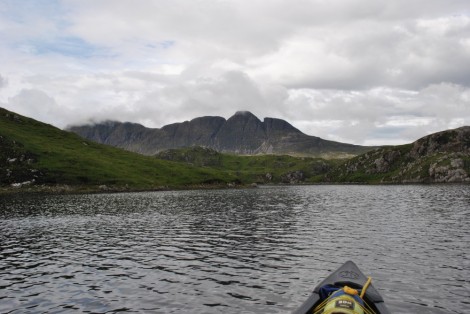
My View of Suilven dominating the skyline as I head out of the bay and back to Loch Veyatie
By this time the rain and wind had subsided and was replaced with sunshine which was an invite for the legendary Scottish midges to make an appearance. They don’t normally bug me but on this occasion as there was no other option available, they feasted on me! I carry a head net in my PFD for just such an occasion which I normally put on just before landing and for short periods. I also carry a full midge jacket which I then put on for longer periods once settled.
The famous Scottish Midges!
Would you trust this man? Not a good look but essential !
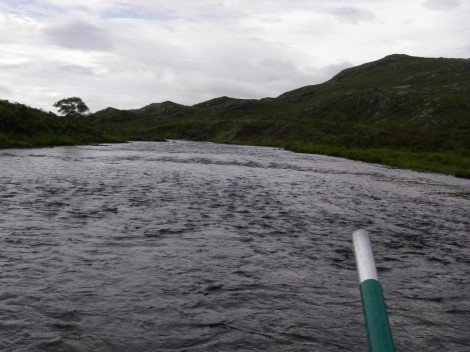
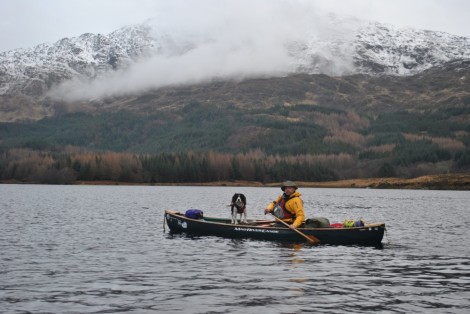
A few km’s later the Loch becomes a river and I was now being overshadowed by the classic peaks of Suilven. This gave me the opportunity to engage in a spot of downstream poling, which was a great way to stretch my legs. Not that this would be a problem soon with another portage looming. Some distance later after picking my way through the twists and turns, the flow slows and you find yourself in the calmer waters of Fionn Loch.
Time for a spot of downstream poling
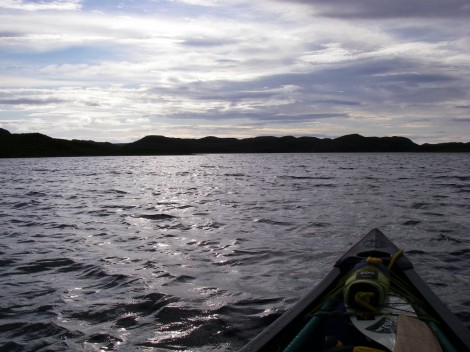
Calmer waters of Fionn Loch together with much improved weather
I was now looking for a bay on the west side where the water leaves the loch and heads downhill heading for the Falls of Kirkaig. At this point I needed to leave the Loch and try and find a portage route across to Sionascaig.
Leaving Fionn Loch behind me heading over to Sionascaig
OK which way now?
On route to Scionascaig
This wasn’t to be an easy portage, with over 2 km of rough ground to cover and no chance of a trolley being used. I like to keep the legs short whilst portaging, sticking to 100m at a time, and always carrying my kit first and then returning for my boat. This then allows me to vary my route and select the best option for when Im carrying my boat. Several times I managed to loose either my boat or kit and on one occasion both whilst walking back and forth. Eventually I found myself looking down the final 500m of the remaining portage that would take me into Sionascaig, accompanied by some spectacular sunsets over the surrounding mountains.
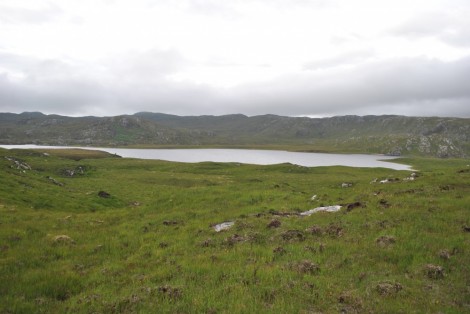
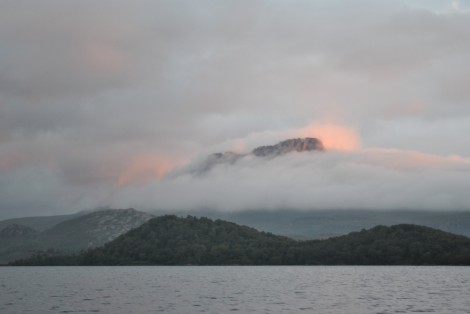
After nine and a half hours of paddling, poling and portaging Sionascaig was now in clear view and it was all downhill
However the route down wasn't easy and took some selection
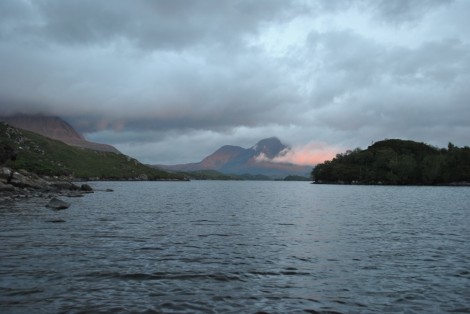
Stunning sun set over Cul Mor
Stac Polly at sunset, peering through the cloud
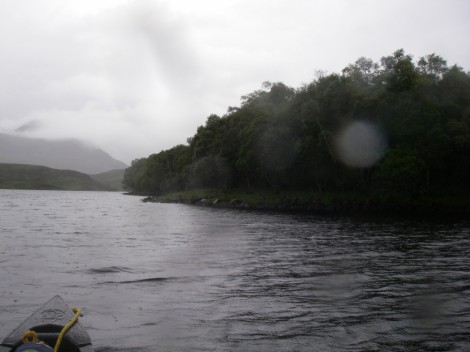
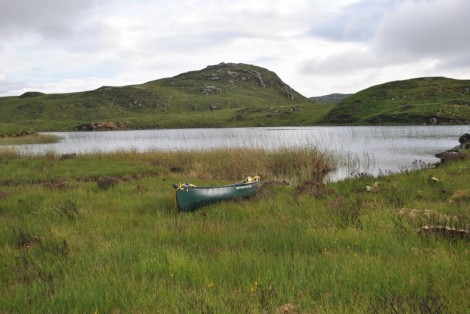
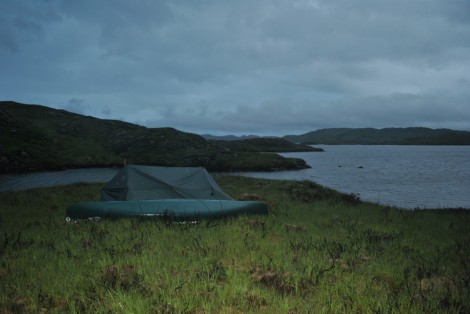
It felt good to have water under my boat again as I paddled a couple of km around to Boat Bay. After searching around a bit for a good bivy site, I eventually set my tarp up for the night in a sheltered spot opposite Boat Bay, sorted some food and went to bed tired but happy. Luckily I had taken a hooped bivy bag with me, which saved me from a night of misery courtesy of the midges.
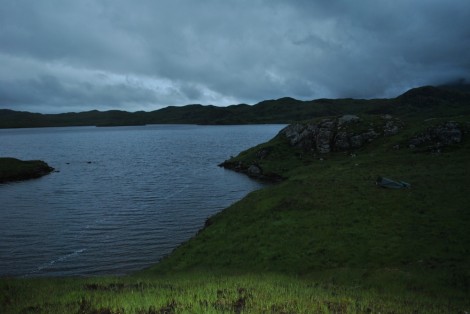
Next day after a late start I spent the day exploring Sionascaig further before finding a new bivy spot very close to the start of the portage trail back over to Loch Veyatie. As I settled down for the night the weather was turning with the wind building and light but steady rain.
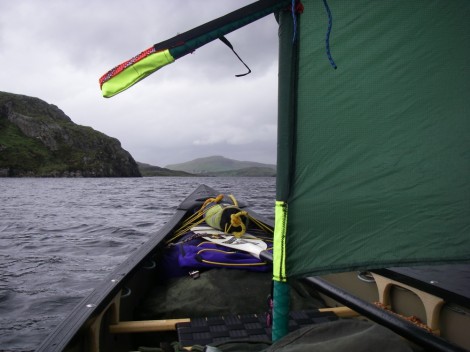
I was in for a wet and windy night with an early morning call!
I could hear the weather worsening as it whipped and lashed at my tarp making sleeping a challenge. This continued throughout the night until at around 0430 a huge squall flattened my tarp! Luckily because of the way my tarp was set with my boat along the back edge it didn’t take off and disappear. I crawled out into the pouring rain and wind and surveyed the situation. As it was nearly light I decided to quickly pack and retreat to Loch Veyatie via the previously mentioned portage route.
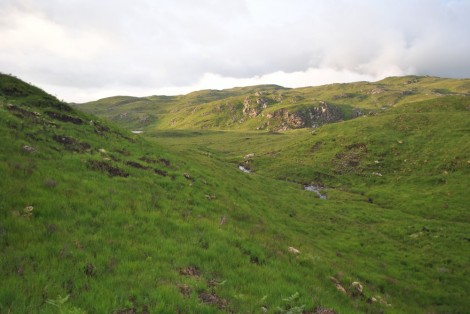
Kit packed I set off with my familiar routine of kit first and then boat, again with the legs kept to around 100 m. It was hard going as there was no real path just a wet, tussock strewn 2 km of slog, all slightly up hill and then there was few hundred metres descent down to the water in a sheltered bay. I was quite tired and hungry at this point so stopped for breakfast before continuing.
Looking back from where I had come from. Started the portage at around 0515 in the morning
Where I was headed never seemed to get any closer
Careful route selection was essential. This was the ground for most if not all the 2km, and its all slightly uphill !
Challenging times.. a picture paints a thousand words!
Portage nearly over, looking down into the bay where I had breakfast and that leads to Loch Veyatie
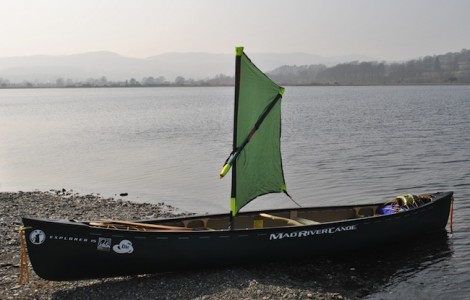
As luck would have it the rain had eased and the wind was blowing down the Loch in the direction I was heading. I quickly rigged my solo sail, sat back and enjoyed the swift journey down the Loch to the fish farm I had passed previously.
Luck was on my side so I grabbed the opportunity and sailed back to the fish farm
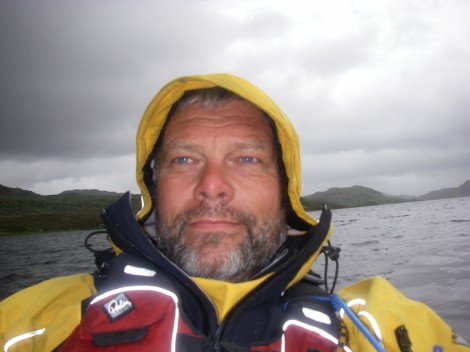
Glad to have my Aleutian cag with me. Great expedition jacket
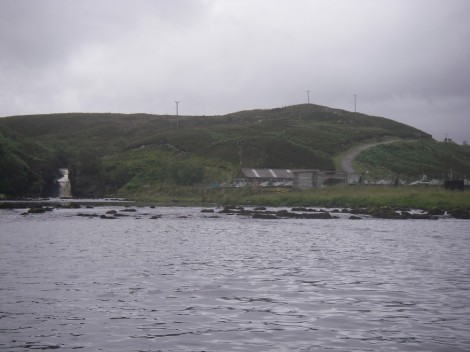
The fish farm and the end of my journey, or was it?
Unfortunately there was no vehicle access down from the road to the farm, so I set off on foot back to my car, moved it to the gate at the top of the track and returned to my boat with a portage trolley. With my boat strapped on I set off on the last part of my journey back to my car before heading back to Dinngwall.
Using a trolley for the portage up from the fish farm and back to the car
I thoroughly enjoyed the trip, despite the bad weather that woke me and cut my trip short. There is lots of scope to extend this trip and include a few more lochs. I could easily have spent more time exploring Sionascaig, in fact I would very much like to head back there soon and maybe even take in one of the surrounding peaks or ridges. A beautiful place with stunning views and well worth a trip. Go and see for your self.
Meanwhile here is a little collection of memories from my trip. Hope you enjoy it
Music by Dan-O at DanoSongs.com
Happy paddling and see you on the water…..
Jules
Bespoke Canoe Coaching, Guiding, Safety & Rescue training and BCU awards
Wether your paddling on open, or moving water, having a good understanding of and being able to apply the principles of trim are fundamental to being an effective open boat paddler.
One way to think about trim is as a footprint that is created in the water by the boat, or the amount of boat in contact with the water and the shape that is created in the water by the boat. The size, shape and depth of this footprint can be changed by both your position and that of any kit in the boat, both of which can have a dramatic effect on performance.
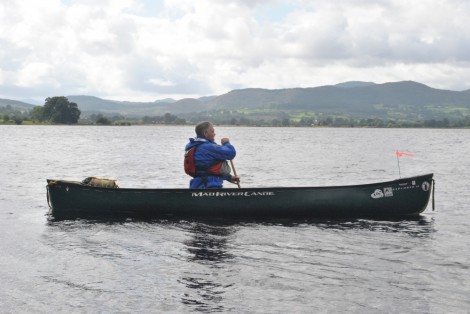
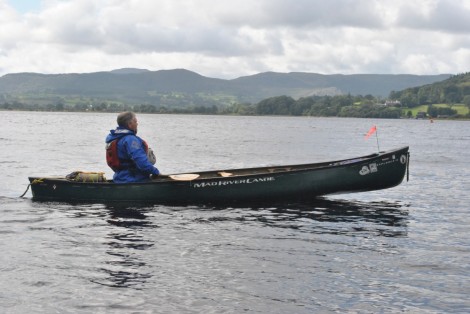
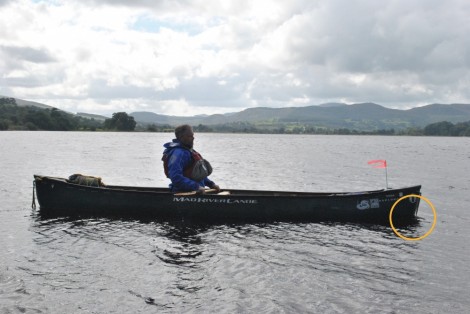
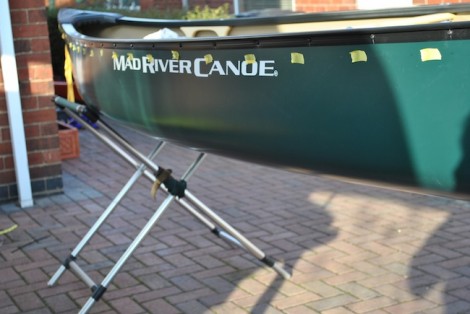
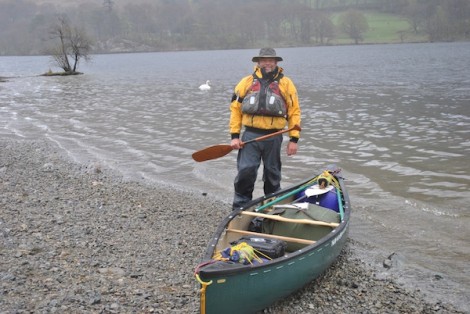
My boat trimmed as I would normally paddle it, slightly bow light
Usually when things aren’t quite working as they should be, or paddling seems like hard work then I encourage people to revisit their trim and adjust it accordingly as a first priority.
Think trim, trim, trim and trim again!
You can develop your understanding of trim especially in relation to wind with a few simple exercises. Firstly find a safe area of open water with a steady wind blowing. Then use extremes of trim by moving your position to either all the way forward to the bow or back to the stern and take note of the effect this has in relation to which end of your boat points into wind. Once this is confirmed try paddling around into, down and across the wind.
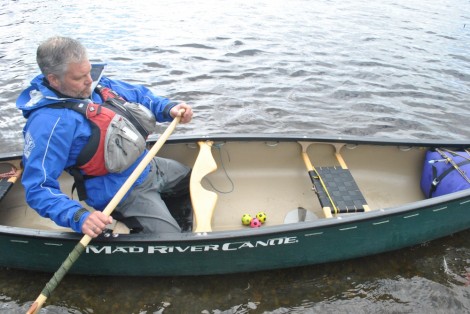
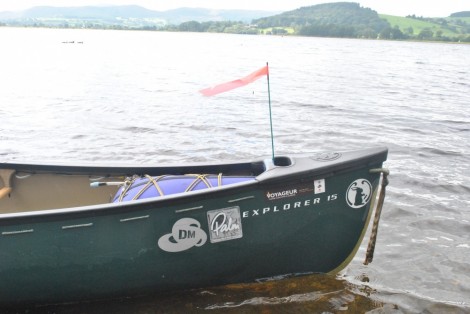
TOP TIP: You can help your awareness of wind and its effect in relation to trim with the use of a few quick and simple visual aids. Drop a couple of balls into the bottom of your boat and watch where they settle in your boat. More towards the bow or stern? Use a simple tell-tale flag on the bow of your boat to determine a definite wind direction and now relate this to the direction your boat faces with your given trim.
A couple of loose balls as a visual guide to trim
Simple flag to aid confirmation of wind direction
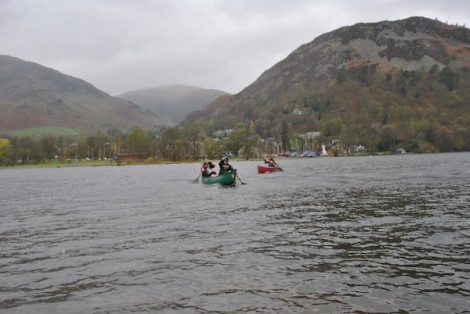
Very soon you will become aware that although these extremes of trim work they can effect your overall stability, control and ability to paddle effectively. So lets look look at changing our trim with more subtlety. After all Im sure you will agree that you really don’t wont to be getting up and moving around in your boat too much in windy conditions i.e. the middle of a lake or Loch risking a capsize!
Big changes in trim can be effective but you may loose some stability and control!!
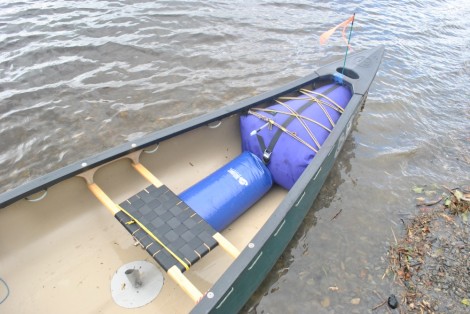
So rather than making big changes to our trim by moving, lets look at being more subtle by moving our kit/bags. A good way to experiment with this is with the use of some dry bags full of water.
25 L drybag full of water is a good starting point
25 Litres drybag is a good starting point (you may need more) and will result in up to 25 Kg of weight. When placed right at the bow or stern this can can have quite a dramatic effect. View someone else in a boat using the bags full of water to see the effect or have someone photograph you in your boat. Pay particular attention to the where the bow stem or stern curls and under the boat and how much much if any of a gap is produced.
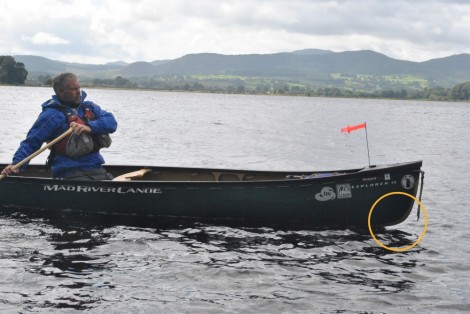
Look for the gap that is created in the area indicated above
Gap at bow stem no longer visible as the trim has been adjusted to bow heavy by moving the drybag forward
Now imagine your boat is sat in the center of a clock face with the wind coming from a12:00 direction. By using subtle movements of the bag/s, and then fine tuning with small movements of yourself (leaning forward/backward or simply moving slightly ) try and get your boat to point to the various numbers/hours on the clock face, and naturally stay there without much effort from yourself.
Next time your out try and achieve the same effects with your kit bag or simply carry a spare drybag that you can fill with water and use to adjust your trim.
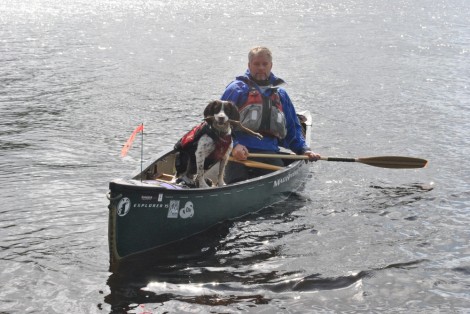
Rannoch, the alternative way to trim your boat. Available from all good dog breeders!!
Hopefully with this new found knowledge you can get your boat to naturally point in your desired direction of travel and life will be somewhat easier! It makes sense that if your boat is already pointing in your desired direction of travel, paddling will be a lot easier and there will be no need for wasted energy trying to fight with any wind.
Remember think trim, trim, trim and trim again
In my next coaching dispatch I will give some ideas on how to use trim when paddling in windy conditions on open water, along with a few other strategies for coping with wind.
This along with more of my coaching articles will soon be available for download as PDF’s and in ibook format
Big thankyou to Andy Morgan for giving his time and helping with the photos and filming
See you on the water……
Jules
Bespoke Canoe Coaching, Guiding, Safety & Rescue training and BCU awards
I had half a day to kill after a long journey and needed a bit of a chill and a shake out paddle. I remembered an interesting little paddle, quite local to where I was that I had done a year or so previously. That trip is the much overlooked Rivers Glass and Beauly.
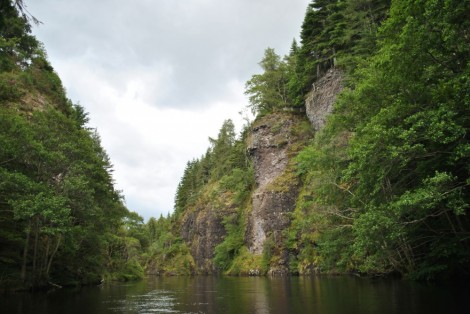
Both these rivers really are little gems and very often ignored due to their low grade, with the River Beauly having the stunning steep sided Aigas Gorge which is quite unusual at this grade of water, and is home to some regularly seen Otters. Only the River Conon has a larger catchment area than the 270 square miles of the Beauly system. The Rivers lie to the south west of Dingwall in Strathglass and to the North of the Great Glenn and is easily be accessed via the A831 through the Muir of Ord and Beauly.
This system finds its origins in Glen Affric with the River Affric which then becomes the River Glass above Cannich. Here there is a good access and egress, from where this stretch can then be paddled to the road bridge at Mauld which crosses the river just before the River Farrar and Struy Bridge. Again there is good access and egress and the river now becomes the Beauly and is a nice trip down through the Aigas Gorge to the get out at the Aigas Dam.
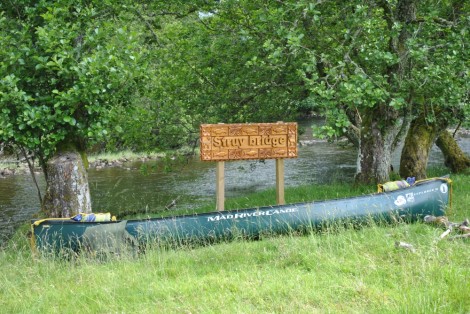
The put in at Struy Bridge
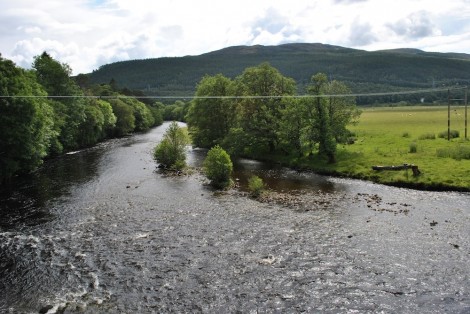
Looking downstream of the bridge
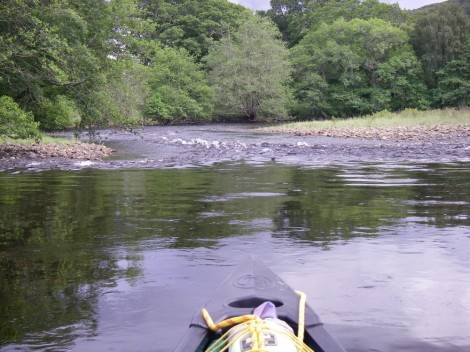
As I only had half a day I opted on this occasion to put on at Struy bridge and paddle the section to the Aigas Dam. I made a point of stopping at the the dam and inspecting the get out as I drove to the put in, and left my bike for a quick shuttle at the end of the day. After the usual faff associated with open boating I launched from the field beside the bridge and paddled down the Farrar to where it met the Beauly.
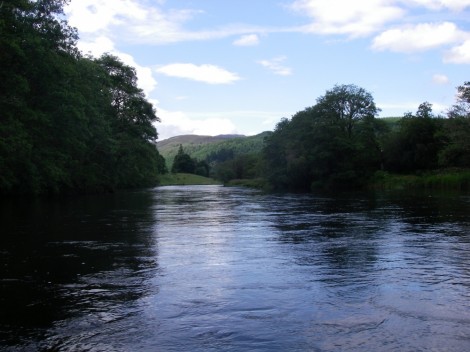
The Beauly
The weather was rather interesting as to my front were great black, bellowing storm clouds and very loud rumbles of thunder could be heard, whilst over my shoulder was blue sky and sunshine. This was to the be the case for the remainder of the day along with the the occasional heavy downpour. Although I could see and hear the thunder and lightning I never really caught up with it and ended up feeling like I was chasing it all day!
Beckoning storm clouds to my front!
Clearer sky's to my rear
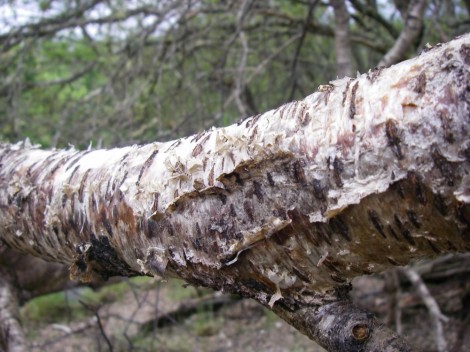
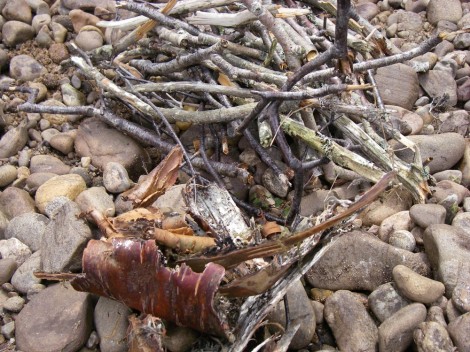
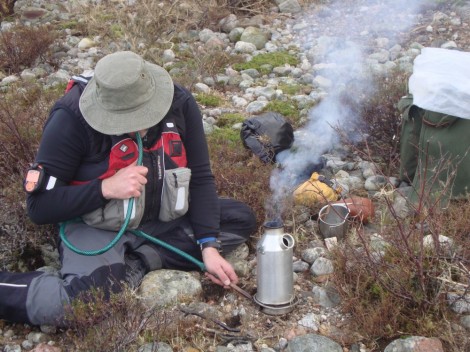
Part way down I decided to stop for some lunch and a brew with the aid of my Kelly Kettle. I always carry a fire steel steel with me for lighting fires, stoves etc so all I had to do now was find some tinder and some fuel. Luck would have it that very close to where I had stopped I found an old Birch tree. On closer inspection I found that its bark was in just the state for lighting my kettle. I chose some of the very flakey, loose paper thin bark as tinder for my spark, and some of the thicker more substantial bark to add to this to get it going, along with a collection of small dry twigs. I generally carry a small leather pouch with some dry bark and other dry tinders just in case I cant find what I need. I like to use Birch bark for tinder as it contains natural oils which help it to burn, even when wet plus it burns hot and for quite sometime ensuring the fire gets a good start.
Thin and fury looking bark for tinder
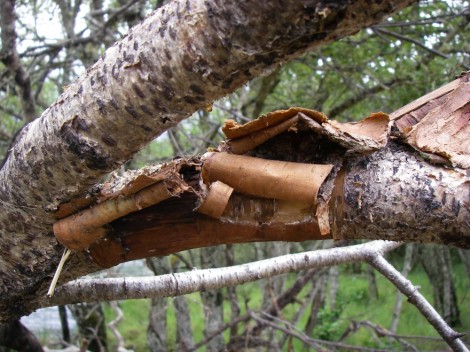
Thicker bark for getting the fire going
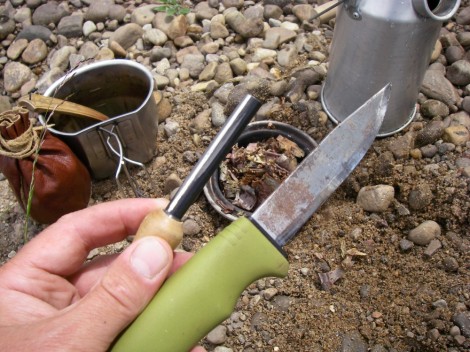
Preparation is everything when lighting fire or in this case my kettle. I prepared a pile of tinder in the form of the very thin bark, a few strips of the thicker bark and broke the twigs up into piles of thin to thick. Kelly Kettle filled with water and ready I drop a few sparks onto the very thin bark and gain a flame quickly. Now I add some of the thicker strips of bark and once they have caught’ place the kettle over the fire base. This acts like a chimney and draws the fire. I can now carefully add the sticks trough the hole in the top starting with the thinnest first and gradually building up. Be careful not to overdo it and smother the the young flames.
A good selection of tinder and fuel
I always carry a good knife and a firesteel
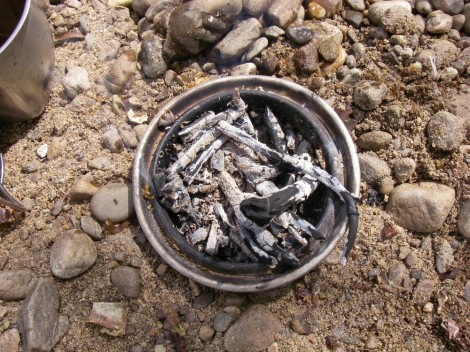
Now is a good time to give the fire lots of oxygen via the holes in the base of the kettle, by blowing or fanning. Once your kettle is going drip feed the thicker sticks until the water is boiled. Remember not leave the cork in, and be careful lifting the kettle off the base as the flames may still be coming out of the top where the handle goes. With practice, lighting and using a Kelly Kettle can become second nature and can be as quick as using a stove but definitely more satisfying and fun.
The base with a dead fire
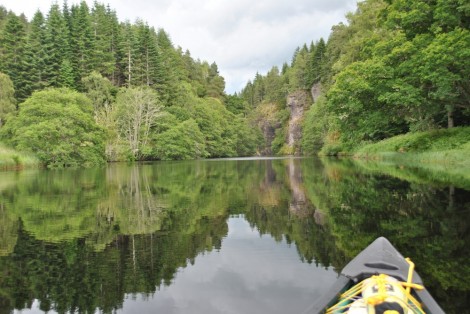
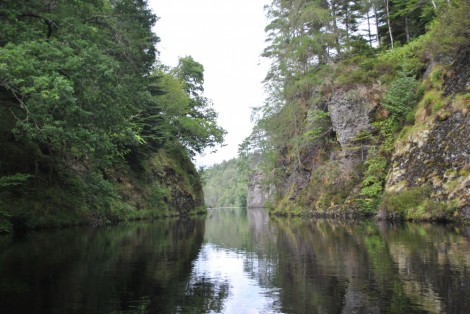
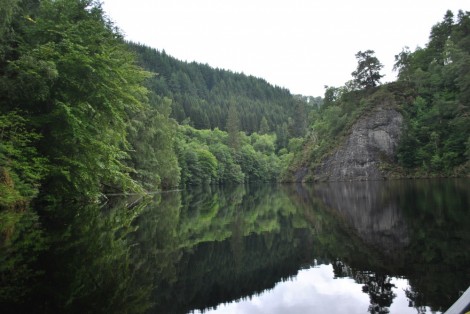
I soon arrived at Aigas Island and the start of the Gorge, which as I mentioned earlier is a bit of a surprise. Its hard to get your head round, but you are now actually paddling through part of reservoir! Very steep rocky sides tower above the paddler as you paddle through. The Island itself can be paddle on either side although I feel the left is much more interesting.
Approaching Aigas Island
Steep sides of the gorge
Leaving the gorge
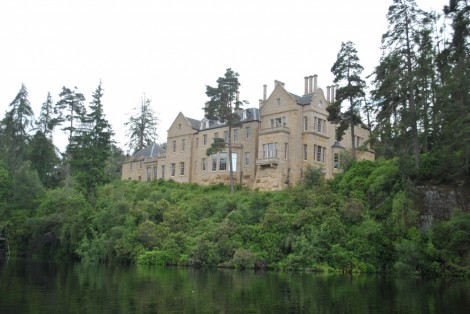
On leaving the gorge and paddling around to the right a very big and grand property is clearly visible above, on the Island. This is Eilean Aigas House, previously a seat for Lord Fraser of Lovat. The original family home was demolished by a Canadian Millionaire and has been replaced by this stunning building, in this stunning location. Incidentally if you happen to have a spare £15,000,000 plus just lying around doing nothing you could put in an offer on the property as its up for sale!!
For sale. Offers in excess £15,000,000 !!
Back to reality and it’s only a distance of 2 km to the Aigas Dam and the get out. The egress is short distance before the dam itself and is a bit of scramble up the bank with your boat and kit, before finding the tarmac track up to the main road.
Approaching the Aigas Dam
After a quick portage up to the road it was time to head off back to the car courtesy of the local shuttle service … aka my bike. The short cycle back gave me time to reflect on my day of storm chasing, Kelly kettles and gorges. I finished in a very chilled and relaxed state ready for some more challenging paddling later in the week.
Portage up to the road
The local shuttle service .... aka my bike!
This section I paddled is only 10-12 km long but as mentioned earlier a longer paddle of 25 km can be had by launching further upstream at Cannich. I have on one occasion portaged 2 km down the road from Aigas Dam and launched again by the Kilmorack bridge and paddled a further 4 km down to Lovat Bridge. It really is a lovely paddle with no nasty surprises. Wether a days relaxed paddling, a family trip or an introductory paddle for people its well worth the visit.
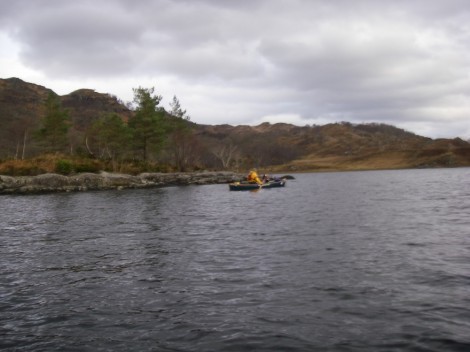
Earlier this year a friend of mine asked me to take him on a little trip to the stunning Loch Sheil, which is a real wilderness experience, with no roads leading into or out of most of its banks. It is 18 miles long from its northern most end at the famous Glenfinnan monument on the ‘Road to he Isles’ to Acharcle at the southern end. Wildlife is always very plentiful and the Loch is well know for its Golden Eagles, as indeed we found out after we spotted a fine specimen which stayed with us for a while before disappearing off into the distance heading off to the surrounding forestry and mountains.
Loch Sheil is on the west coast of Scotland set in a dramatic rift, surrounded by peaks such as Moidart, Ardgour and Sunart and is around 18 miles west of Fort William by road on the A830. It is the 4th longest lake in Scotland, at 18 miles, yet averages just half a mile wide. It is very deep in parts and as it is so long it contains and is surrounded by many differing habitats. The Loch and in particular Glenfinnan is also well know for its presence in the Harry Potter films, in particular ‘The Chamber of Secrets”. So dont be surprised if whilst your at the Glenfinnan end of the Loch you see The Hogworts Express steaming across the Glenfinnan Viaduct!!
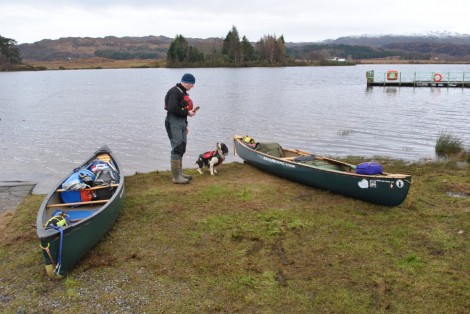
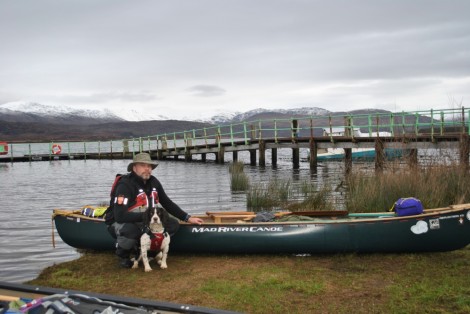
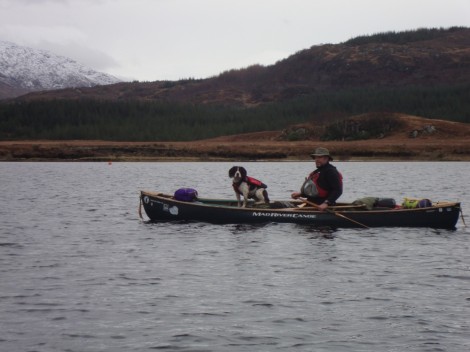
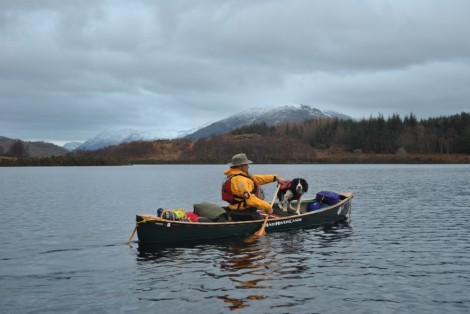
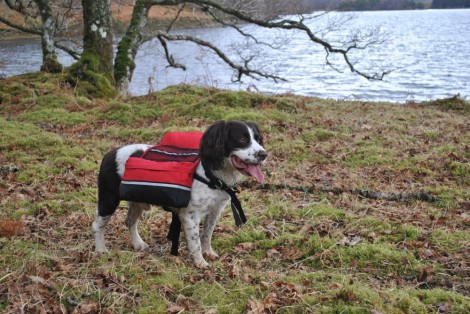
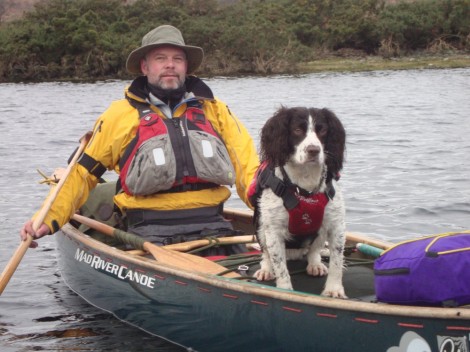
I was joined on this trip by my good friend and fellow paddler Iain together with my trusted hound Rannoch. This was Rannoch’s first trip away since snapping his cruciate ligament whilst out running and having to have it rebuilt followed by lots of physio and hydrotherapy, a rather costly affair indeed!! Bye the way has anyone tried enforcing 6-8 weeks bed rest for a Springer Spaniel?
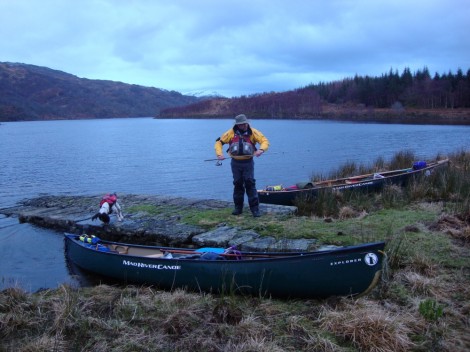
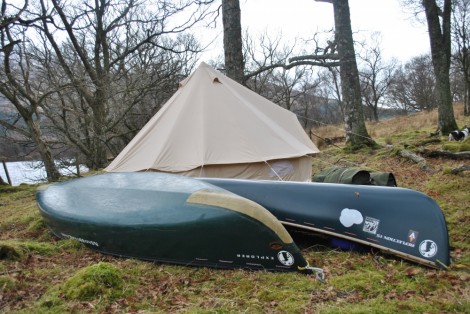
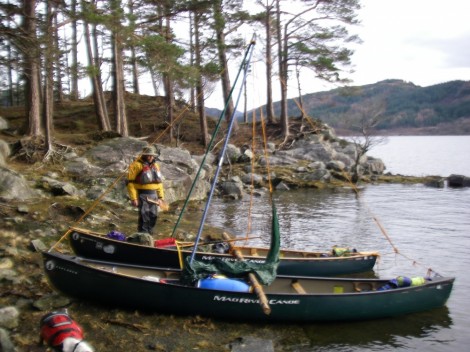
As there were no portages planned we decided go heavy,on a trip of luxury and comfort with lots of good food, and wine of course together with some cast Iron Dutch Ovens, tripods to cook with and to finish it all off a canvas Bell Tent to live in. Boats packed, us ready and Rannoch with his own PFD fitted we set off heading north surrounded by majestic mountains lightly dusted with snow.
Rannoch and Iain playing hunt the stick!
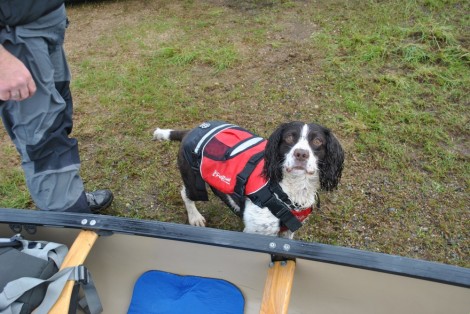
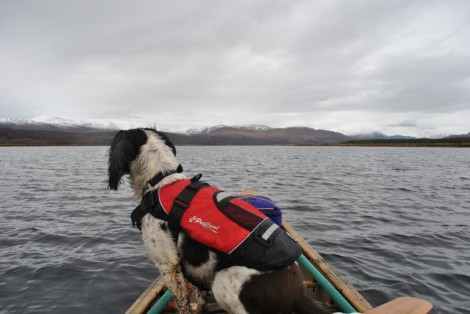
Are you ready, can we go yet? Rannoch in his PFD
Ready for the off
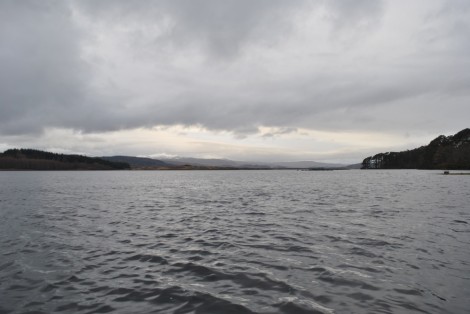
Looking North up the Loch
Iain soaking up the environment
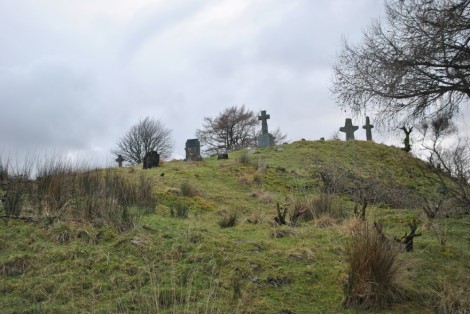
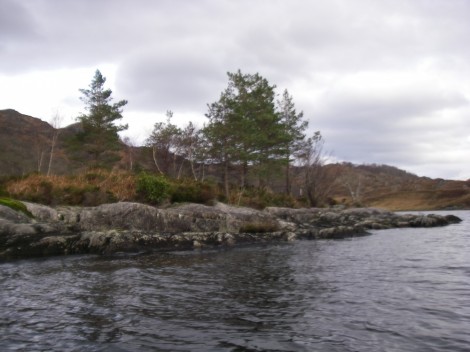
The weather was kind to us as we set off although it was threatening to snow on and off and there was a steady wind blowing into our faces all day. Our plan was to head north but keeping to the southern shoreline for some shelter, and make our way up to the ancient burial island of Eilean Fhianain with St Finans Chapel on it.
After battling with the now quite strong wind we decided to take shelter, have some lunch and a well earned brew courtesy of our Kelly Kettle. Lit with a small amount of Birch Bark I was carrying together with a fire steel the Kettle was soon on the go. I always carry a small supply of dry tinder type material for firefighting etc as I cant always guarantee finding something suitable near by, and I always carry a fire steel as even when wet these will give sparks unlike a wet lighter or matches. I also carry a short length of garden hose which has a piece of copper pipe with its end flattened pushed into it. I use this to blow down giving my fire or kettle lots of oxygen which is very important, especially in the early stages. I would like like to lay claim to this useful little addition, however a few years I found mention of something very similar in one of Calvin Rustrum books on wilderness living! Meanwhile whilst I kept an eye on things Iain headed off in search of some dry wood for the kettle eagerly assisted by Rannoch.
Lighting the Kelly Kettle with the aid of a bit of garden hose and copper pipe!
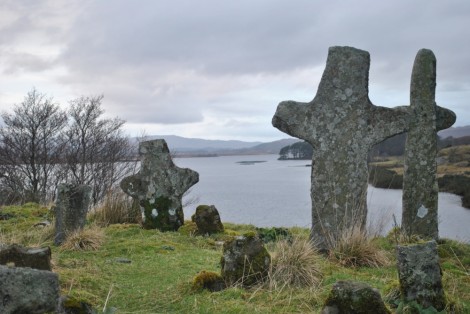
A short time later we were back on our travels, with the temperature dropping quite quickly now and the wind picking up it was time to add a layer or two, so on went my Palm Alaska, a great jacket for this type of environment. We soon arrived at the ancient burial Island and spent some time exploring it, noting that some of the dates on the tomb stones were in some cases from the last few years. I also took the opportunity to get out the fishing rod and try and catch some supper for us, but instead caught nothing!!
Looking up to the burial site on Eilean Fhianain
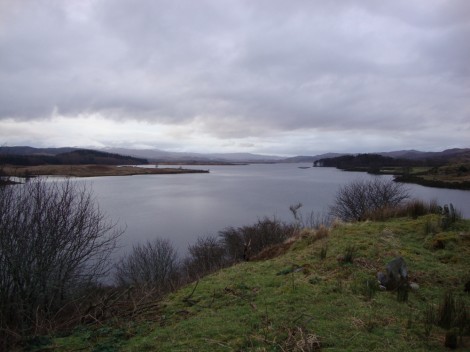
The view back down the Loch from the burial island
Dad are you sure there's fish in here?
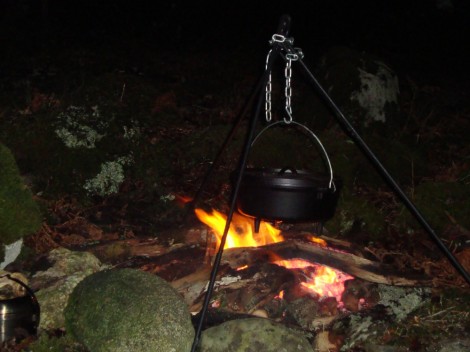
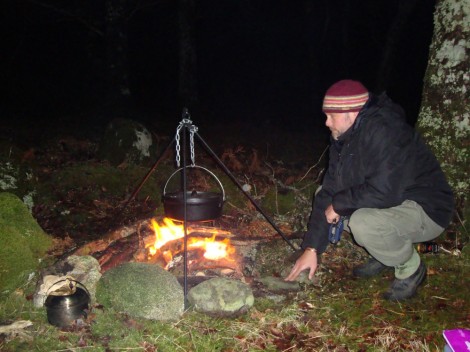
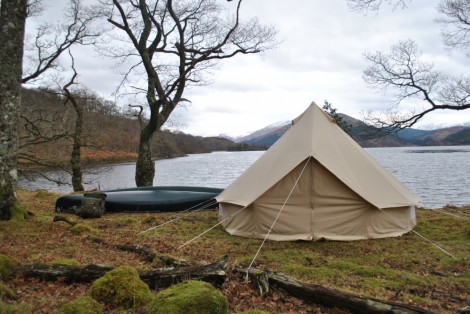
After leaving the island we pushed further north and started looking for a good place to camp. Eventually and just as light was starting to fade we found a good spot and set up our camp. We chose to use a Bell Tent which meant we had alot of room including standing room and cooked some fine cuisine on open fires using our Dutch Oven suspended with a tripod. A truly cracking combination.
Home sweet home..
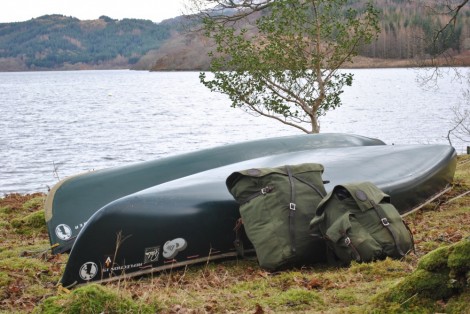
In keeping with the mood of the trip I chose to carry my kit in traditional Duluth canoe packs, made from canvas and leather and incorporate a Tump line worn on the head whilst carrying. These packs were made popular by the late Bill Mason in the Path of the Paddle series. Very robust, very versatile and designed specifically to fit in canoes.
My Duluth packs
Even Rannoch has his own portage sack so as to carry his food and kit!
Over the next day or so we pushed on further up the Loch. One area of particular interest to me is the small island of Eilean Drollman which is the exact spot on which I was camping on whilst on a similar canoe trip on September 11 2001, the day of the twin towers tragedy! I was unaware of exactly what had happened until a day or so later when I visited Fort William and was stunned by the events that had occurred. Hence I now know that island as 9/11 island. It is always a weird experience visiting this spot and remembering what has happened.
9/11 island and my bivy spot from 2001!
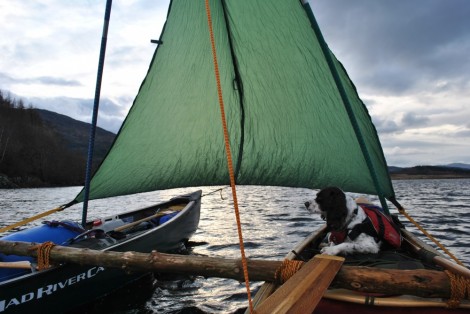
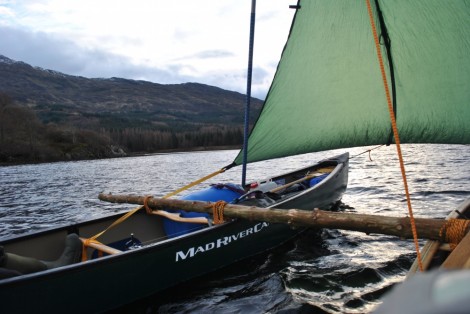
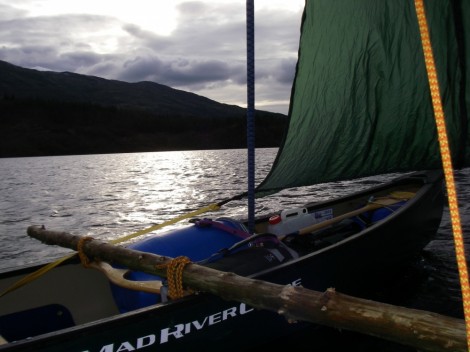
All too soon it was time to head back down the loch. Luckily the wind was in our favor so we took the chance to make the most of it and sail back. We spent some time rafting the boats together and building an A-frame sailing rig to accommodate my tandem sail I had made. We opted for a single spar across the center of our boats, made from and old log we found. I like to use a single spar in the middle as it allows the boats to move independently, however if conditions are more challenging then I may use two spars, one at the bow and one at the stern. Really important here is that any knots, lashings etc used are of a quick release style in case of the event of a capsize. It is also very important to have a system for the sail to be raised and lower quickly. Remember to have a plan should anything happen i.e. man overboard, swamping or a capsize.
Building our tandem sailing rig
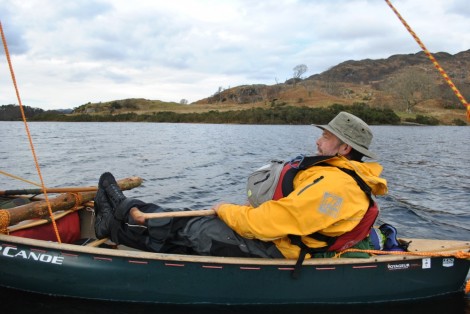
Putting my feet up and letting the wind do the work
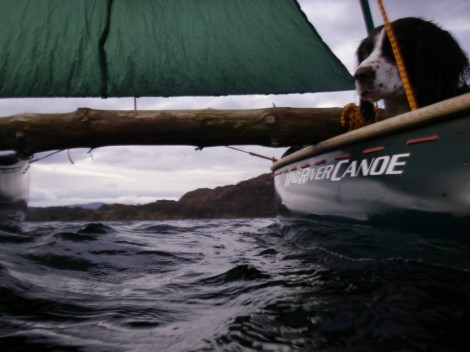
A tired but very happy Rannoch
A good couple of days paddling and exploring can be had on Loch Sheil or a longer more interesting trip can be had by paddling the Loch Sheil circuit starts at Glenfinnan passes down Loch Sheil into Loch Moidart and then following an exposed coast line north to Glen Uig before heading further up the coast finishing at Lochailort. I have completed this circuit a umber of times and have extended it further by continuing on the River Ailort (tracking, polling and grunting!) to Loch Eilt and then finding the road at its Eastern end to portage back to the start. These trips can be reversed according to the prevailing winds and conditions.
If however if like us you are just after a few days on Loch Sheil then there are two options for launching. The first is at the northern end from a small pier near the hotel (grid 901805) and the second which is where we began our trip is at another small pier this time in Acharacle (grid 684 678).
This is another one of those special places I never grow tired of. Every time I go back I discover something new. Go and see for your self.
The final words must come from my paddling partner from the trip Iain…..
I’m taking part in the rather insane and incredibly physically challenging Yukon River Quest in aid of Help for Heroes.
If you can support me your donation really will make a difference to this amazing group of young people. Please visit our fundraising page http://bitly.com/HoPyM3o
or you can Text YUKN99 £(the amount you wish to donate) to 70070. Thank you for your support.
Next Friday I will be flying out to Whitehorse, Yukon Territory in the North of Canada to take part in this years Yukon River Quest, which is also known as the “Race to the Midnight Sun” and is billed as “The most spectacular paddling race in the world!”
I will be heading out for this years race with two teams, one of which is from London Irish Premier Rugby Club, and the other is from Interserve, which is one of the world’s foremost support services and construction companies. I will be member of the team from London Irish Rugby comprising of Toby Booth, Justin Bishop, Neil Hatley, Gavin Gleave, Tony Cilia and of course myself. As well as successfully completing the race our aim is to raise money for our chosen charity Help for Heroes, which helps wounded service men and women that have been injured whilst serving in Iraq or Afghanistan. You can visit their site at www.helpforheroes.org.uk and find out more about the fantastic work they do.
The 14th Annual Yukon River Quest starts to the east of Alaska at Whitehorse, Yukon on the 27th June 2012 finishing some 450miles/745km later on Armed Services Day, the 1st July just below the Arctic Circle, at Dawson City, Yukon. Athletes paddling canoe/kayak, solo, tandem and crewed join from around the world to test their endurance, racing day and night along the 450miles/745km of rugged river shoreline to the Klondike in the most spectacular paddling race in the world.
The Yukon River Quest had its birth in the Dyea to Dawson Centennial Race to the Klondike. In 1997 and 1998, up to 50 two-person teams hiked over the 33-mile Chilkoot Trail from Dyea, Alaska to Lake Bennett, and then got in their canoes and paddled 100 miles of headwater lakes to the beginning of the Yukon River in Whitehorse, where they continued on for another 460 miles to Dawson City. The event was a tremendous success, drawing adventure athletes from around the world, but the best teams were always the best paddlers.
Now a days the race starts with a 400m run to the boats and launching point, each team will then follow the route taken by prospectors chasing the last great gold rush of 1897. Like the aspiring miners of the Klondike, the race is more than just the story of gold and glory. To get to their final destination of Dawson, each team will have to endure a daunting challenge on a perilous river in raw wilderness – at least 30% of participants do not complete the race due to the severity of conditions. All teams must be self sufficient, for in the wilderness if you capsize and lose your boat it is possible you may be out there on your own for days.
There are only two compulsory stops throughout the entire race. The first is at Carmacks, which is approximately 220miles/340km in to the race and must be reached within 35 hrs. Here teams must take an enforced minimum 7 hour rest before continuing. The second compulsory stop is only for 3 hours and comes after 374miles/602km and is located at Kirkman Creek. Other challenges that we will encounter during the race include the 30 mile long Lake Laberge which can often involve strong winds and waves, and the aptly named Five Finger Rapids or Rink Rapid. I was also a little concerned when I had to sign a disclaimer saying that I accepted the risk that I may be mauled by bears, burnt to a crisp in forest fires and that I may be several days from help!!
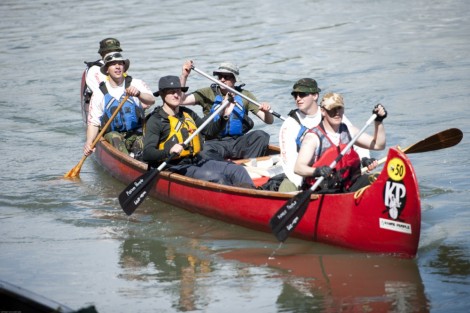
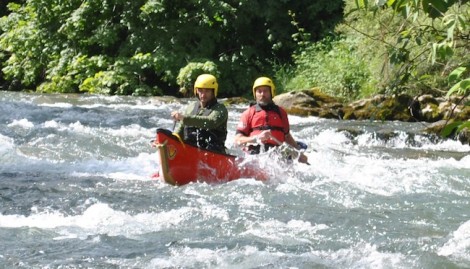
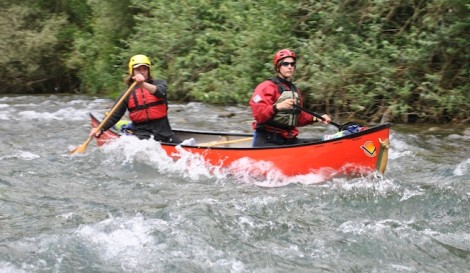
We have entered in the Voyageur class, which means we will be paddling a Voyageur style of canoe just like the one in photo below.
A Voyageur style canoe during a previous Yukon River Quest
The Voyageurs were the people who engaged in the transportation of furs by canoe during the fur trade, it is a French word which literally means “traveller” The Voyageurs used two types of craft during the era of the fur trade. The famous Canot de Maitre on which the fur trade depended was around 36 feet long, had a crew of 6-12 and was capable of carrying 3 tons over the route from Montreal to Lake Superior, hence it was also know as the Montreal Canoe. The smaller Canot du Nord carried a crew of 6 or 8 and a cargo of around 1.5 tons over the smaller lakes, rivers and streams of the Northwest.
The Voyageurs who crewed these boats were also know as Engage’s or hired canoe men and would have fulfilled different roles. The Gouvernail would have been in the stern of the canoe and acted as a steersman. The Avant was in the bow and as well as being the captain and lookout he was also responsible for steering. The remainder of the crew were the work horses and were know as Milieu or middle paddler.
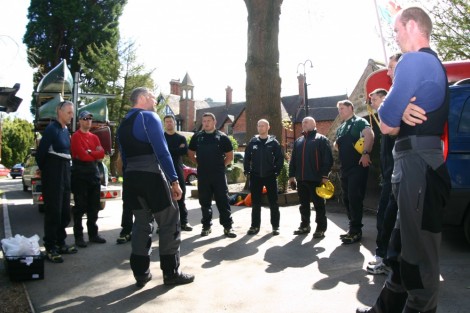
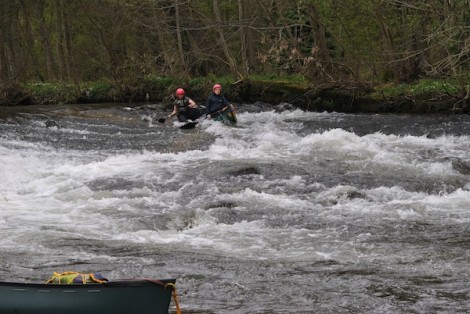
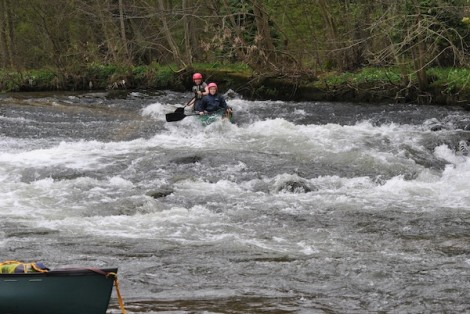
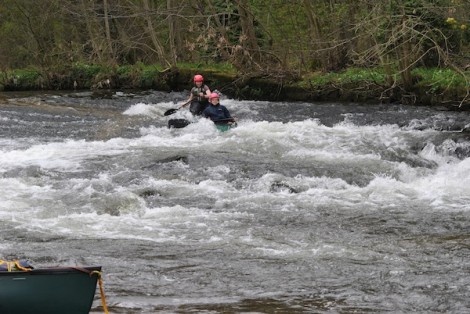
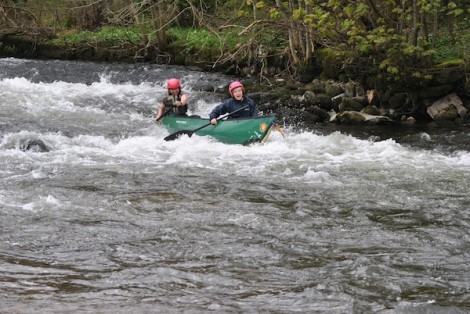
All of us involved have been putting in quite a lot of training for the event in various ways, including a having spent a weekend in North Wales and discovering the delights of the River Dee!
A quick team talk before getting on the water
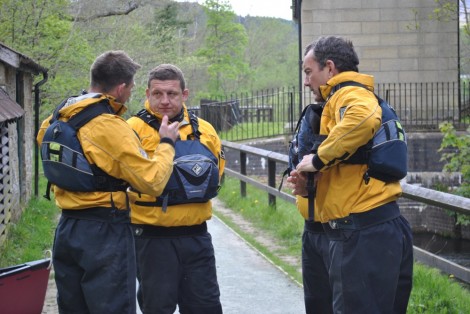
Bish explaining to Hatts and Tony about the finer art of paddling!
A fine body of men! From L-R Me, Justin Bishop, Toby Booth, Tony Cilia and Neil Hatley
Hey guys, doe s my bum look big in this?
You can find out more about our challenge by visiting
Outfitting your Open Canoe and giving it that personal touch is what truly gives it an identity and really makes it your own. This can however appear quite a daunting task and a mini adventure in its self, especially when starting from scratch and when a new boat is involved. So after having recently fitted my latest boat, I thought I would share my experiences and offer some of my thoughts and guidance.
My first tip would be to spend some time planning it, considering how and what you are intending to use your boat for. Are you going to use your boat solo or tandem, on open or white water, for short trips or expeditions? All of these have certain common elements but also have very different needs. Have a look around at other boats you may have seen or used, and see what others have done, then ask yourself if it will suit your intended use. Remember just because it works for one person doesn’t necessarily mean it will work for you!
There is no quick fix for outfitting your boat so be prepared to put in some hours, in order to achieve the best results and maximum satisfaction from all your hard work. Time well spent fitting your boat out initially, will hopefully lead to many hours of enjoyment rather than having to make lots of alterations and adjustments.
I have fitted out a number of boats over the years and have what I feel is good set up for the type of paddling I enjoy. I paddle both open and white water and a lot of solo expeditioning or journeying, so the style of outfitting I choose reflects this. There is no single right or wrong way of doing this; the most important thing is that it works for you.
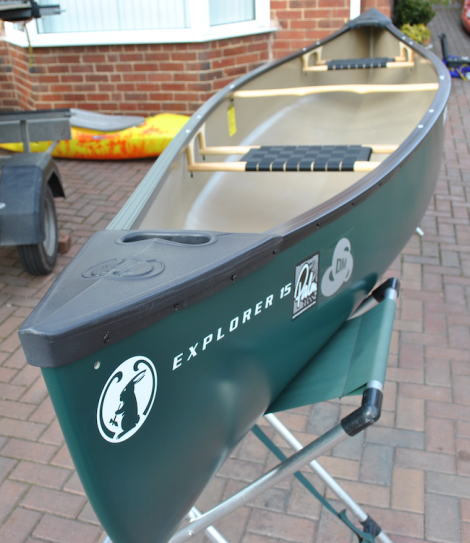
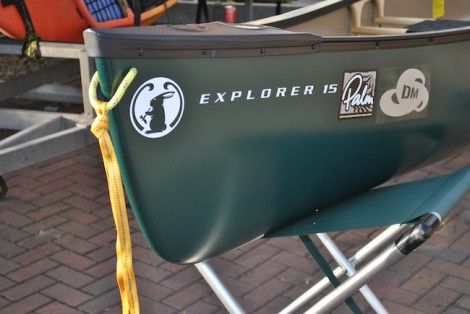
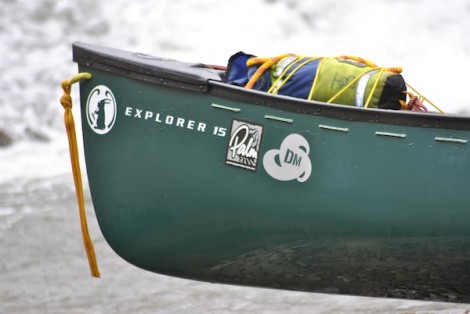
In this instance I have chosen a Mad River Explorer 15 in Royalex. Originally designed by Jim Hendry this is a good all-rounder, with its shallow “V” hull giving good tracking performance, and is stable with a dry ride in various challenging conditions even when loaded for a trip.
What you might need.
Next stage is to gather everything you need for the task ahead. For my outfitting I used the following:
10m of 5mm cord Rope cutter
5m of 4mm cord Electric drill & drill bits
5m of 4mm shock cord Spanners
2m of 10mm Kermantle rope Phillips screwdriver
Zip ties Pliers
5m of 5mm plastic tubing Sand paper
2 X 32” air bags Set square
1 X kneeling thwart kit Ruler
2 X 2” D-rings Pencil
Vinyl bond glue
Vinyl mast foot
Mast bracket
Ok so you have decided on your set up and you’ve got your tools and every thing else you may need, next stage is to get started.
Grab loops.
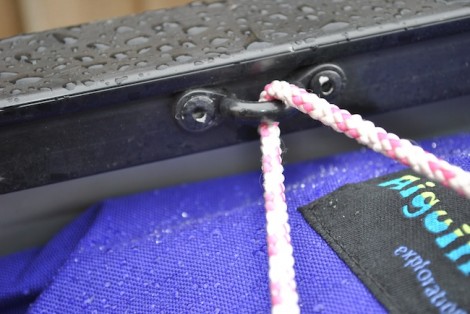
A good starting point is with the grab loops. These will form a secure attachment point for painters, swim lines etc and therefore need to be strong. A common error I see quite often is the practice of attaching things such as painters to the boats deck plates, this is not a good idea as they are not designed to take a load and will pop off when you least want them to. For mine I have used some 10mm Kermantle rope.
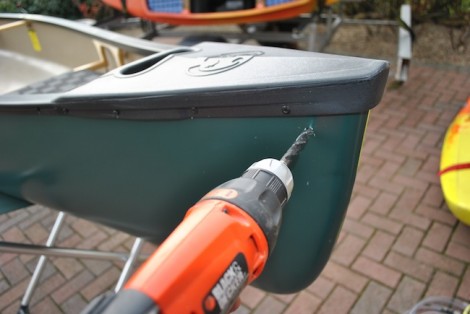
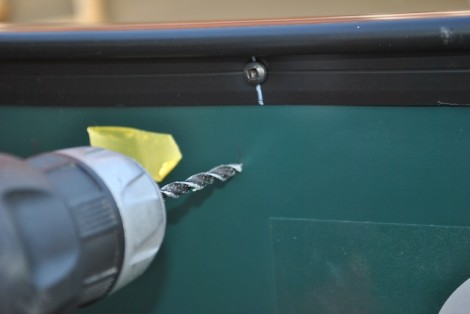
Take a deep breadth and drill!!
Start by drilling a hole just large enough for your rope on either side at both the bow and stern. I have chosen to drill my holes around 6-8 cm back from the bow and 6cm down from the top of the deck plate. At this point remember the old adage, measure twice, drill once! Or in my case measure, measure, measure and then measure some more before taking a deep breath and drilling!
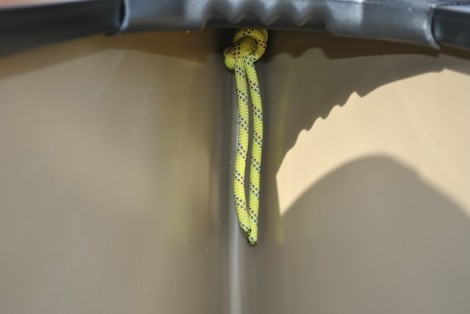
Once drilled and cleaned out, thread your rope through so that both ends of the rope end up inside of the bow and below the deck plate.
At this point I make sure that the loop on the outside is snug to the hull before tying a overhand knot on the bight close up to the inside.
I now turn my attention the loop on the outside, which is at the moment flush to the hull. Taking a cloth to protect my boat I take the handle from my hammer and ease it between the boat and the loop. It will take some levering and time, but be patient. Once the handle is in the loop I then twist it around as in the picture above. The result of this little challenge is that loop should become slightly larger whilst the knot inside pulls tight up against itself. The idea being to create a loop just big enough to take painters etc, and not being too big i.e. big enough to get your hand through as it could become and entrapment hazard. Not only that, but from experience large loops have a habit of getting caught and snagged up on trees, branches and anything else that presents itself. Now re-visit the knot on the inside and use a couple of zip ties to secure the ends.
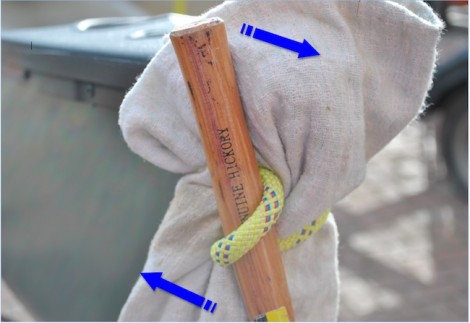
To finish off with I tie a short length of webbing tape (just long enough to reach the water) through the loop to act as swim tails. I find these have a number of uses including as a quick grab for self rescues, carrying and should I have to approach a casualty in the water, I would rather that they grabbed these than the gunwhales as they do not have such a capsizing effect as someone pulling down on the sides.
Finally secure the remaining ends with a couple of zip ties.
The finished article above with the swim tail fitted. Note the small size of the grab loop. If you are going to attach painters remember that they go through this loop, and can be either permanently attached or removable for transporting. As for length then it is again very much down to personal choice and how/where you will be using your boat. I would suggest as a minimum, a boats length of floating rope. If you choose longer then consider how you will manage and store the line in the boat when it is not being used, as ropes and water are not a good combination with a possible risk of entanglement or entrapment. Now simply repeat this process at the other end of the boat.
Floatation/Buoyancy
Irrelevant of what type of paddling you are intending to take part in, some form of floatation is critical. As it is says this will aide the boats buoyancy should it become swamped or in the event of a capsize.
Floatation or buoyancy can take a number of forms ranging from solid (polystyrene) to inflatable air bags and are normally fitted in both the bow and stern and sometimes in the centre. Solid blocks although initially more expensive are more robust, certainly wont burst and require less maintenance. However as they are solid they don’t always fit perfectly to the shape of the hull, leaving voids around them, which can fill with water and may there fore require some shaping to ensure a better fit. Air bags however, although cheaper do run the risk of being punctured and at £30 -£50 per bag can be a costly option. They can however be protected with foam matting or by using protective bag covers. Also because they are inflatable they will fit the contours of the hull better, leaving little if any of the surrounding area unfilled. Do remember however to let some air out of them when storing them or if they are in the sun for a period of time.
Solid blocks tend to be limited to around 32”; airbags however come in a wider range of sizes meaning that for a solo paddler who would not normally use the area in front on the bow seat they could choose a longer air bag up to the seat adding more floatation. If they then decide to use the bow seat for tandem paddling, then simply deflate the bag a little and roll up the spare out of the way. Just measure from either end of your boat up to where you want the air bag to end and then get a bag that fits closest to your needs.
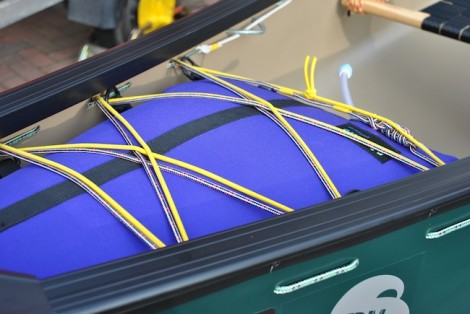
How you attach your buoyancy is important, as you don’t want it to pop out when swamped or capsized. The best way to achieve this is with a criss-cross cord lashing over the bag/block to the gunwales together with some form of strap that goes over the top of it and secures into the bottom of the boat.
I have chosen 32” air bags bow and stern as most of my paddling is solo, however I may require the option of tandem. As previously mentioned I choose to use protective fabric bag covers, which I think are an excellent addition and are available from Aiguille Alpine.
In order to lash my bags in I have two options. Either to drill into the gunwales and attach some form of P-clip system along the length of where the air bag sits or alternatively drill a number of holes through the side of my boat just below the gunwale , then thread cord through making lashing points (drill & lace). I prefer the later as I find this stronger and I can continue the lacing throughout the length of the boat giving me lots of options for lashing and attaching equipment etc.
Above an example of a P-clip with cord lashing and a protective air bag cover visible.
Using a piece of card as a template
I make a start by firstly deciding on the spacing between the holes, and how far below the gunwales they should be. I normally use a spacing of around 8cm between holes and about 2 cm below the bottom of the gunwale. Next I make a small card template to help with the job of marking it all out.
Holes marked and spacing with tape
As I intend to lace the entire length of the boat I start at the center of the boat marking holes either side of the ends of the Yoke. I then continue this process down both sides of the boat and to each end marking where the cord loops will be on the outside with yellow tape. Remember to make sure that the end of the cord should end up inside the boat at the last hole.
Once happy I drill the holes, remembering measure twice, drill once!!
View of the lacing from the outside
I used a 5mm drill bit so that the cord (also 5mm) is a snug fit. With the holes drilled I start at one end, and secure with a knot on the inside then begin to lace down the sides of the boat using 5mm cord. I personally would not use anything less than 5mm cord for the lacing as it could slice through the plastic like a cheese wire.
Inside view of lacing with plastic tubing to make clip in points
On the inside I use short lengths of 5mm plastic tubing, slid over the cord to provide convenient loops for attachment. I find these a lot easier to clip and tie into than when the cord is fitted flush to the boat. I don’t fit these throughout, only where I think they will be of most use for lashing and securing kit. To help slide the tubing over the cord I soak them first in boiling water to soften them and then use a piece of very thin cord/twine to pull the thicker cord through. You may need to remove the seats to allow threading of the cord/lacing and replace once completed. I make sure the cord is pulled tight as I go and finish at the ends on the inside again with an overhand knot.
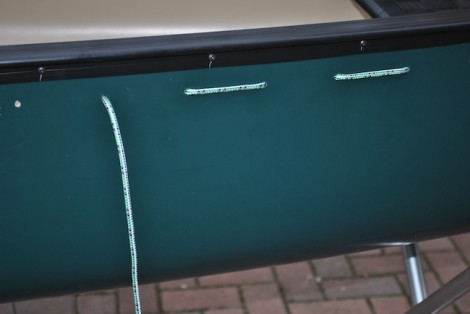
View of lacing with shock cord also threaded through
Once I’ve completed both sides I use 5mm shock cord and weave this through the loops on the inside, as in the photo above. This adds a convenient and secure way for storing things that I may want to access quickly like my sponge or the grip on a paddle.
Note also the floating line secured on the side of the seat. This is my bridle for tracking and lining. These are pre-measured and a knot tied in the centre. One side is permanently attached, when I need to use it I simply unwrap it from the seat and pass it under the boat before securing the other end onto the opposite side of the seat. The result being that the knot ends up under the boat and exactly in the centre without all the fiddling and adjusting that can be associated with attaching a bridle.
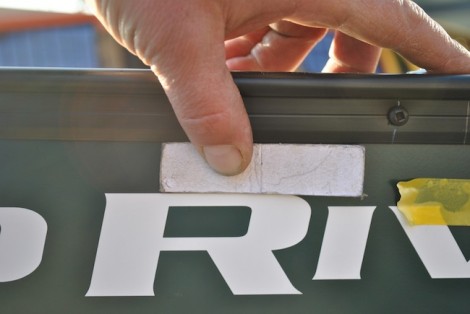
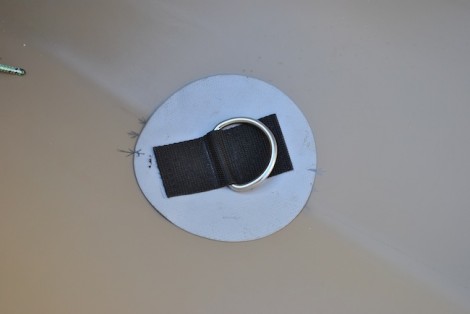
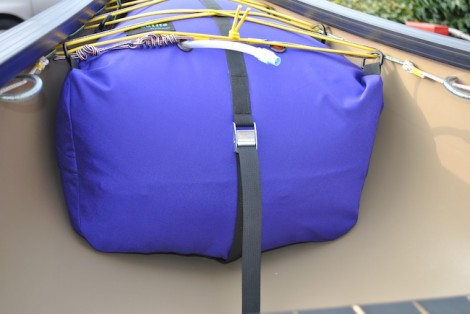
Next I glue in some D-rings to the bottom of the boat in order to secure the strap, which will pass over the top of my airbag ensuring a secure fitting. The airbag covers I have chosen have a strap built in. If you don’t have these then a roof rack strap will do the same job. Remember to pass the strap through the grab loop on the inside of the boat before passing over the bag and securing.
The D-rings should be positioned underneath your bags or blocks rather than in front of them. This will ensure any tension on the D-ring will have a forward pull rather than an upward one, which could lead to the ring being pulled out.
I use my inflated air bags to work out exactly where I want the rings and draw round them. I have used large 2” rings for this job. Note the angle I have had to set the rings at in order to accommodate the shallow ‘V’ of the hull.
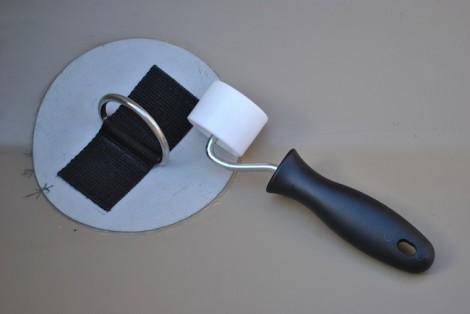
Next I use sandpaper to roughen the surface of the hull where the D-ring will be glued and also the back of the ring. I then clean both surfaces with meths and allow to dry prior to applying the glue. I have used Vina (Mondo bond & River bond similar products) bond and apply this to both surfaces then leave until touch dry.
As above once dry to the touch I carefully position the ring in the pre-prepared area and use to small hand roller to remove any air bubbles and ensure that the ring is firmly pressed down, paying attention to the center area around the ring and the edges of the patch.
I must point out that in this article I am referring to the guleing of D-rings etc into a boat made of Royalex and provided I use the technique mentioned I have not had any issues with them sticking or falling out. If however you have a non Royalex boat then you may encounter some issues with regards the glueing of items. I have had some success using Evostick but the surface really does have to be well prepared and in some cases some gentle heat is applied in an attempt to de-polarize the plastic and aid adhesion. Remember to test a small area with the glue first. You don’t want to melt a hole in your prized possession! Any doubts contact the manufacturer.
Once the rings are dry I put the air bags back in place and thread the strap through, then finish off by using a criss cross lashing of 4mm cord over the bags and through the cord loops on the inside of the boat.
Air bag fully lashed and shock cord added
I have also added some shock cord over the bags for tucking a spare paddle and swim lines etc under. Note I don’t recommend using only shock cord to secure your airbags as this will allow too much movement in the bags, possibly resulting in the air bag being popped out when swamped.
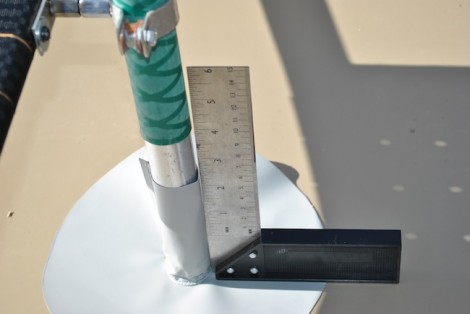
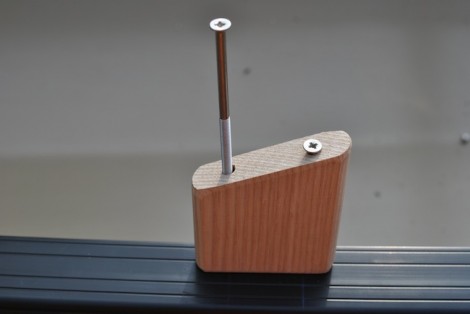
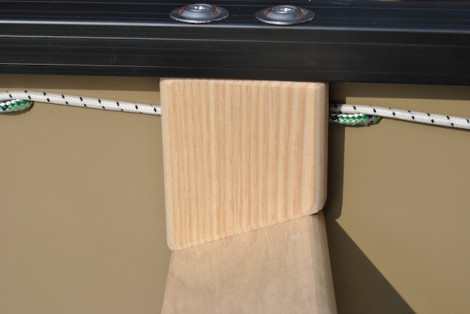
As I will be using the boat for some solo sailing I use the same gluing technique to fix a vinyl mast foot into the bottom of the boat.
Using a set-square to ensure mast, mast foot and clamp are all aligned
I particularly like the vinyl mast foot as it folds flat when loaded with kit or when the seat area is being used. Generally I position the mast foot etc in the area to the rear of the front seat. Note the removable bracket I have used on the seat to hold the mast securely and the set-square I have used to ensure everything is square.
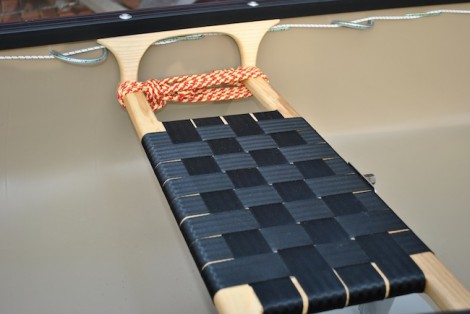
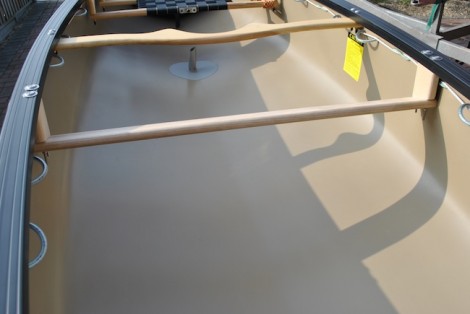
Kneeling thwart
For some this may be as far as your outfitting goes and your boat is now ready for paddling tandem. If however you intend paddling your boat solo then you may want to consider fitting a kneeling thwart. This will greatly aid your connectivity with your boat leading to better stability, control and overall performance. For some the idea of having your feet and lower legs slid underneath a wooden bar may give the feeling of being trapped and take people out of their comfort zone. If this is the case then maybe consider using some form of closed cell foam saddle, that could either be loose so as to move it either around or from boat to boat, or secured in some way.
Deciding where to place your thwart is down to personal choice but generally they are fitted as near to the centre of the boat as possible (i.e the yoke), as this will then form the pivot point around which the boat will turn. This really highlights safety concerns so it is really important that you ensure you have enough room to move and escape if needed should a capsize occur.
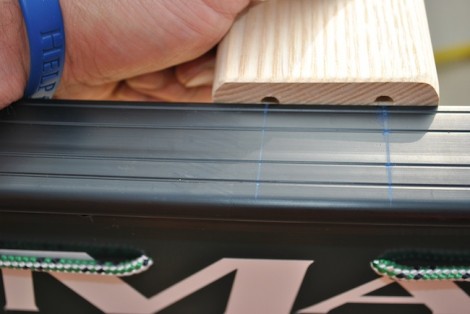
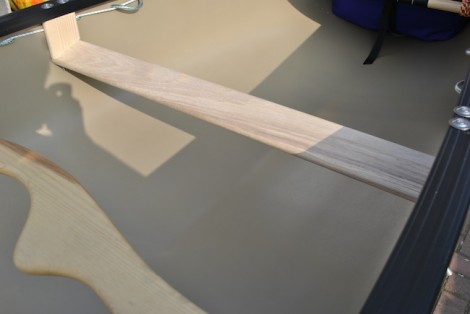
Another consideration is how you want your boat to be trimmed. For me personally I look for my boat to be slightly bow light when un-laden, then when I paddle with my kit bag I can achieve a more neutral trim very easily if required. One way to achieve this is to move around in the boat and have someone provide you with feedback as to how the trim looks. Better still have someone armed with a camera who can take pictures of you in the boat, then you too can actually see the effect of your positioning. You will need to have the bar from your thwart with you to enable you to identify its planned position in relation you.
Decision made its now time to fit your thwart. I use the riser blocks to start marking out where I need to drill my gunwales. By offering up the riser block to the gunwale I can mark the distance between the holes, then using my set square mark across the gunwale. Noting the exact position in relation the bolts on the yoke I mark out the opposite gunwale as well.
Marking out using a set-square
Using a riser block to check the location of holes.
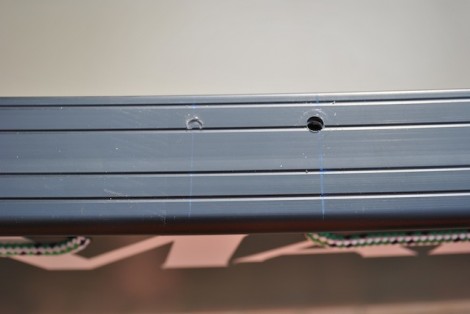
Now using the riser block again, but upside down and making sure it is flush with the inside of the gunwale, I start to screw the supplied bolts in. When I then remove the blocks I will have the position of the holes marked and ready for drilling.
In the picture above a drilled hole can be clearly seen along side the mark created by screwing the bolt through the riser.
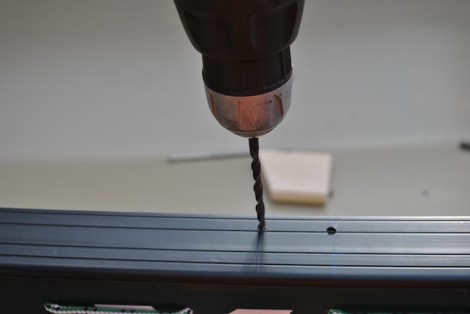
Remembering to measure twice and drill once repeat the procedure on the opposite side. Once completed fit your riser blocks in position, up the correct way and with the longest edge towards the front. This will allow you to check their position and help you with determining the correct length to cut the bar.
You now need to determine the length of the cross bar, remembering to take your measurement from the bottom of the riser blocks, allowing for some excess on either end and then cut to length. Using the same technique mentioned above mark out the location of the holes in the cross bar. When drilling the holes remember that they will need to be at an angle (appprox 15-20 degrees) to allow for the bolts to pass through the angled cross bar.
Before finally assembling your thwart it is a good idea to give all the wooden parts, especially where you have trimmed them a good couple of coats of Boiled Linseed oil. For this I use a 50/50 mix of Boiled Linseed and White Spirit. Leave each coat to soak in and then buff vigorously with a cloth before completely dry in order to remove any excess. The heat generated by the rubbing will also help the oil soak in.
Be careful not to over tighten the bolts, and use the correct size screwdriver so as not to damage or strip out the heads of the bolts as the stainless is quite soft.
Again going back to safety concerns it is a good idea now to try the thwart and make sure that you can get your feet in and out from under it safely. If not, trim 1 cm at a time from the top of the riser blocks on both sides until you are happy. This can be revisited at later date and more adjustments for comfort or safety can again be made.
With your boat now fitted out, you can head off on your adventures and look forward to many hours of happy paddling.
This was never meant to be the definitive guide to outfitting a canoe. It is merely some of my thoughts and advice I would like to share with you and hopefully it will help you with your outfitting.
Remember there are lots of ways of doing this and I have only covered some of them. Just because it works for me doesn’t mean it will work for you!
Big thank you to the guys at Palm and Desperate Measures for their help and support in my ventures.
This article is available todownload and print out as a PDF document to help you with your outfitting. Good luck and I hope you find this of use.
I would like to leave you with some pictures of my newly out fitted boat.
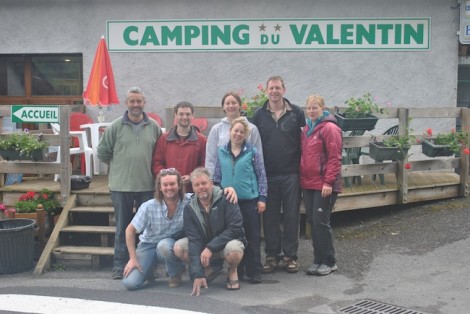
The Pyrenees is probably not the first place that springs to mind when you mention the words Open Boating! But having just returned from a short paddling trip there, rest assured a good time was had by all. The aims of our trip was to allow people to work towards BCU star wards where possible and also to give people an Alpine experience. We based our selves at the Camping du Valentin campsite in Laruns at the head of the Ossau valley, which is in the Parc National des Pyrenees.
The Pyrenees itself is a mountain range in the South West of Europe that forms a natural border between France and Spain and offers the perfect environment for adventure and a challenge offered by the variety of good white water paddling. Anyone and everyone will enjoy paddling the rivers in the Pyrenees, as there are sections of rivers ranging from grade 2 to 5+. The river levels vary according to the water releases from dams, rainfall and melting snow. This year the levels were low due to a lack of rain and little snowmelt, this however did not prove to be too much of an issue for our plans.
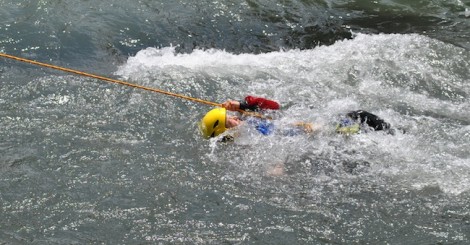
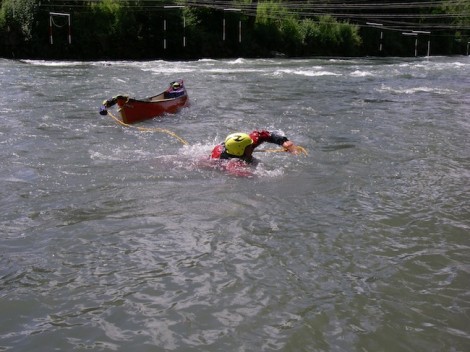
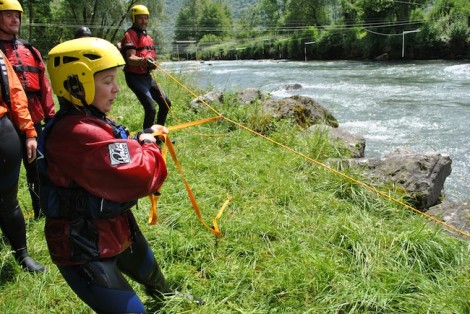
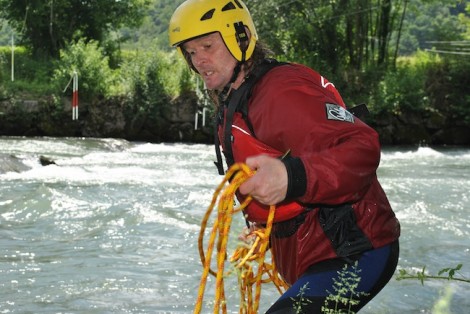
It was decided that a god starting point would be to spend the first day after traveling, refreshing peoples rescue skills at the Slalom course on the River Pau not far from Lourdes. This proved to be worthwhile and gave people the opportunity to practice their swimming, use of throwlines and good chance to explore the use of swim lines, all of which proved very useful as the week developed.
Throwline practice
Getting to grips with swim lines
Using a vector to pull to assist the rescue of a canoe
Knit one, pearl one!!
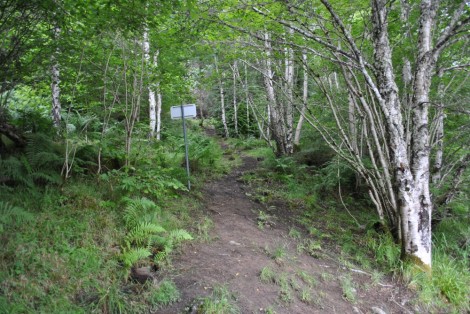
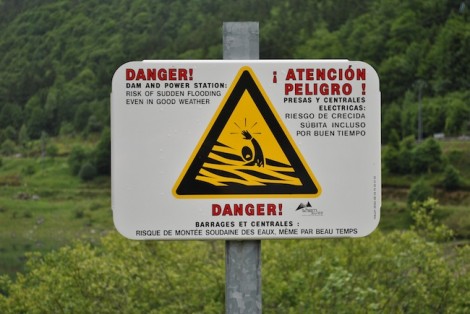
Despite the variety of river paddling opportunities available to us, day two found us searching for some flat water in the form of a lake in order to look at some fundamental canoe skills, paddling both tandem and solo prior to tackling some of the rivers. This proved somewhat of a challenge as most of the local lakes are in fact private and owned by the Hydro-electric scheme and paddling is not permitted.
One of the many warning signs
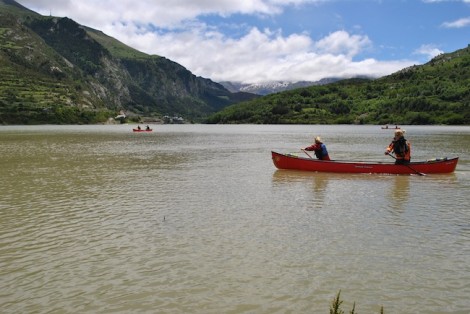
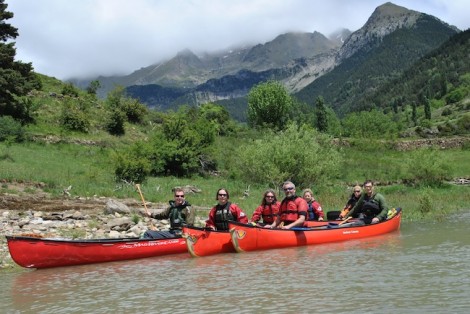
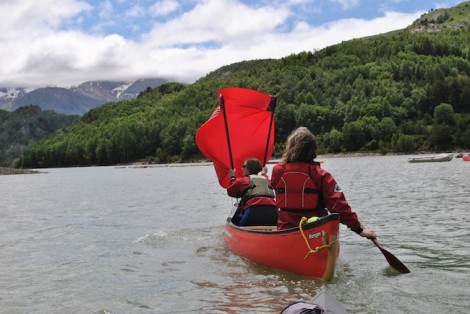
Even after some careful research prior to the trip and after having spoken to some local paddlers our first location was a classic example of this and so we had to head further afield and travel across the border into Spain. This proved worth while and gave the group the opportunity to not only paddle in a stunning setting but also due to the wind an opportunity for a bit of sailing.
A stunning setting for some open water paddling
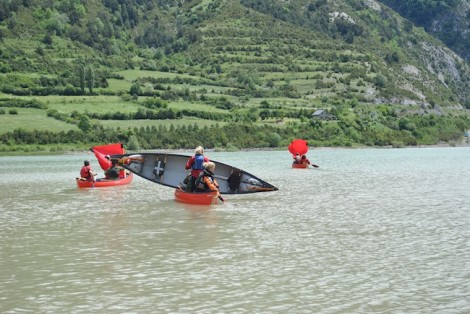
Time for some sailing
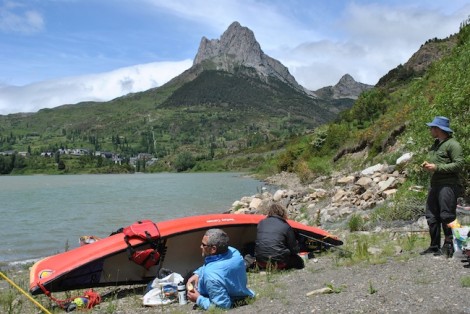
After having explored the local area and enjoying the scenery we headed back to the beach for a spot of lunch and an opportunity to take a look at the use of tarp shelters in conjunction with boats, poles and paddles etc
A bit of tarpology was also on the lunch time menu!
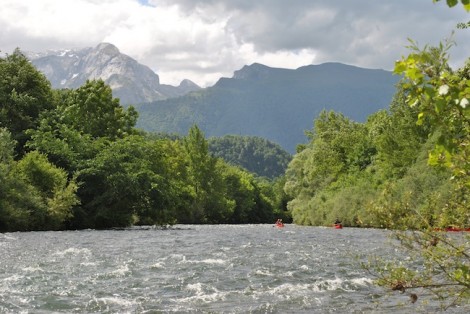
For the remainder of the week we focused on our white water paddling and visited a number of rivers including the Garve de Pau and Garve d’Ossau. The guide book states that theses rivers are grade 2 to 3, however due to the low water conditions they were only of a good grade 2 with nothing too serious. Incidentally the guide book I refer to is White Water Pyrenees by Patrick Santal.
Looking back up the Ossau with the majestic mountains in the back ground
The look of concentration!
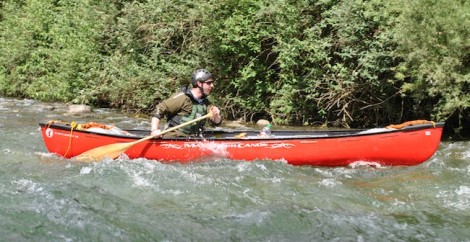
During our river trips we came across a number of barrages that form part of the Hydro electric scheme and required portaging. Also a number of weirs were encountered, that after inspection were run, proving to be a real highlight for some.
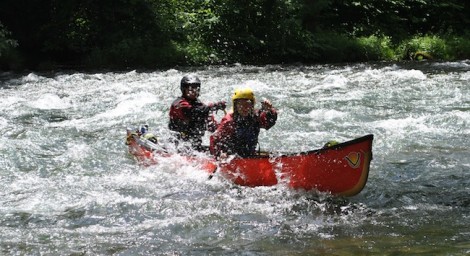
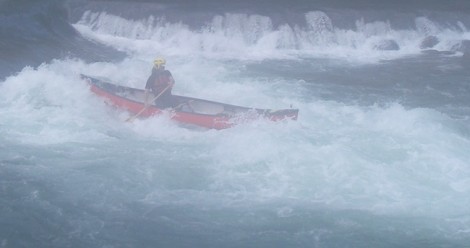
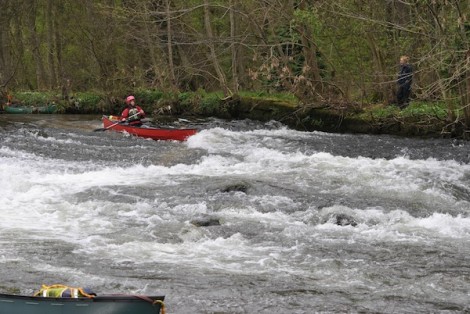
Richard narrowly avoiding swamping!
Enjoying one of the many weirs
Despite the low levels of water experienced the trip proved to be a great success, and I would certainly recommend it as a good paddling location for open boat. I am already planning to head back there again next year and explore more of the rivers. All those who took part benefitted greatly and felt the experience was worth while, plus a big improvement was noted in everyones skills.
Thanks to everyone that came along and made the trip possible.
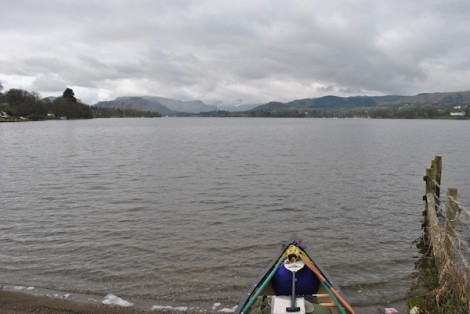
The Lakes is a place I like to try and visit a couple of times a year as I enjoy both the paddling and scenery it has to offer. So whilst on one of my trips earlier this year I took the opportunity to revisit Ullswater whilst introducing a few young kayakers to the delights that open boating has to offer. I felt that paddling the entire length of Ullswater followed by an overnight bivy then a trip down some easy grade moving water of the River Eamont was the way ahead.
Keep smiling and hopefully the weather will improve..!
Ullswater is the second largest lake in the English Lake District. It is approximately 9 miles long and 0.75 miles wide and has a depth of 60 metres. It is said to be one of the most beautiful of the English Lakes and has been compared to Lake Lucerne in Switzerland. The name Ullswater is said to have possibly originated from a Nordic Cheif ‘Ulf” who ruled the area.
One of Ullswater’s interesting facts is that Sir Donald Campbell set the world water speed record on Ullswater on July 23, 1955, when he piloted the jet-propelled hydroplane “Bluebird K7″ to a speed of 202.32 mph (325.53 km/h).
Dark clouds building
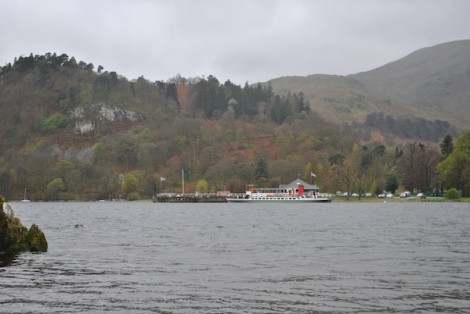
Looking back to the Jetty and one of the Steamers that runs trips along Ullswater
We chose to launch at the Southern end of the Lake on the Western shore at the Jetty where the Steamers sail from. Launching here is free although there is a fee for parking. The weather was rather unsettled with strong gusting winds and heavy showers so I was very glad I was wearing my old favorite an Aleutian Cag. Not to be put perturbed by the conditions we set off trying to get some shelter provided by the many surrounding hills. As we paddled across we had a good view down the lake of what was to come on our journey.
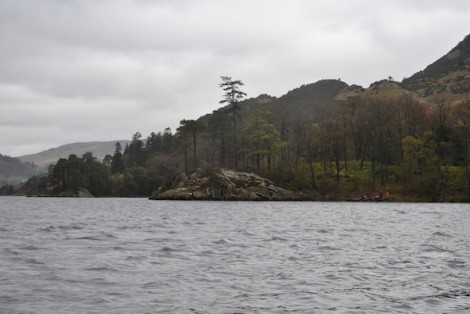
Heading over to the Eastern shore seeking shelter
Looking down the Lake
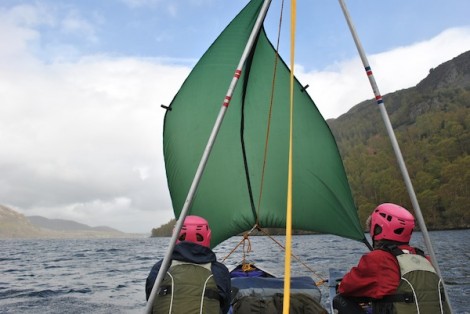
As previously mentioned the winds were quite strong so we decided to harness the effects and rafted our boats together, building a Catamaran style sailing rig. All set and fully briefed with regards safety, man over board etc we were off. The decision was made that due to the speed we were traveling at we would only sail for a short distance so as not to end our days journey by arriving at the end too soon.
Hoist the mainsail!
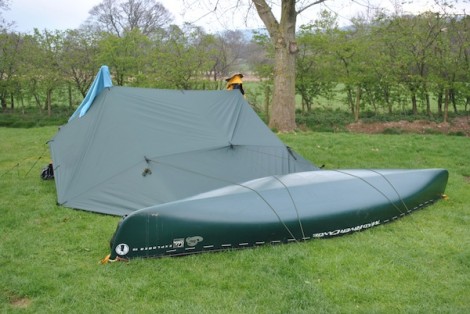
My home for the night
We made good time and soon arrived at the far end of the Lake not far from Pooley Bridge. We camped for the night at the Waterside Campsite which I can thoroughly recomend. As usual I opted for a tarp shelter using my boat rather than a tent.
View back up the Lake as we set off
Next morning we set off paddling from the site heading to Pooley Bridge where the River Eamont flows out. This is a very pleasant section of river at a grade 1-2. Overhanging trees being the biggest hazard together with a few weirs, most of which can be run in lower levels but may require inspection at higher levels.
Enjoying some of the flatter sections
Two's company three's a crowd!
Me thinks you enjoyed that!
A very photogenic Explorer 15
Who's driving?
And before you ask, no they didn't!!
A few drops later and it was time for some lunch near the Eamont Bridge before continuing on down to our finish point at Brougham Castle. This section of the River Eamont is approximately 11km with the option of extending the trip further, as the River Lowther now joins leading on a further 7km to where it joins the River Eden.
Despite the challenging weather a great couple of days paddling were had. I can thoroughly recommend this trip, but as previously mentioned check the levels before setting off and if in doubt seek some advice. Many thanks to Angus, Maria and Oliva for accompanying me and may be now Ive converted you to wannabe open boaters!
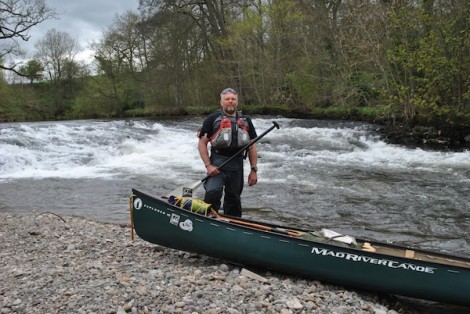
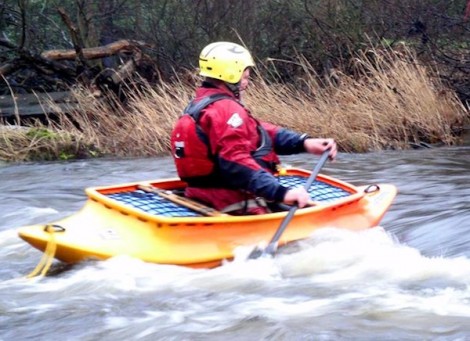
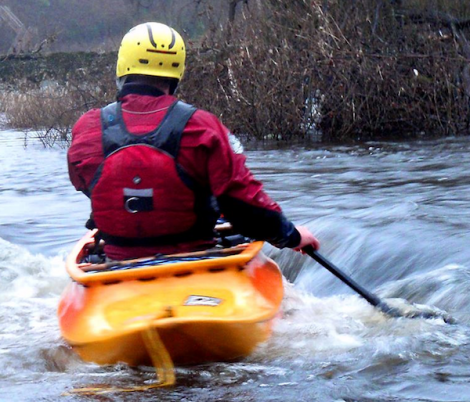
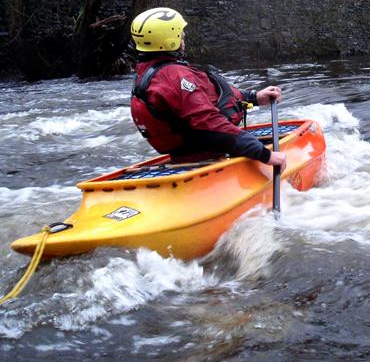
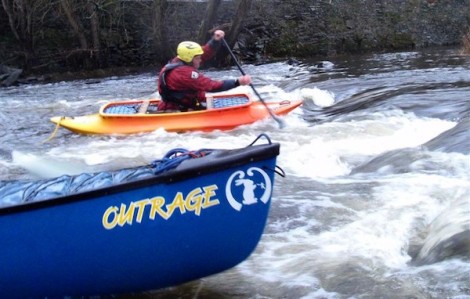
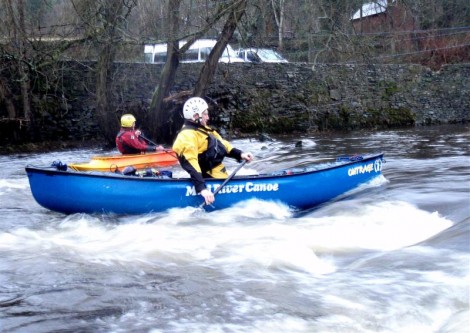
Having paddled open boats of the more traditional variety for many years I recently decided to revisit and explore the world of the White Water Canoe or ‘Spec Boating‘ as it is sometimes referred to.
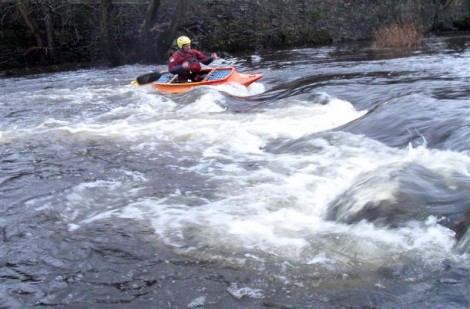
Early days. Its like learning to paddle again!
I have been the proud owner of a Mad River Outrage for a number of years and have had lots of fun and enjoyment paddling it. Although I will say I did clock up a number of hours trying to roll it! It definitely allowed me to take my White Water paddling into new areas, and gave me some new skills to apply to my traditional style of paddling. The boat seen above is a Spanish Fly and paddling this has been like learning to paddle again from scratch.
A good stern pry is one of the keys to paddling a WW Canoe
Although still an open canoe these boats take on a somewhat different appearance, being alot shorter in length, have a more pronounced rocker and in some cases quite bold edges. Unlike traditional canoes the boats tend to have a saddle of some form in place of a kneeling thwart together with some kind of strap system to ensure a snug/secure fit and also to allow the boat to be rolled. Another feature of a White water specific specific canoe is that most of the empty space within is occupied by air bags. All these features greatly aid the performance and the fun that can be had by a canoe in a more challenging environment.
Andy paddling my Mad River Outrage
One of two poses... Either swimming or about to swim!
Having spent more time in it recently its time to move on. In a few weeks I will be visiting the Pyrenees for some trad style boating and hopefully to have some more fun in my WW canoes. Then later this year another trip to the North of Scotland is on the cards. Hope to have some tales of paddling them together with some pictures soon.


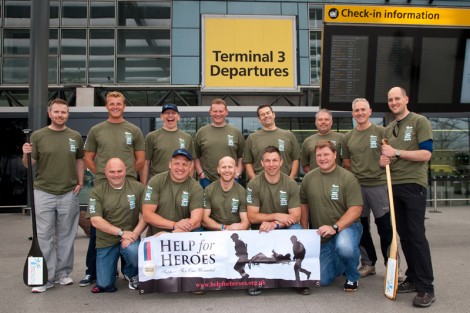
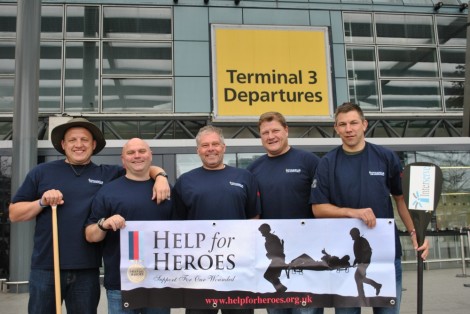
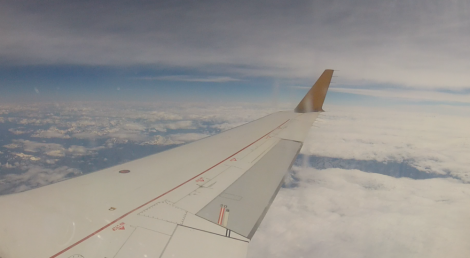
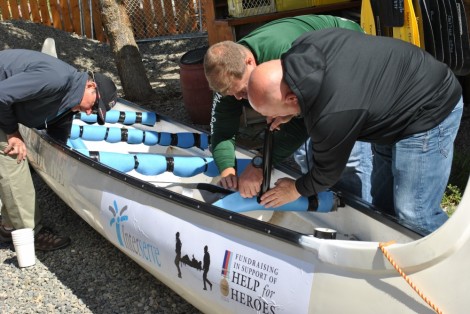
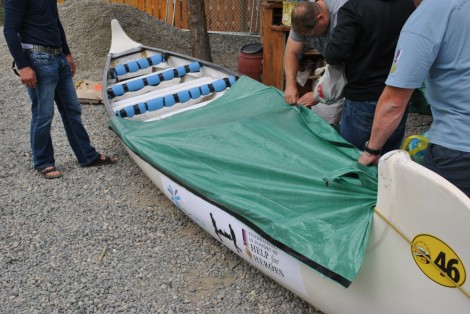
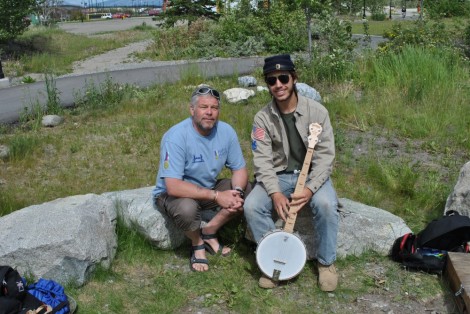
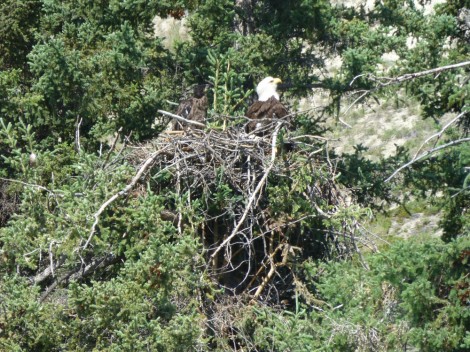
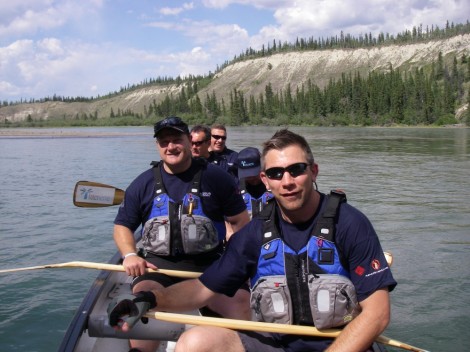
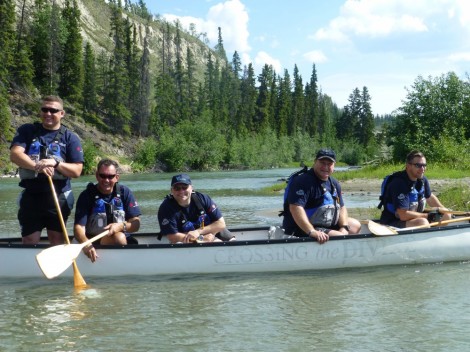
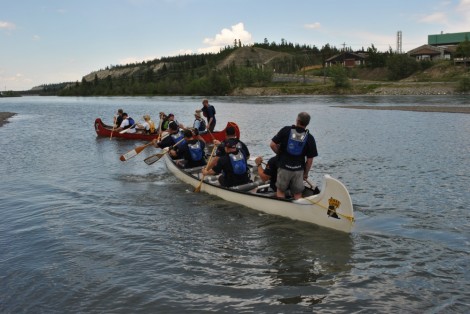
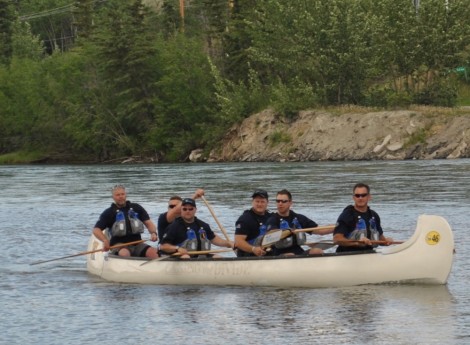
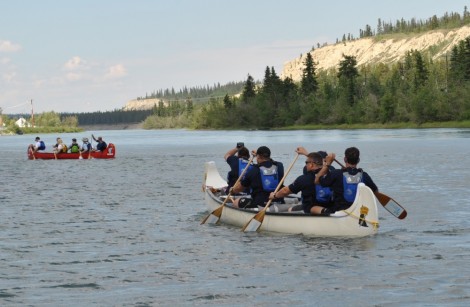
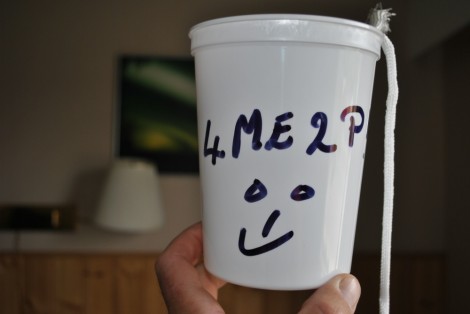
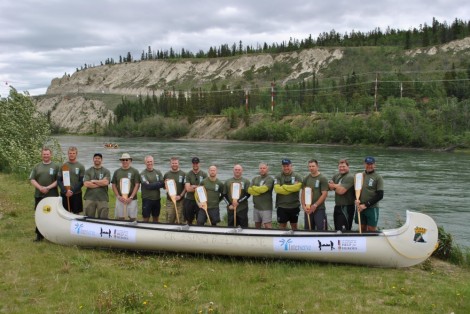
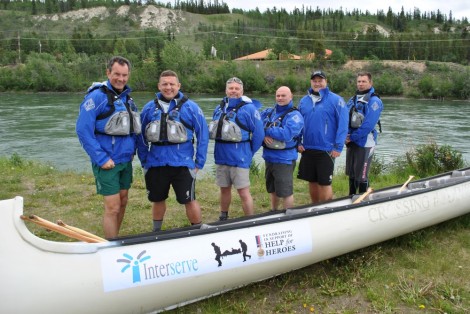
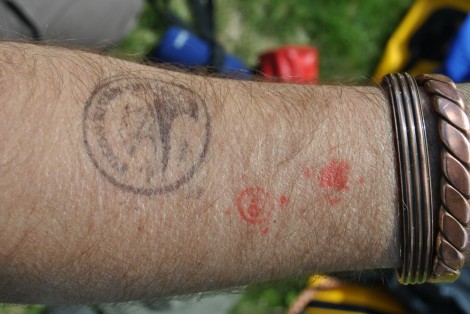
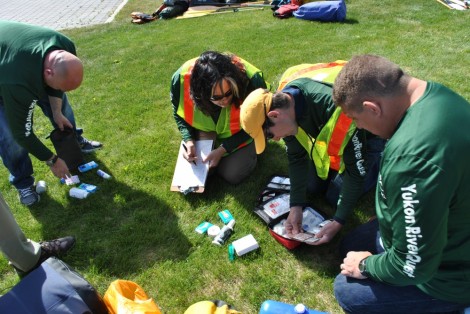
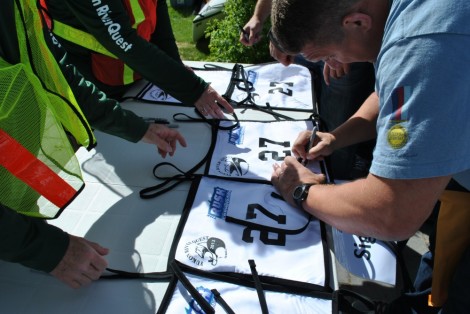
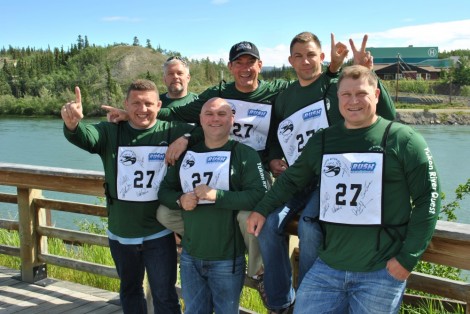
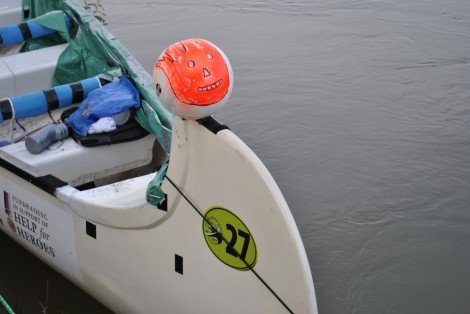
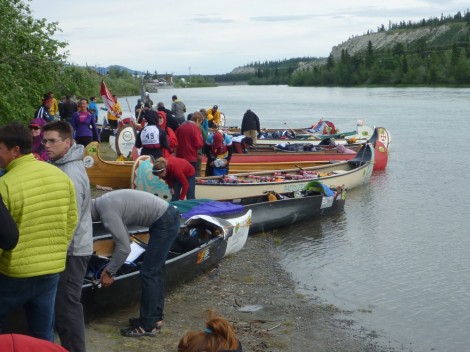
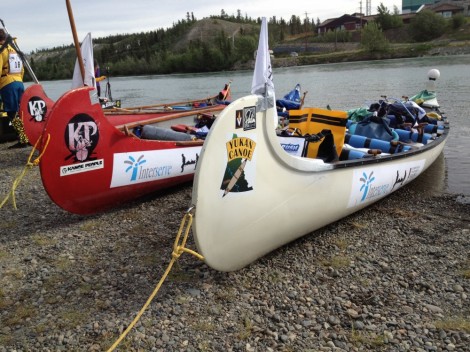
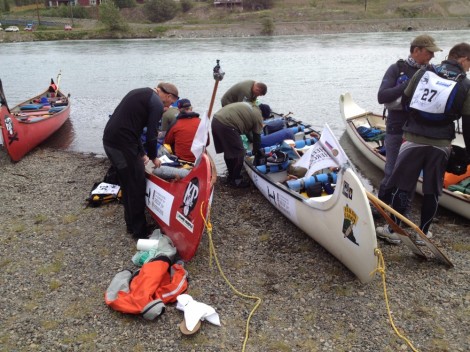
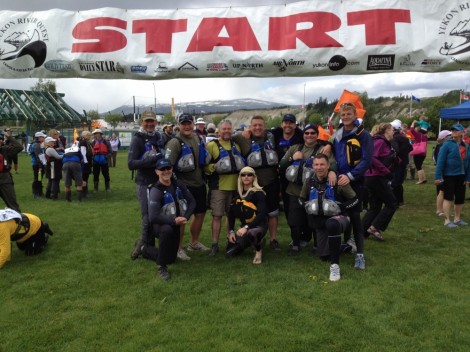
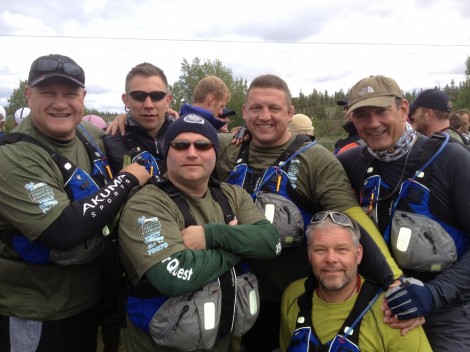
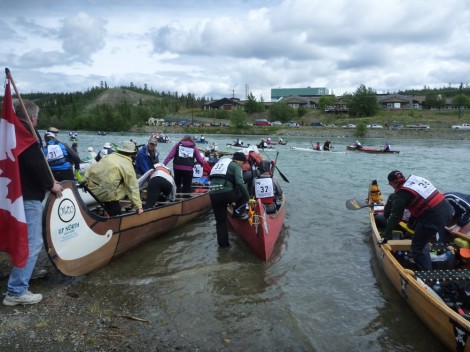
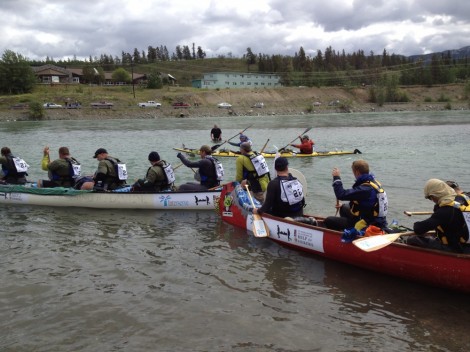
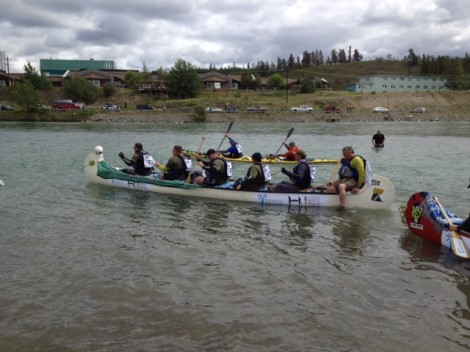 That was it we were on our way, next stop the old Coal mine camping ground at Carmacks which would be around 210 miles later and would hopefully take us about 24 hours. Conditions were the best they had seen in years with good weather and high river levels. After a couple of hours we seemed to loose all the hustle and bustle and settled down to a steady rhythm and just the odd couple of boats around us as we entered the start of Lake Laberege and passed the first of 5 check points before Carmacks. These CP’s are all manned and act as safety to give help when needed and also to record the times of racers before sending them on via sat phones to the Comms centre were they are updated and posted on the race website.
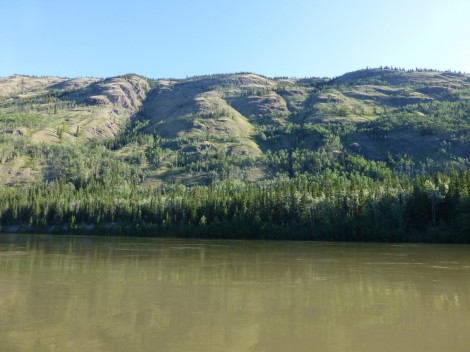
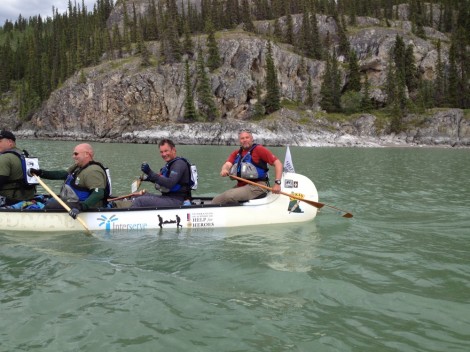
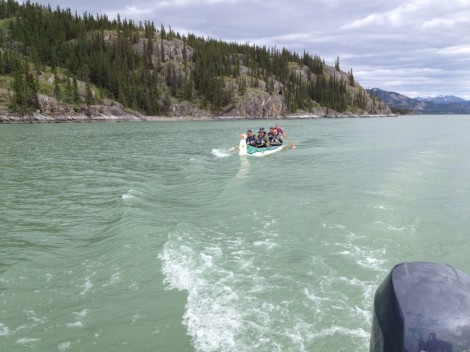 As well as these CP’s there are also a number of Safety Monitoring points or MP’s on route, which again are manned, they quite often have fires burning and hot drinks,for racers to warm up. There was to be 3 of these MP’s between us and Carmacks which proved very useful.