Outfitting an Open Canoe
Outfitting your Open Canoe and giving it that personal touch is what truly gives it an identity and really makes it your own. This can however appear quite a daunting task and a mini adventure in its self, especially when starting from scratch and when a new boat is involved. So after having recently fitted my latest boat, I thought I would share my experiences and offer some of my thoughts and guidance.
My first tip would be to spend some time planning it, considering how and what you are intending to use your boat for. Are you going to use your boat solo or tandem, on open or white water, for short trips or expeditions? All of these have certain common elements but also have very different needs. Have a look around at other boats you may have seen or used, and see what others have done, then ask yourself if it will suit your intended use. Remember just because it works for one person doesn’t necessarily mean it will work for you!
There is no quick fix for outfitting your boat so be prepared to put in some hours, in order to achieve the best results and maximum satisfaction from all your hard work. Time well spent fitting your boat out initially, will hopefully lead to many hours of enjoyment rather than having to make lots of alterations and adjustments.
I have fitted out a number of boats over the years and have what I feel is good set up for the type of paddling I enjoy. I paddle both open and white water and a lot of solo expeditioning or journeying, so the style of outfitting I choose reflects this. There is no single right or wrong way of doing this; the most important thing is that it works for you.
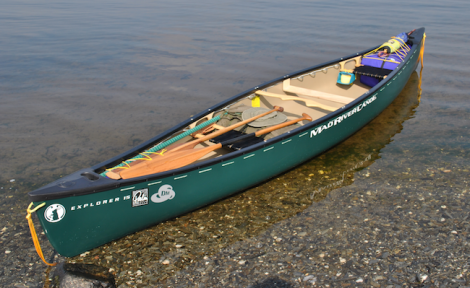
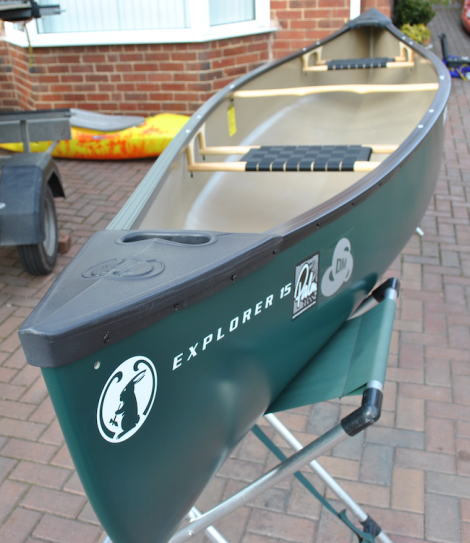
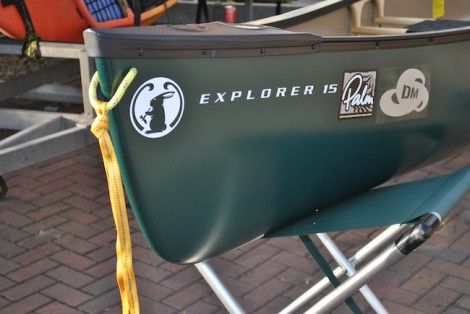
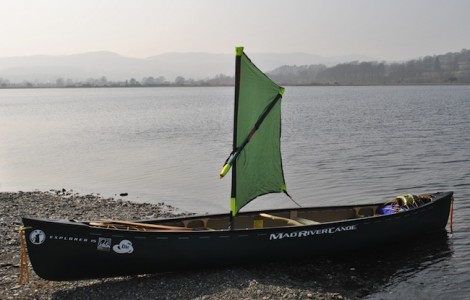
In this instance I have chosen a Mad River Explorer 15 in Royalex. Originally designed by Jim Hendry this is a good all-rounder, with its shallow “V” hull giving good tracking performance, and is stable with a dry ride in various challenging conditions even when loaded for a trip.
What you might need.
Next stage is to gather everything you need for the task ahead. For my outfitting I used the following:
10m of 5mm cord Rope cutter
5m of 4mm cord Electric drill & drill bits
5m of 4mm shock cord Spanners
2m of 10mm Kermantle rope Phillips screwdriver
Zip ties Pliers
5m of 5mm plastic tubing Sand paper
2 X 32” air bags Set square
1 X kneeling thwart kit Ruler
2 X 2” D-rings Pencil
Vinyl bond glue
Vinyl mast foot
Mast bracket
Ok so you have decided on your set up and you’ve got your tools and every thing else you may need, next stage is to get started.
Grab loops.
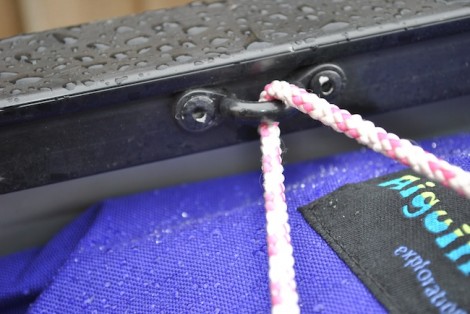
A good starting point is with the grab loops. These will form a secure attachment point for painters, swim lines etc and therefore need to be strong. A common error I see quite often is the practice of attaching things such as painters to the boats deck plates, this is not a good idea as they are not designed to take a load and will pop off when you least want them to. For mine I have used some 10mm Kermantle rope.
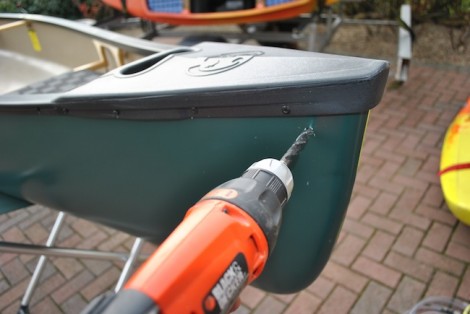
Start by drilling a hole just large enough for your rope on either side at both the bow and stern. I have chosen to drill my holes around 6-8 cm back from the bow and 6cm down from the top of the deck plate. At this point remember the old adage, measure twice, drill once! Or in my case measure, measure, measure and then measure some more before taking a deep breath and drilling!
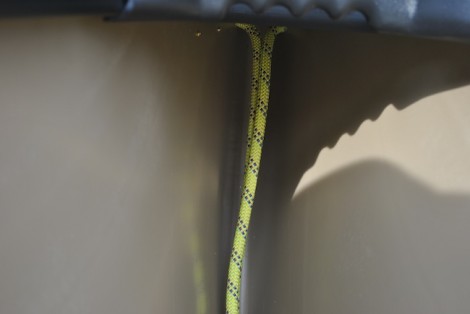
Once drilled and cleaned out, thread your rope through so that both ends of the rope end up inside of the bow and below the deck plate.
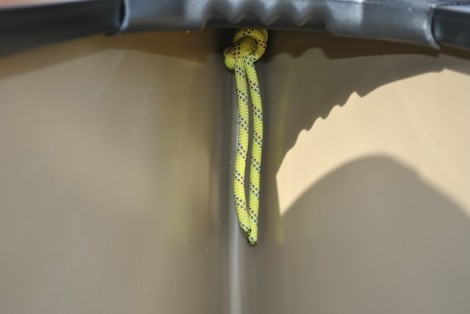
At this point I make sure that the loop on the outside is snug to the hull before tying a overhand knot on the bight close up to the inside.
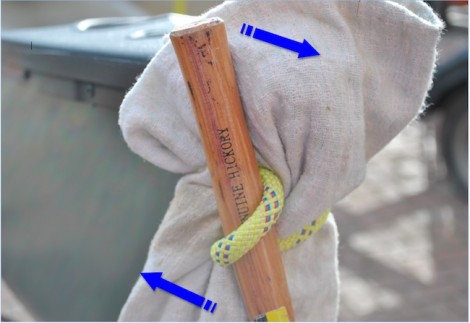
I now turn my attention the loop on the outside, which is at the moment flush to the hull. Taking a cloth to protect my boat I take the handle from my hammer and ease it between the boat and the loop. It will take some levering and time, but be patient. Once the handle is in the loop I then twist it around as in the picture above. The result of this little challenge is that loop should become slightly larger whilst the knot inside pulls tight up against itself. The idea being to create a loop just big enough to take painters etc, and not being too big i.e. big enough to get your hand through as it could become and entrapment hazard. Not only that, but from experience large loops have a habit of getting caught and snagged up on trees, branches and anything else that presents itself. Now re-visit the knot on the inside and use a couple of zip ties to secure the ends.
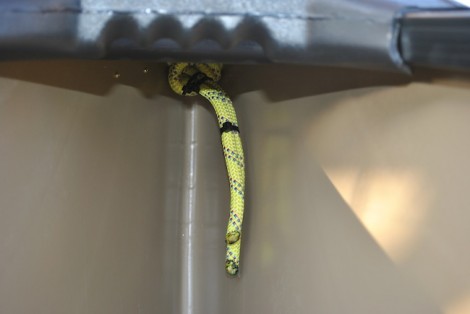
To finish off with I tie a short length of webbing tape (just long enough to reach the water) through the loop to act as swim tails. I find these have a number of uses including as a quick grab for self rescues, carrying and should I have to approach a casualty in the water, I would rather that they grabbed these than the gunwhales as they do not have such a capsizing effect as someone pulling down on the sides.
The finished article above with the swim tail fitted. Note the small size of the grab loop. If you are going to attach painters remember that they go through this loop, and can be either permanently attached or removable for transporting. As for length then it is again very much down to personal choice and how/where you will be using your boat. I would suggest as a minimum, a boats length of floating rope. If you choose longer then consider how you will manage and store the line in the boat when it is not being used, as ropes and water are not a good combination with a possible risk of entanglement or entrapment. Now simply repeat this process at the other end of the boat.
Floatation/Buoyancy
Irrelevant of what type of paddling you are intending to take part in, some form of floatation is critical. As it is says this will aide the boats buoyancy should it become swamped or in the event of a capsize.
Floatation or buoyancy can take a number of forms ranging from solid (polystyrene) to inflatable air bags and are normally fitted in both the bow and stern and sometimes in the centre. Solid blocks although initially more expensive are more robust, certainly wont burst and require less maintenance. However as they are solid they don’t always fit perfectly to the shape of the hull, leaving voids around them, which can fill with water and may there fore require some shaping to ensure a better fit. Air bags however, although cheaper do run the risk of being punctured and at £30 -£50 per bag can be a costly option. They can however be protected with foam matting or by using protective bag covers. Also because they are inflatable they will fit the contours of the hull better, leaving little if any of the surrounding area unfilled. Do remember however to let some air out of them when storing them or if they are in the sun for a period of time.
Solid blocks tend to be limited to around 32”; airbags however come in a wider range of sizes meaning that for a solo paddler who would not normally use the area in front on the bow seat they could choose a longer air bag up to the seat adding more floatation. If they then decide to use the bow seat for tandem paddling, then simply deflate the bag a little and roll up the spare out of the way. Just measure from either end of your boat up to where you want the air bag to end and then get a bag that fits closest to your needs.
How you attach your buoyancy is important, as you don’t want it to pop out when swamped or capsized. The best way to achieve this is with a criss-cross cord lashing over the bag/block to the gunwales together with some form of strap that goes over the top of it and secures into the bottom of the boat.
I have chosen 32” air bags bow and stern as most of my paddling is solo, however I may require the option of tandem. As previously mentioned I choose to use protective fabric bag covers, which I think are an excellent addition and are available from Aiguille Alpine.
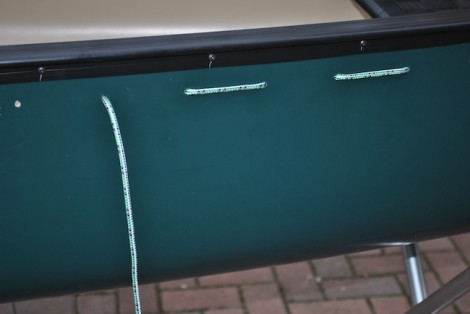
In order to lash my bags in I have two options. Either to drill into the gunwales and attach some form of P-clip system along the length of where the air bag sits or alternatively drill a number of holes through the side of my boat just below the gunwale , then thread cord through making lashing points (drill & lace). I prefer the later as I find this stronger and I can continue the lacing throughout the length of the boat giving me lots of options for lashing and attaching equipment etc.
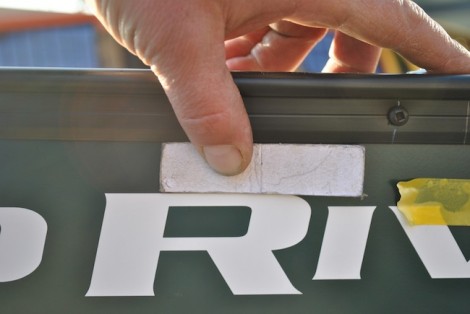
I make a start by firstly deciding on the spacing between the holes, and how far below the gunwales they should be. I normally use a spacing of around 8cm between holes and about 2 cm below the bottom of the gunwale. Next I make a small card template to help with the job of marking it all out.
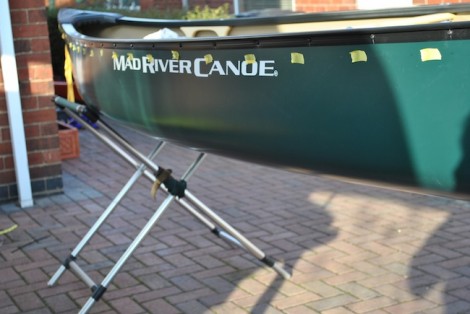
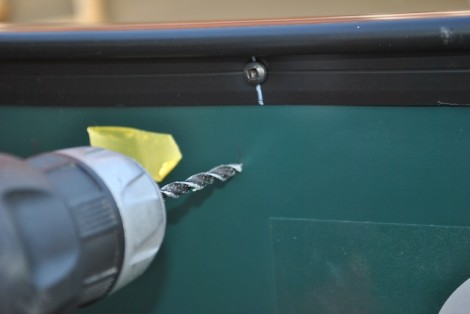
As I intend to lace the entire length of the boat I start at the center of the boat marking holes either side of the ends of the Yoke. I then continue this process down both sides of the boat and to each end marking where the cord loops will be on the outside with yellow tape. Remember to make sure that the end of the cord should end up inside the boat at the last hole.
I used a 5mm drill bit so that the cord (also 5mm) is a snug fit. With the holes drilled I start at one end, and secure with a knot on the inside then begin to lace down the sides of the boat using 5mm cord. I personally would not use anything less than 5mm cord for the lacing as it could slice through the plastic like a cheese wire.
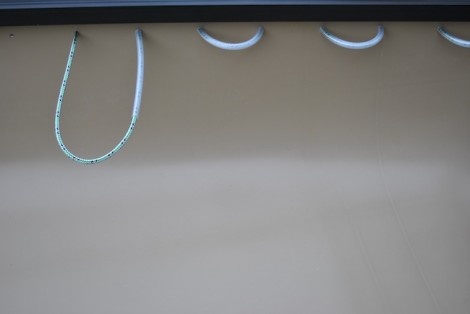
On the inside I use short lengths of 5mm plastic tubing, slid over the cord to provide convenient loops for attachment. I find these a lot easier to clip and tie into than when the cord is fitted flush to the boat. I don’t fit these throughout, only where I think they will be of most use for lashing and securing kit. To help slide the tubing over the cord I soak them first in boiling water to soften them and then use a piece of very thin cord/twine to pull the thicker cord through. You may need to remove the seats to allow threading of the cord/lacing and replace once completed. I make sure the cord is pulled tight as I go and finish at the ends on the inside again with an overhand knot.
Once I’ve completed both sides I use 5mm shock cord and weave this through the loops on the inside, as in the photo above. This adds a convenient and secure way for storing things that I may want to access quickly like my sponge or the grip on a paddle.
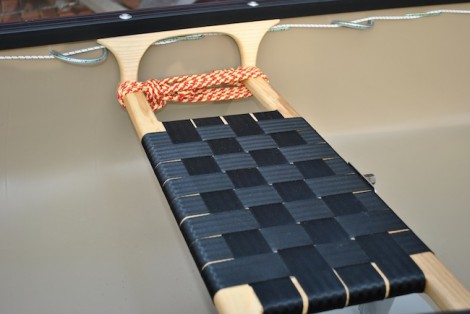
Note also the floating line secured on the side of the seat. This is my bridle for tracking and lining. These are pre-measured and a knot tied in the centre. One side is permanently attached, when I need to use it I simply unwrap it from the seat and pass it under the boat before securing the other end onto the opposite side of the seat. The result being that the knot ends up under the boat and exactly in the centre without all the fiddling and adjusting that can be associated with attaching a bridle.
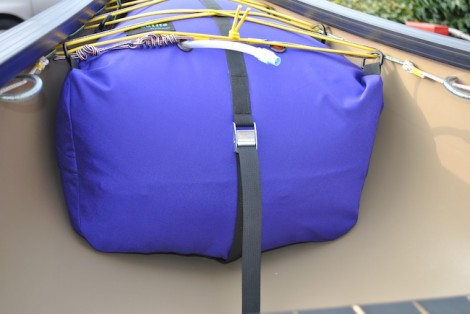
Next I glue in some D-rings to the bottom of the boat in order to secure the strap, which will pass over the top of my airbag ensuring a secure fitting. The airbag covers I have chosen have a strap built in. If you don’t have these then a roof rack strap will do the same job. Remember to pass the strap through the grab loop on the inside of the boat before passing over the bag and securing.
The D-rings should be positioned underneath your bags or blocks rather than in front of them. This will ensure any tension on the D-ring will have a forward pull rather than an upward one, which could lead to the ring being pulled out.
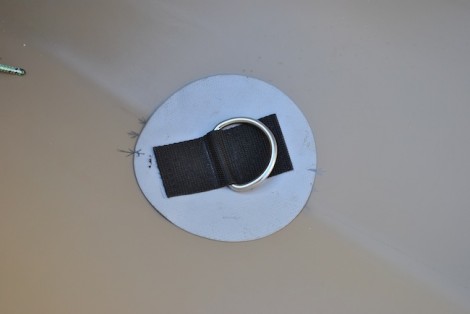
I use my inflated air bags to work out exactly where I want the rings and draw round them. I have used large 2” rings for this job. Note the angle I have had to set the rings at in order to accommodate the shallow ‘V’ of the hull.
Next I use sandpaper to roughen the surface of the hull where the D-ring will be glued and also the back of the ring. I then clean both surfaces with meths and allow to dry prior to applying the glue. I have used Vina (Mondo bond & River bond similar products) bond and apply this to both surfaces then leave until touch dry.
As above once dry to the touch I carefully position the ring in the pre-prepared area and use to small hand roller to remove any air bubbles and ensure that the ring is firmly pressed down, paying attention to the center area around the ring and the edges of the patch.
I must point out that in this article I am referring to the guleing of D-rings etc into a boat made of Royalex and provided I use the technique mentioned I have not had any issues with them sticking or falling out. If however you have a non Royalex boat then you may encounter some issues with regards the glueing of items. I have had some success using Evostick but the surface really does have to be well prepared and in some cases some gentle heat is applied in an attempt to de-polarize the plastic and aid adhesion. Remember to test a small area with the glue first. You don’t want to melt a hole in your prized possession! Any doubts contact the manufacturer.
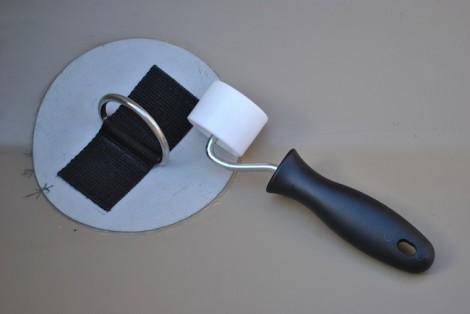
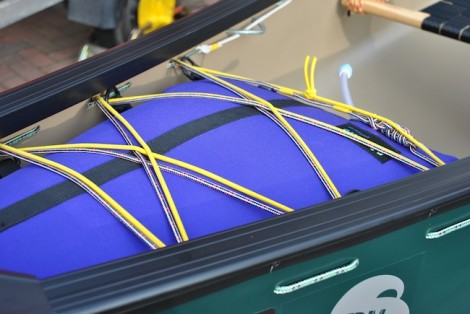
Once the rings are dry I put the air bags back in place and thread the strap through, then finish off by using a criss cross lashing of 4mm cord over the bags and through the cord loops on the inside of the boat.
I have also added some shock cord over the bags for tucking a spare paddle and swim lines etc under. Note I don’t recommend using only shock cord to secure your airbags as this will allow too much movement in the bags, possibly resulting in the air bag being popped out when swamped.
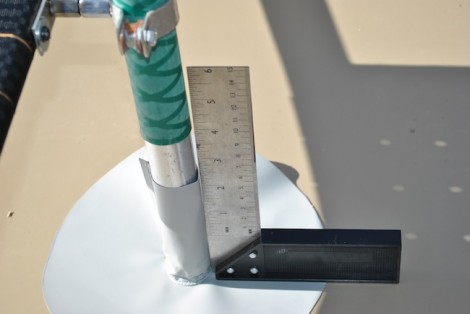
As I will be using the boat for some solo sailing I use the same gluing technique to fix a vinyl mast foot into the bottom of the boat.
I particularly like the vinyl mast foot as it folds flat when loaded with kit or when the seat area is being used. Generally I position the mast foot etc in the area to the rear of the front seat. Note the removable bracket I have used on the seat to hold the mast securely and the set-square I have used to ensure everything is square.
Kneeling thwart
For some this may be as far as your outfitting goes and your boat is now ready for paddling tandem. If however you intend paddling your boat solo then you may want to consider fitting a kneeling thwart. This will greatly aid your connectivity with your boat leading to better stability, control and overall performance. For some the idea of having your feet and lower legs slid underneath a wooden bar may give the feeling of being trapped and take people out of their comfort zone. If this is the case then maybe consider using some form of closed cell foam saddle, that could either be loose so as to move it either around or from boat to boat, or secured in some way.
Deciding where to place your thwart is down to personal choice but generally they are fitted as near to the centre of the boat as possible (i.e the yoke), as this will then form the pivot point around which the boat will turn. This really highlights safety concerns so it is really important that you ensure you have enough room to move and escape if needed should a capsize occur.
Another consideration is how you want your boat to be trimmed. For me personally I look for my boat to be slightly bow light when un-laden, then when I paddle with my kit bag I can achieve a more neutral trim very easily if required. One way to achieve this is to move around in the boat and have someone provide you with feedback as to how the trim looks. Better still have someone armed with a camera who can take pictures of you in the boat, then you too can actually see the effect of your positioning. You will need to have the bar from your thwart with you to enable you to identify its planned position in relation you.
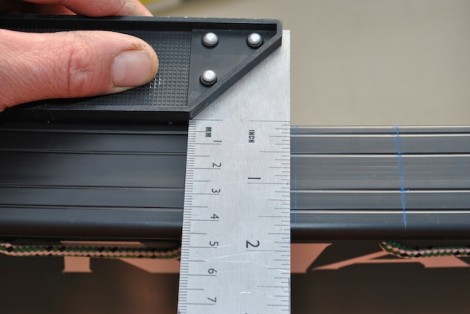
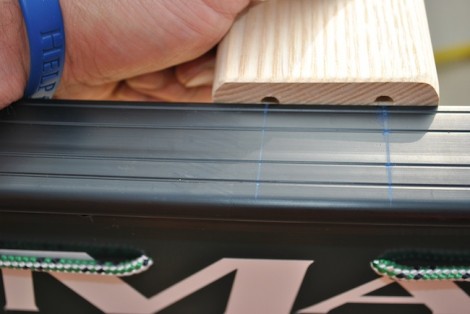
Decision made its now time to fit your thwart. I use the riser blocks to start marking out where I need to drill my gunwales. By offering up the riser block to the gunwale I can mark the distance between the holes, then using my set square mark across the gunwale. Noting the exact position in relation the bolts on the yoke I mark out the opposite gunwale as well.
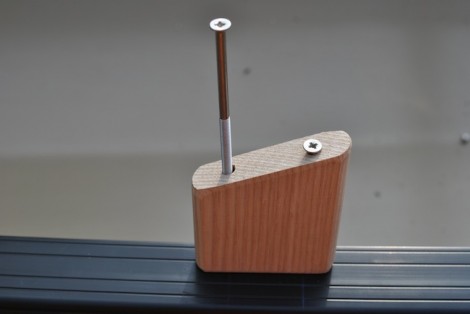
Now using the riser block again, but upside down and making sure it is flush with the inside of the gunwale, I start to screw the supplied bolts in. When I then remove the blocks I will have the position of the holes marked and ready for drilling.
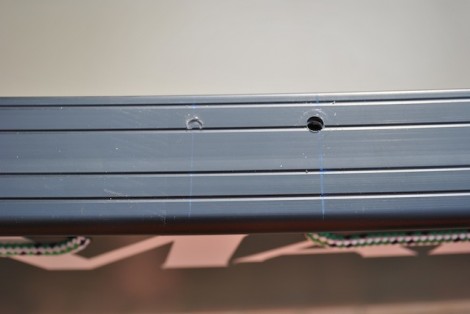
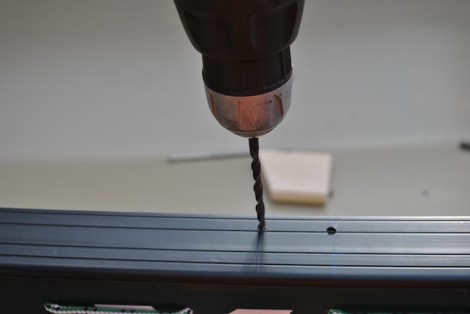
In the picture above a drilled hole can be clearly seen along side the mark created by screwing the bolt through the riser.
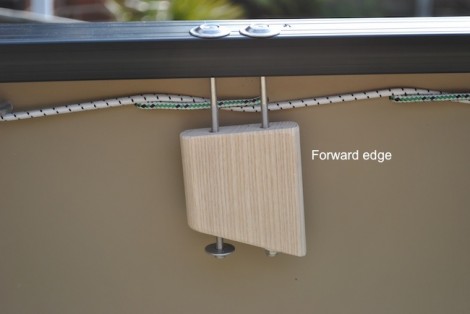
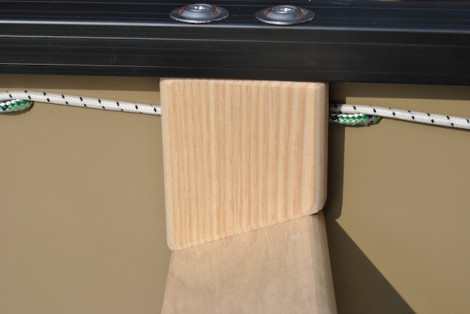
Remembering to measure twice and drill once repeat the procedure on the opposite side. Once completed fit your riser blocks in position, up the correct way and with the longest edge towards the front. This will allow you to check their position and help you with determining the correct length to cut the bar.
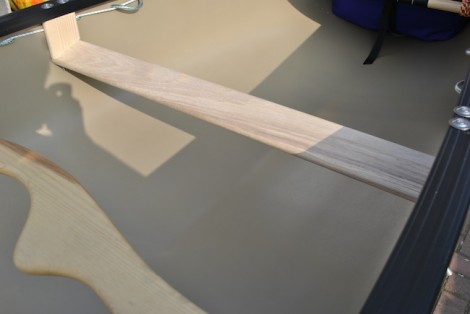
You now need to determine the length of the cross bar, remembering to take your measurement from the bottom of the riser blocks, allowing for some excess on either end and then cut to length. Using the same technique mentioned above mark out the location of the holes in the cross bar. When drilling the holes remember that they will need to be at an angle (appprox 15-20 degrees) to allow for the bolts to pass through the angled cross bar.
Before finally assembling your thwart it is a good idea to give all the wooden parts, especially where you have trimmed them a good couple of coats of Boiled Linseed oil. For this I use a 50/50 mix of Boiled Linseed and White Spirit. Leave each coat to soak in and then buff vigorously with a cloth before completely dry in order to remove any excess. The heat generated by the rubbing will also help the oil soak in.
Be careful not to over tighten the bolts, and use the correct size screwdriver so as not to damage or strip out the heads of the bolts as the stainless is quite soft.
Again going back to safety concerns it is a good idea now to try the thwart and make sure that you can get your feet in and out from under it safely. If not, trim 1 cm at a time from the top of the riser blocks on both sides until you are happy. This can be revisited at later date and more adjustments for comfort or safety can again be made.
With your boat now fitted out, you can head off on your adventures and look forward to many hours of happy paddling.
This was never meant to be the definitive guide to outfitting a canoe. It is merely some of my thoughts and advice I would like to share with you and hopefully it will help you with your outfitting.
Remember there are lots of ways of doing this and I have only covered some of them. Just because it works for me doesn’t mean it will work for you!
Big thank you to the guys at Palm and Desperate Measures for their help and support in my ventures.
This article is available to download and print out as a PDF document to help you with your outfitting. Good luck and I hope you find this of use.
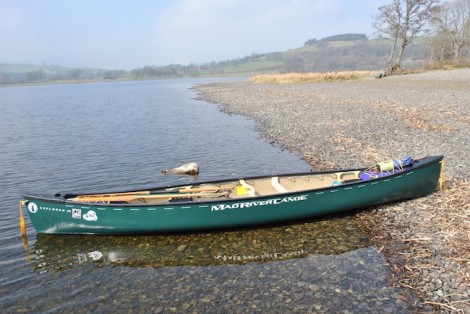
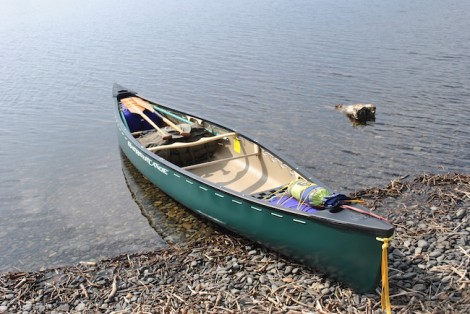
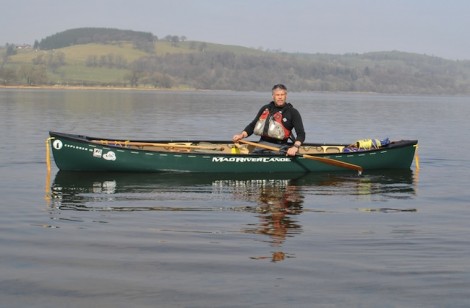
I would like to leave you with some pictures of my newly out fitted boat.
Enjoy, and see you on the water…..
Jules
comment
Please Leave a Reply
TrackBack URL :


Thanks, brilliant and detailed article. i have just bought a new Old Town Guide 147 and am looking at best way to fit it out. Some really useful ideas here.