I had half a day to kill after a long journey and needed a bit of a chill and a shake out paddle. I remembered an interesting little paddle, quite local to where I was that I had done a year or so previously. That trip is the much overlooked Rivers Glass and Beauly.
Both these rivers really are little gems and very often ignored due to their low grade, with the River Beauly having the stunning steep sided Aigas Gorge which is quite unusual at this grade of water, and is home to some regularly seen Otters. Only the River Conon has a larger catchment area than the 270 square miles of the Beauly system. The Rivers lie to the south west of Dingwall in Strathglass and to the North of the Great Glenn and is easily be accessed via the A831 through the Muir of Ord and Beauly.
This system finds its origins in Glen Affric with the River Affric which then becomes the River Glass above Cannich. Here there is a good access and egress, from where this stretch can then be paddled to the road bridge at Mauld which crosses the river just before the River Farrar and Struy Bridge. Again there is good access and egress and the river now becomes the Beauly and is a nice trip down through the Aigas Gorge to the get out at the Aigas Dam.
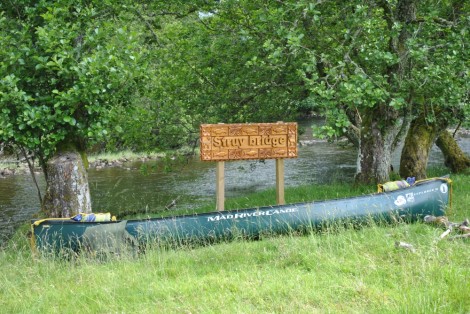
The put in at Struy Bridge
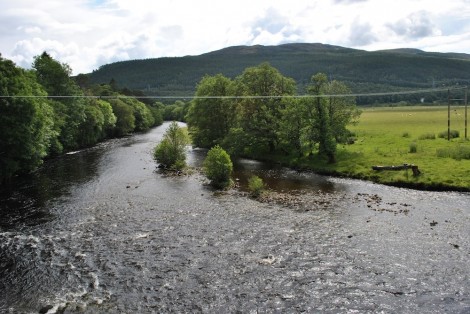
Looking downstream of the bridge
As I only had half a day I opted on this occasion to put on at Struy bridge and paddle the section to the Aigas Dam. I made a point of stopping at the the dam and inspecting the get out as I drove to the put in, and left my bike for a quick shuttle at the end of the day. After the usual faff associated with open boating I launched from the field beside the bridge and paddled down the Farrar to where it met the Beauly.
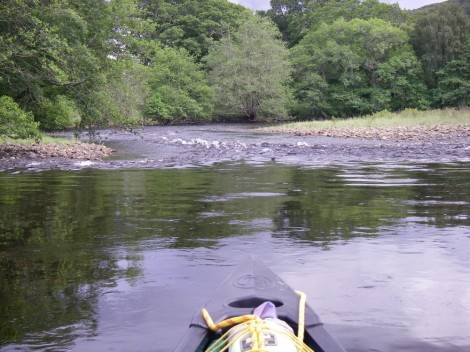
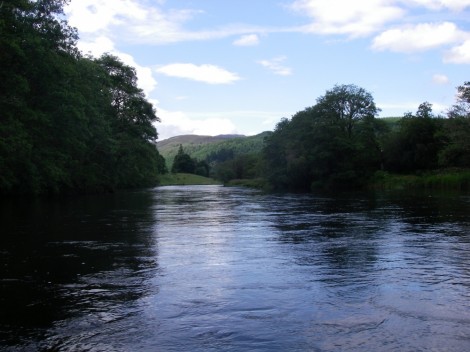
The Beauly
The weather was rather interesting as to my front were great black, bellowing storm clouds and very loud rumbles of thunder could be heard, whilst over my shoulder was blue sky and sunshine. This was to the be the case for the remainder of the day along with the the occasional heavy downpour. Although I could see and hear the thunder and lightning I never really caught up with it and ended up feeling like I was chasing it all day!
Beckoning storm clouds to my front!
Clearer sky's to my rear
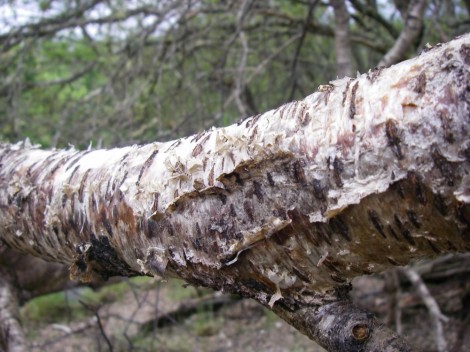
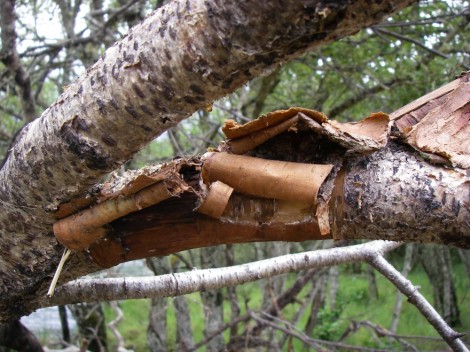
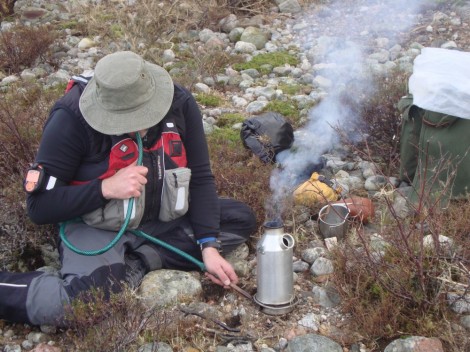
Part way down I decided to stop for some lunch and a brew with the aid of my Kelly Kettle. I always carry a fire steel steel with me for lighting fires, stoves etc so all I had to do now was find some tinder and some fuel. Luck would have it that very close to where I had stopped I found an old Birch tree. On closer inspection I found that its bark was in just the state for lighting my kettle. I chose some of the very flakey, loose paper thin bark as tinder for my spark, and some of the thicker more substantial bark to add to this to get it going, along with a collection of small dry twigs. I generally carry a small leather pouch with some dry bark and other dry tinders just in case I cant find what I need. I like to use Birch bark for tinder as it contains natural oils which help it to burn, even when wet plus it burns hot and for quite sometime ensuring the fire gets a good start.
Thin and fury looking bark for tinder
Thicker bark for getting the fire going
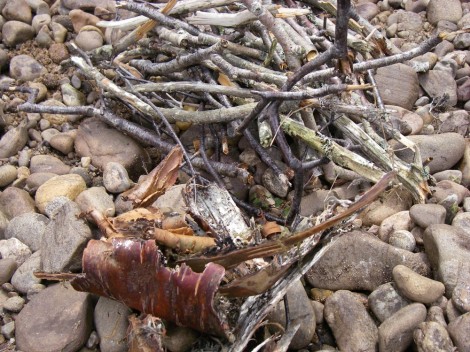
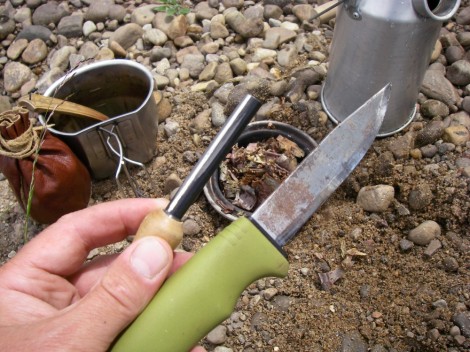
Preparation is everything when lighting fire or in this case my kettle. I prepared a pile of tinder in the form of the very thin bark, a few strips of the thicker bark and broke the twigs up into piles of thin to thick. Kelly Kettle filled with water and ready I drop a few sparks onto the very thin bark and gain a flame quickly. Now I add some of the thicker strips of bark and once they have caught’ place the kettle over the fire base. This acts like a chimney and draws the fire. I can now carefully add the sticks trough the hole in the top starting with the thinnest first and gradually building up. Be careful not to overdo it and smother the the young flames.
A good selection of tinder and fuel
I always carry a good knife and a firesteel
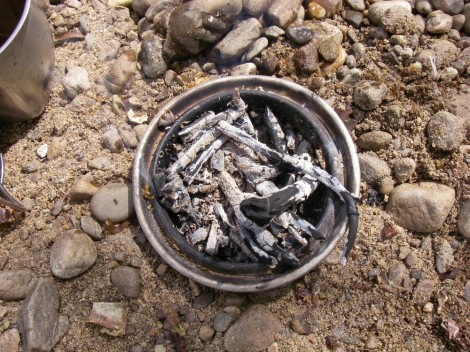
Now is a good time to give the fire lots of oxygen via the holes in the base of the kettle, by blowing or fanning. Once your kettle is going drip feed the thicker sticks until the water is boiled. Remember not leave the cork in, and be careful lifting the kettle off the base as the flames may still be coming out of the top where the handle goes. With practice, lighting and using a Kelly Kettle can become second nature and can be as quick as using a stove but definitely more satisfying and fun.
The base with a dead fire
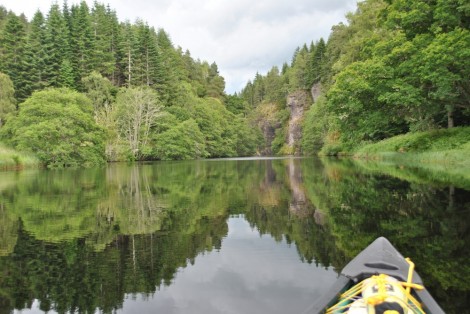
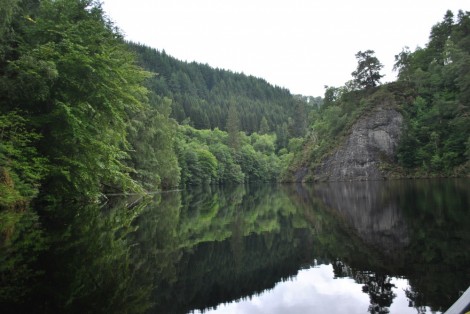
I soon arrived at Aigas Island and the start of the Gorge, which as I mentioned earlier is a bit of a surprise. Its hard to get your head round, but you are now actually paddling through part of reservoir! Very steep rocky sides tower above the paddler as you paddle through. The Island itself can be paddle on either side although I feel the left is much more interesting.
Approaching Aigas Island
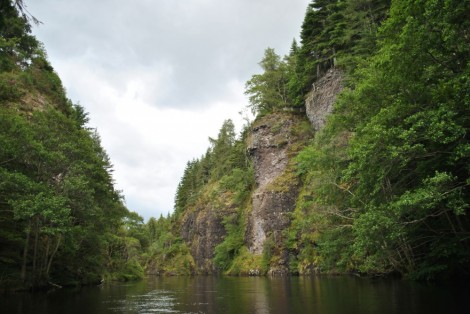
Steep sides of the gorge
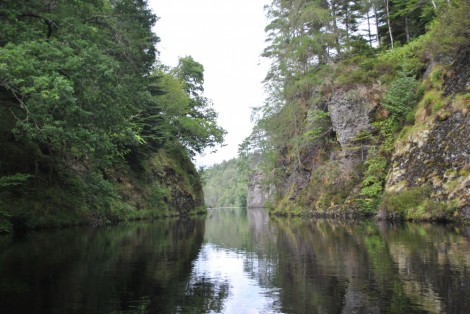
Leaving the gorge
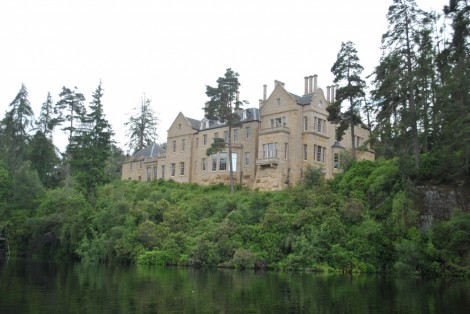
On leaving the gorge and paddling around to the right a very big and grand property is clearly visible above, on the Island. This is Eilean Aigas House, previously a seat for Lord Fraser of Lovat. The original family home was demolished by a Canadian Millionaire and has been replaced by this stunning building, in this stunning location. Incidentally if you happen to have a spare £15,000,000 plus just lying around doing nothing you could put in an offer on the property as its up for sale!!
For sale. Offers in excess £15,000,000 !!
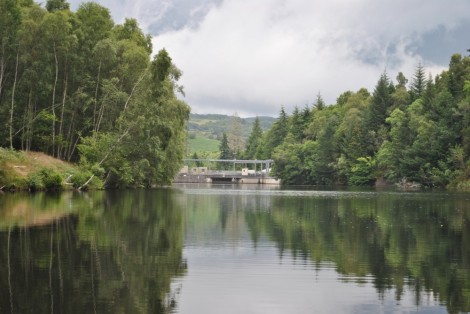
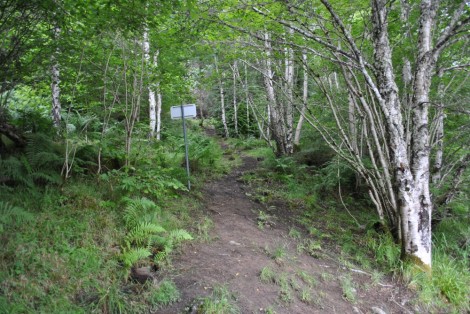
Back to reality and it’s only a distance of 2 km to the Aigas Dam and the get out. The egress is short distance before the dam itself and is a bit of scramble up the bank with your boat and kit, before finding the tarmac track up to the main road.
Approaching the Aigas Dam
After a quick portage up to the road it was time to head off back to the car courtesy of the local shuttle service … aka my bike. The short cycle back gave me time to reflect on my day of storm chasing, Kelly kettles and gorges. I finished in a very chilled and relaxed state ready for some more challenging paddling later in the week.
Portage up to the road
The local shuttle service .... aka my bike!
This section I paddled is only 10-12 km long but as mentioned earlier a longer paddle of 25 km can be had by launching further upstream at Cannich. I have on one occasion portaged 2 km down the road from Aigas Dam and launched again by the Kilmorack bridge and paddled a further 4 km down to Lovat Bridge. It really is a lovely paddle with no nasty surprises. Wether a days relaxed paddling, a family trip or an introductory paddle for people its well worth the visit.
Earlier this year a friend of mine asked me to take him on a little trip to the stunning Loch Sheil, which is a real wilderness experience, with no roads leading into or out of most of its banks. It is 18 miles long from its northern most end at the famous Glenfinnan monument on the ‘Road to he Isles’ to Acharcle at the southern end. Wildlife is always very plentiful and the Loch is well know for its Golden Eagles, as indeed we found out after we spotted a fine specimen which stayed with us for a while before disappearing off into the distance heading off to the surrounding forestry and mountains.
Loch Sheil is on the west coast of Scotland set in a dramatic rift, surrounded by peaks such as Moidart, Ardgour and Sunart and is around 18 miles west of Fort William by road on the A830. It is the 4th longest lake in Scotland, at 18 miles, yet averages just half a mile wide. It is very deep in parts and as it is so long it contains and is surrounded by many differing habitats. The Loch and in particular Glenfinnan is also well know for its presence in the Harry Potter films, in particular ‘The Chamber of Secrets”. So dont be surprised if whilst your at the Glenfinnan end of the Loch you see The Hogworts Express steaming across the Glenfinnan Viaduct!!
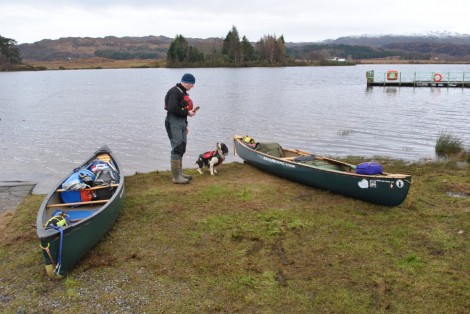
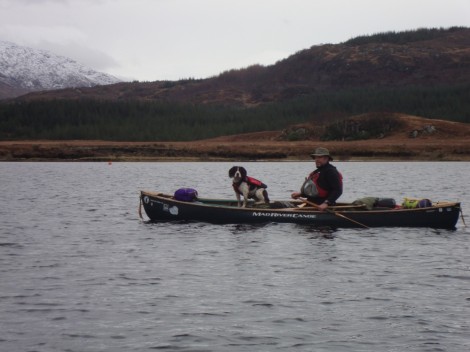
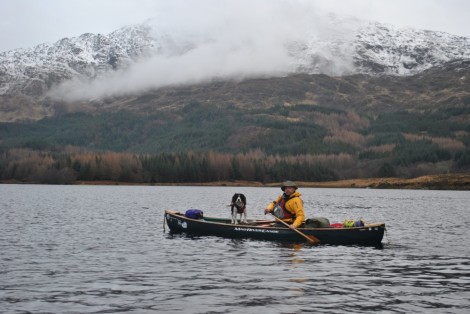
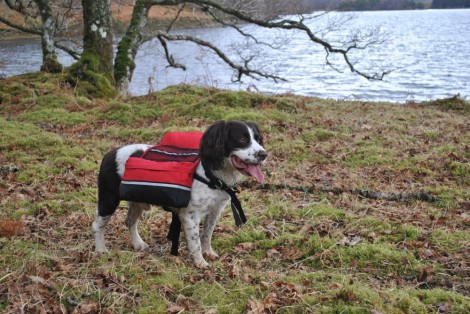
I was joined on this trip by my good friend and fellow paddler Iain together with my trusted hound Rannoch. This was Rannoch’s first trip away since snapping his cruciate ligament whilst out running and having to have it rebuilt followed by lots of physio and hydrotherapy, a rather costly affair indeed!! Bye the way has anyone tried enforcing 6-8 weeks bed rest for a Springer Spaniel?
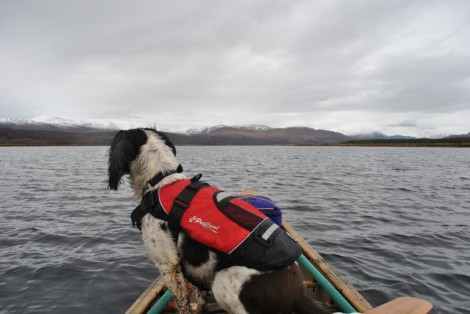
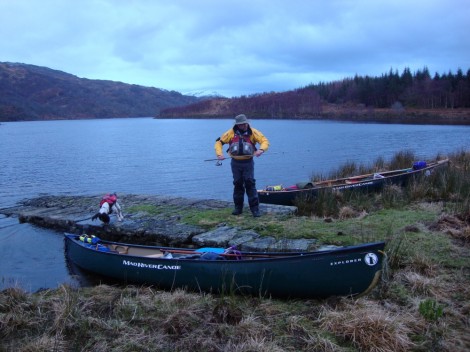
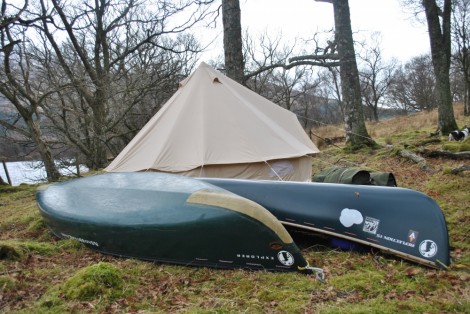
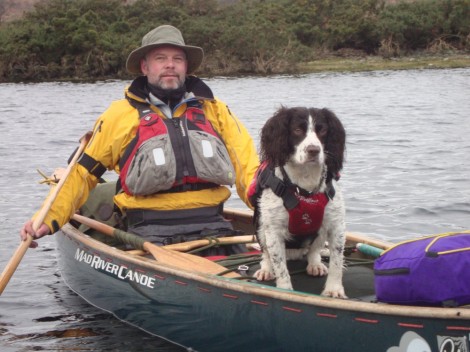
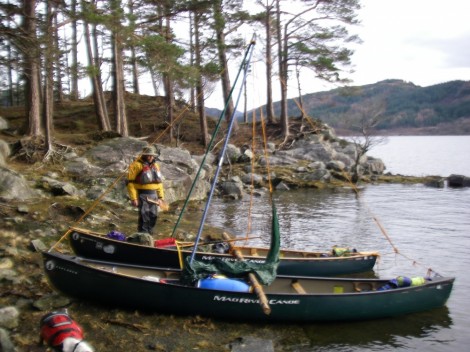
As there were no portages planned we decided go heavy,on a trip of luxury and comfort with lots of good food, and wine of course together with some cast Iron Dutch Ovens, tripods to cook with and to finish it all off a canvas Bell Tent to live in. Boats packed, us ready and Rannoch with his own PFD fitted we set off heading north surrounded by majestic mountains lightly dusted with snow.
Rannoch and Iain playing hunt the stick!
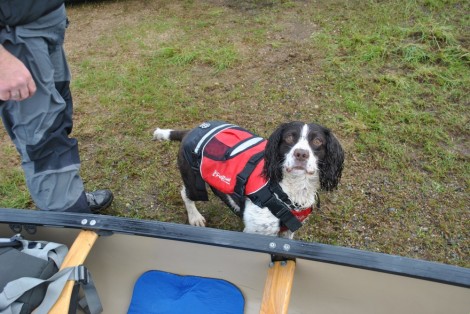
Are you ready, can we go yet? Rannoch in his PFD
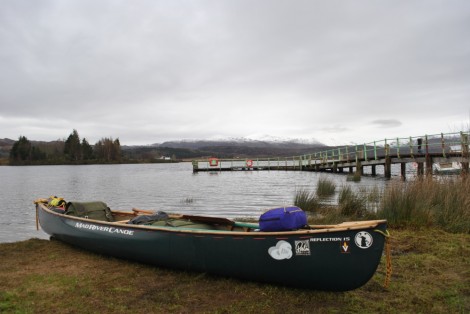
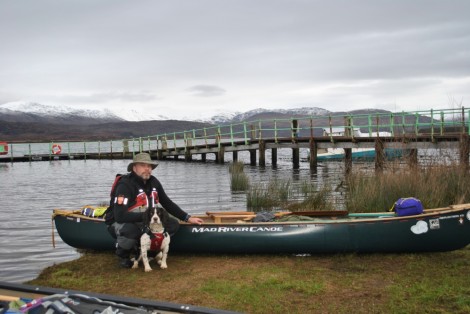
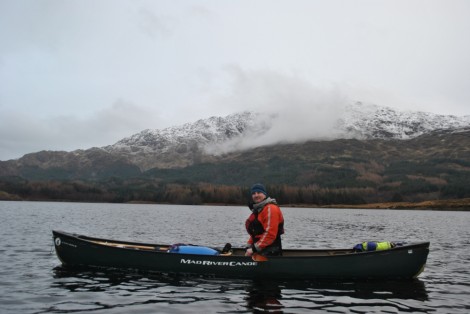
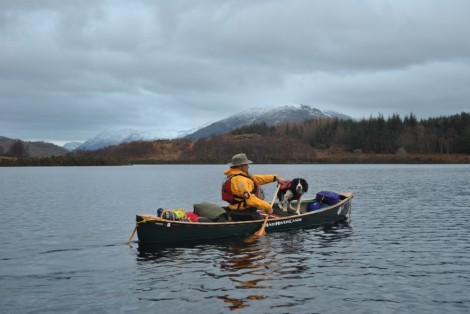
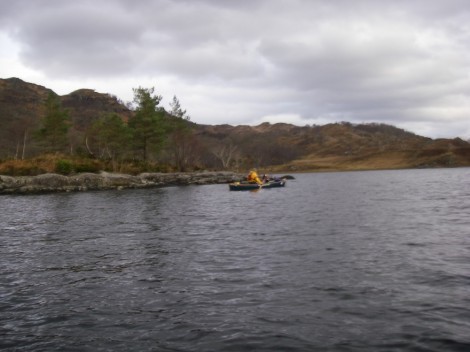
Ready for the off
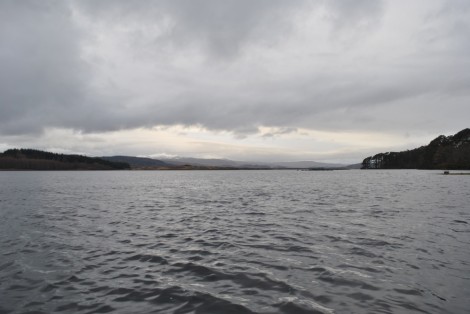
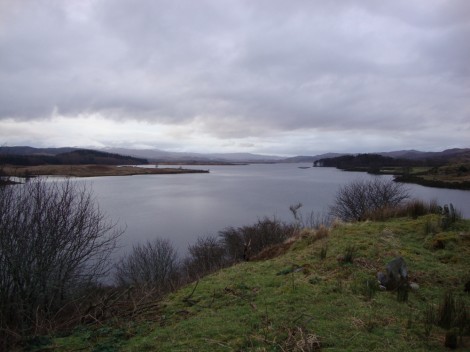
Looking North up the Loch
Iain soaking up the environment
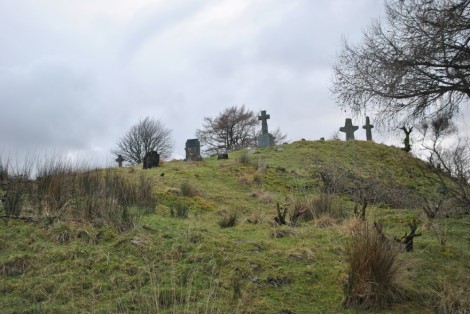
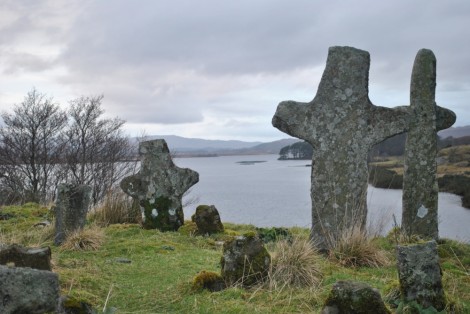
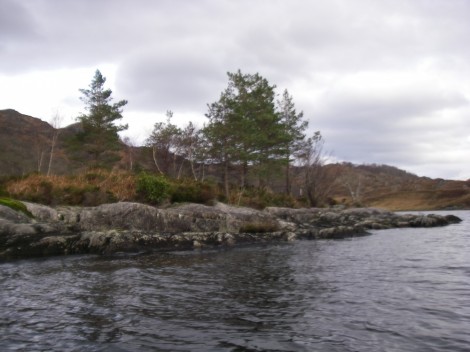
The weather was kind to us as we set off although it was threatening to snow on and off and there was a steady wind blowing into our faces all day. Our plan was to head north but keeping to the southern shoreline for some shelter, and make our way up to the ancient burial island of Eilean Fhianain with St Finans Chapel on it.
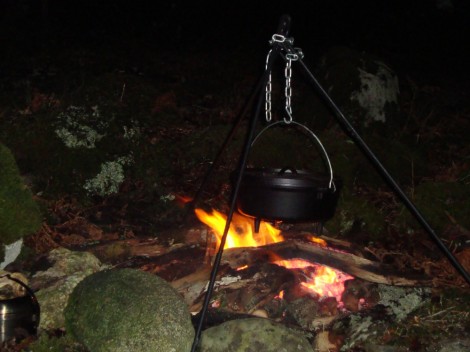
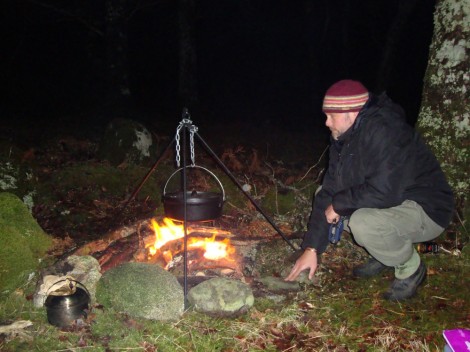
After battling with the now quite strong wind we decided to take shelter, have some lunch and a well earned brew courtesy of our Kelly Kettle. Lit with a small amount of Birch Bark I was carrying together with a fire steel the Kettle was soon on the go. I always carry a small supply of dry tinder type material for firefighting etc as I cant always guarantee finding something suitable near by, and I always carry a fire steel as even when wet these will give sparks unlike a wet lighter or matches. I also carry a short length of garden hose which has a piece of copper pipe with its end flattened pushed into it. I use this to blow down giving my fire or kettle lots of oxygen which is very important, especially in the early stages. I would like like to lay claim to this useful little addition, however a few years I found mention of something very similar in one of Calvin Rustrum books on wilderness living! Meanwhile whilst I kept an eye on things Iain headed off in search of some dry wood for the kettle eagerly assisted by Rannoch.
Lighting the Kelly Kettle with the aid of a bit of garden hose and copper pipe!
A short time later we were back on our travels, with the temperature dropping quite quickly now and the wind picking up it was time to add a layer or two, so on went my Palm Alaska, a great jacket for this type of environment. We soon arrived at the ancient burial Island and spent some time exploring it, noting that some of the dates on the tomb stones were in some cases from the last few years. I also took the opportunity to get out the fishing rod and try and catch some supper for us, but instead caught nothing!!
Looking up to the burial site on Eilean Fhianain
The view back down the Loch from the burial island
Dad are you sure there's fish in here?
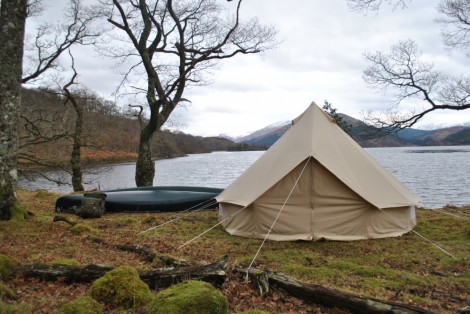
After leaving the island we pushed further north and started looking for a good place to camp. Eventually and just as light was starting to fade we found a good spot and set up our camp. We chose to use a Bell Tent which meant we had alot of room including standing room and cooked some fine cuisine on open fires using our Dutch Oven suspended with a tripod. A truly cracking combination.
Home sweet home..
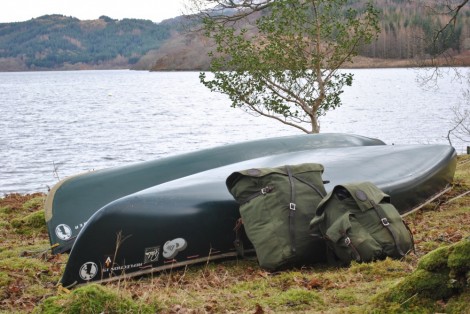
In keeping with the mood of the trip I chose to carry my kit in traditional Duluth canoe packs, made from canvas and leather and incorporate a Tump line worn on the head whilst carrying. These packs were made popular by the late Bill Mason in the Path of the Paddle series. Very robust, very versatile and designed specifically to fit in canoes.
My Duluth packs
Even Rannoch has his own portage sack so as to carry his food and kit!
Over the next day or so we pushed on further up the Loch. One area of particular interest to me is the small island of Eilean Drollman which is the exact spot on which I was camping on whilst on a similar canoe trip on September 11 2001, the day of the twin towers tragedy! I was unaware of exactly what had happened until a day or so later when I visited Fort William and was stunned by the events that had occurred. Hence I now know that island as 9/11 island. It is always a weird experience visiting this spot and remembering what has happened.
9/11 island and my bivy spot from 2001!
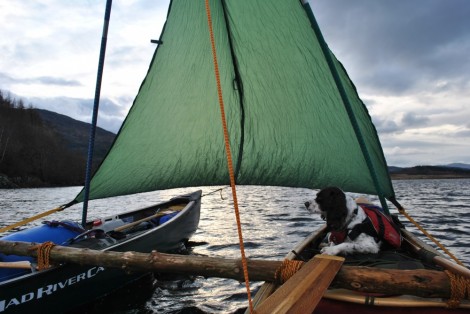
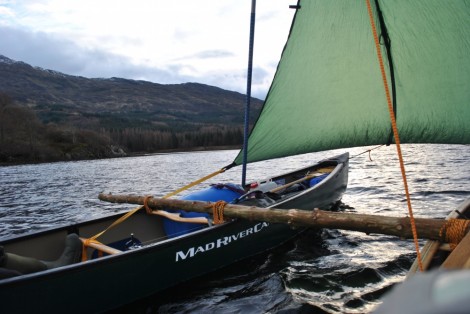
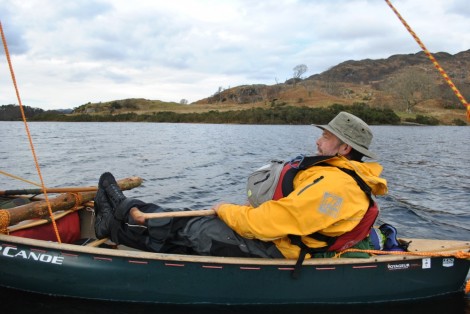
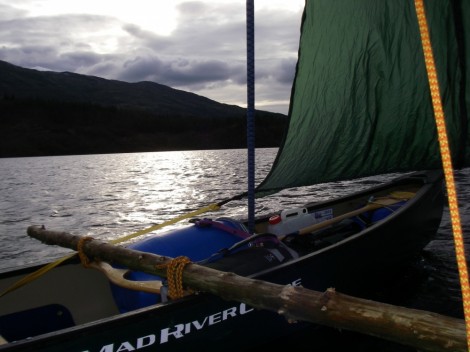
All too soon it was time to head back down the loch. Luckily the wind was in our favor so we took the chance to make the most of it and sail back. We spent some time rafting the boats together and building an A-frame sailing rig to accommodate my tandem sail I had made. We opted for a single spar across the center of our boats, made from and old log we found. I like to use a single spar in the middle as it allows the boats to move independently, however if conditions are more challenging then I may use two spars, one at the bow and one at the stern. Really important here is that any knots, lashings etc used are of a quick release style in case of the event of a capsize. It is also very important to have a system for the sail to be raised and lower quickly. Remember to have a plan should anything happen i.e. man overboard, swamping or a capsize.
Building our tandem sailing rig
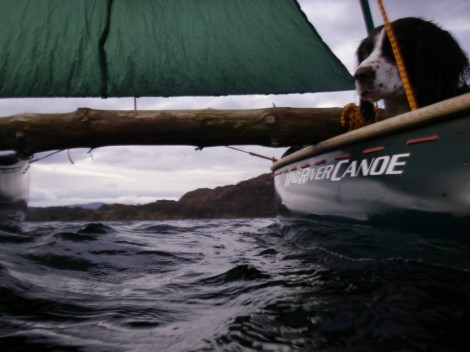
Putting my feet up and letting the wind do the work
A tired but very happy Rannoch
A good couple of days paddling and exploring can be had on Loch Sheil or a longer more interesting trip can be had by paddling the Loch Sheil circuit starts at Glenfinnan passes down Loch Sheil into Loch Moidart and then following an exposed coast line north to Glen Uig before heading further up the coast finishing at Lochailort. I have completed this circuit a umber of times and have extended it further by continuing on the River Ailort (tracking, polling and grunting!) to Loch Eilt and then finding the road at its Eastern end to portage back to the start. These trips can be reversed according to the prevailing winds and conditions.
If however if like us you are just after a few days on Loch Sheil then there are two options for launching. The first is at the northern end from a small pier near the hotel (grid 901805) and the second which is where we began our trip is at another small pier this time in Acharacle (grid 684 678).
This is another one of those special places I never grow tired of. Every time I go back I discover something new. Go and see for your self.
The final words must come from my paddling partner from the trip Iain…..
I’m taking part in the rather insane and incredibly physically challenging Yukon River Quest in aid of Help for Heroes.
If you can support me your donation really will make a difference to this amazing group of young people. Please visit our fundraising page http://bitly.com/HoPyM3o
or you can Text YUKN99 £(the amount you wish to donate) to 70070. Thank you for your support.
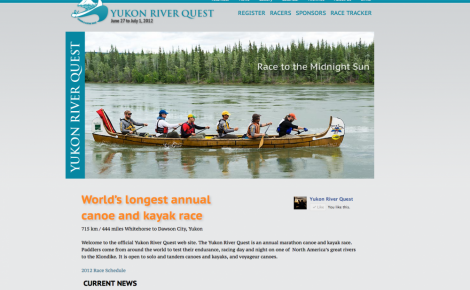
Next Friday I will be flying out to Whitehorse, Yukon Territory in the North of Canada to take part in this years Yukon River Quest, which is also known as the “Race to the Midnight Sun” and is billed as “The most spectacular paddling race in the world!”
I will be heading out for this years race with two teams, one of which is from London Irish Premier Rugby Club, and the other is from Interserve, which is one of the world’s foremost support services and construction companies. I will be member of the team from London Irish Rugby comprising of Toby Booth, Justin Bishop, Neil Hatley, Gavin Gleave, Tony Cilia and of course myself. As well as successfully completing the race our aim is to raise money for our chosen charity Help for Heroes, which helps wounded service men and women that have been injured whilst serving in Iraq or Afghanistan. You can visit their site at www.helpforheroes.org.uk and find out more about the fantastic work they do.
The 14th Annual Yukon River Quest starts to the east of Alaska at Whitehorse, Yukon on the 27th June 2012 finishing some 450miles/745km later on Armed Services Day, the 1st July just below the Arctic Circle, at Dawson City, Yukon. Athletes paddling canoe/kayak, solo, tandem and crewed join from around the world to test their endurance, racing day and night along the 450miles/745km of rugged river shoreline to the Klondike in the most spectacular paddling race in the world.
The Yukon River Quest had its birth in the Dyea to Dawson Centennial Race to the Klondike. In 1997 and 1998, up to 50 two-person teams hiked over the 33-mile Chilkoot Trail from Dyea, Alaska to Lake Bennett, and then got in their canoes and paddled 100 miles of headwater lakes to the beginning of the Yukon River in Whitehorse, where they continued on for another 460 miles to Dawson City. The event was a tremendous success, drawing adventure athletes from around the world, but the best teams were always the best paddlers.
Now a days the race starts with a 400m run to the boats and launching point, each team will then follow the route taken by prospectors chasing the last great gold rush of 1897. Like the aspiring miners of the Klondike, the race is more than just the story of gold and glory. To get to their final destination of Dawson, each team will have to endure a daunting challenge on a perilous river in raw wilderness – at least 30% of participants do not complete the race due to the severity of conditions. All teams must be self sufficient, for in the wilderness if you capsize and lose your boat it is possible you may be out there on your own for days.
There are only two compulsory stops throughout the entire race. The first is at Carmacks, which is approximately 220miles/340km in to the race and must be reached within 35 hrs. Here teams must take an enforced minimum 7 hour rest before continuing. The second compulsory stop is only for 3 hours and comes after 374miles/602km and is located at Kirkman Creek. Other challenges that we will encounter during the race include the 30 mile long Lake Laberge which can often involve strong winds and waves, and the aptly named Five Finger Rapids or Rink Rapid. I was also a little concerned when I had to sign a disclaimer saying that I accepted the risk that I may be mauled by bears, burnt to a crisp in forest fires and that I may be several days from help!!
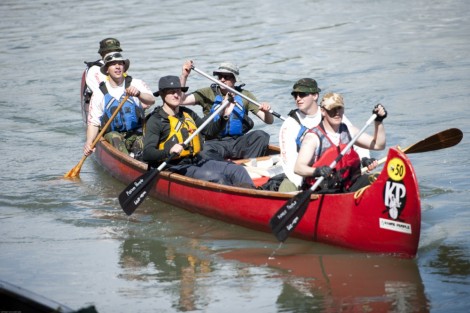
We have entered in the Voyageur class, which means we will be paddling a Voyageur style of canoe just like the one in photo below.
A Voyageur style canoe during a previous Yukon River Quest
The Voyageurs were the people who engaged in the transportation of furs by canoe during the fur trade, it is a French word which literally means “traveller” The Voyageurs used two types of craft during the era of the fur trade. The famous Canot de Maitre on which the fur trade depended was around 36 feet long, had a crew of 6-12 and was capable of carrying 3 tons over the route from Montreal to Lake Superior, hence it was also know as the Montreal Canoe. The smaller Canot du Nord carried a crew of 6 or 8 and a cargo of around 1.5 tons over the smaller lakes, rivers and streams of the Northwest.
The Voyageurs who crewed these boats were also know as Engage’s or hired canoe men and would have fulfilled different roles. The Gouvernail would have been in the stern of the canoe and acted as a steersman. The Avant was in the bow and as well as being the captain and lookout he was also responsible for steering. The remainder of the crew were the work horses and were know as Milieu or middle paddler.
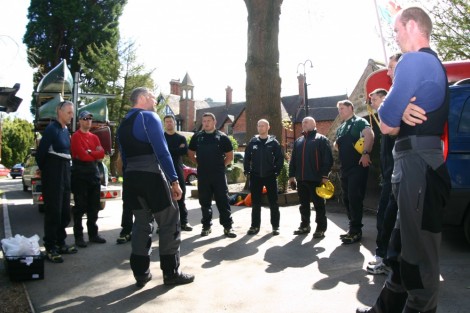
All of us involved have been putting in quite a lot of training for the event in various ways, including a having spent a weekend in North Wales and discovering the delights of the River Dee!
A quick team talk before getting on the water
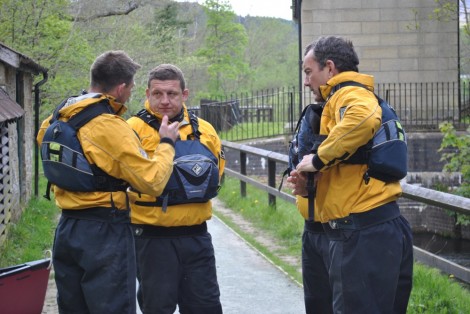
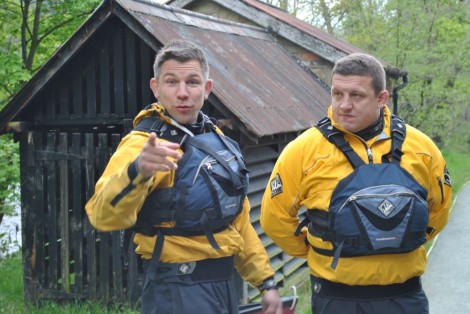
Bish explaining to Hatts and Tony about the finer art of paddling!
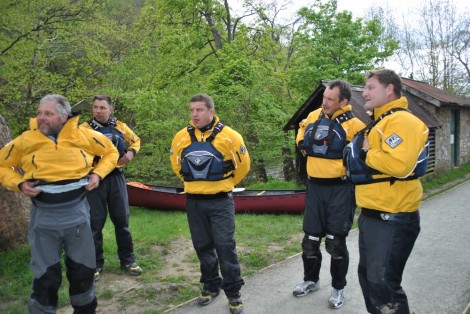
A fine body of men! From L-R Me, Justin Bishop, Toby Booth, Tony Cilia and Neil Hatley
Hey guys, doe s my bum look big in this?
You can find out more about our challenge by visiting
Its UK National Go Canoeing week and chance to show how much you love the sport – so get out there and take part.
National Go Canoeing Week marks the launch of Go Canoeing, a national campaign supported by Canoe England and companies including Palm to encourage and inspire more people to go canoeing more regularly.
So everyone of us that loves paddling should use this week to tell others. To give you some encouragement simply post a picture of you paddling on our Facebook walland you’re in with a chance to win a bag of Palm goodies for sharing your experaince. In fact why not share it with others and spread the message!
To win, simply take a snap of you or your paddling friends and post on our wall. Tell us who, where and when it was (between 6th and 15th of April) and let everyone know why the paddling was so great! We’ll choose the one we feel best represents the spirit of Go Canoeing and announce a winner on Monday the 16th.
There is lot of plastic out there from 20 plus years of kayaks and canoes being made this way. Luckily the properties of the polyethylene material give it a massive lifespan, but at some point boats get written off or folk will want to retire their craft and so the question pops up – what then?
Our Dagger Europe kayaks have made some small inroads with the Fiesta model, the first 100% post production waste re-cycled kayak; but that’s just the tip of the ice berg.
We were recently approached by Engineering graduate and Waste management Consultant Beth Ripper who is study kayak lifespans and she’s just sent out her findings. Read all about it here.
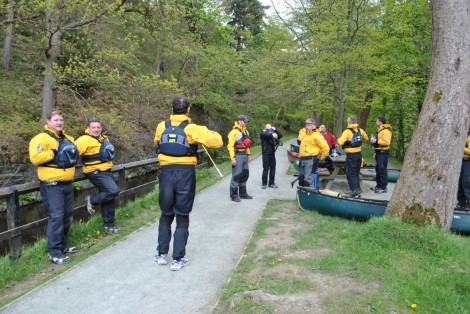
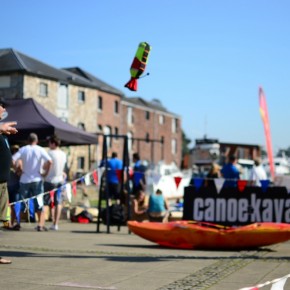
Shaking off sleep from Saturday’s ever-successful South West canoe show, the team were on site early on Sunday to set up the Exe Big paddle.
It didn’t take long for the Piazza to take on the appearance of a festival site, with tents, bunting and boats all creating a mass of colour ready for paddlers to arrive….. Which they did, right on the dot at 9am.
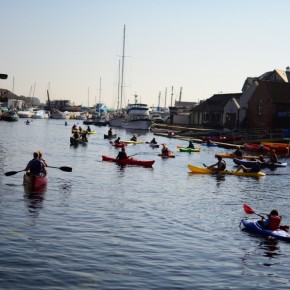
First up were the tours, fully booked out months in advance, the groups were keen to get out and learn about the nature and history of the Exe and adjacent shipping canal. We were fantastically lucky to have staff from the RSPB, Devon Wildlife Trust and an ex head of the Archaeology society as our guides so those lucky enough to secure a place came back a few hours later full of enthusiasm for what they’d learnt and seen on the five mile loop.
Meanwhile on the Piazza, the sunshine brought a great mix of participants, including passers-by keen to have a go at kayaking and canoeing for the first time. Our seasoned team from Bristol based canoe lifesaving club, Globe 360, were constantly busy and had to add boats to the pool of demos available as more and more people got out on the water.
Helping entice folk into giving it a go were the popular Canoe England ergo machines. Racing over a 100m sprint, young and old gave it their all through the day trying to better a time set by development racer Michael Sims and to get a top ranking on the Top Gear style leader board. Predictably no-one beat Michael’s time, but that’s what you’d hope with a national level athlete and it didn’t stop lucky winners getting their prizes!
The CKUK Magazine Throwbag Challenge also drew a crowd each time someone stepped up to throw the rope bag into a boat, gradually getting further away each time they threw. The winners managed an impressive 20-metre throw with pinpoint accuracy to win a year’s magazine subscription, although technique advice from the sidelines seemed as abundant as those trying!
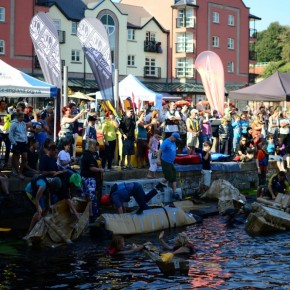
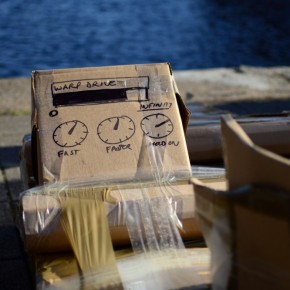
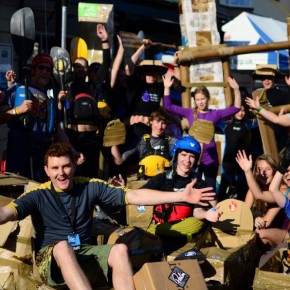
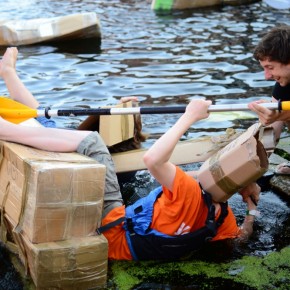
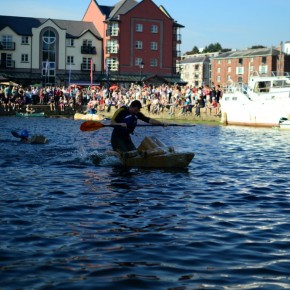
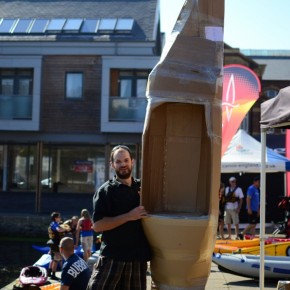
As the afternoon came around so did preparations for the finale of the day: The cardboard canoe race. Starting quietly with boat building by Palm and AS Watersports’ staff, the ‘workshop’ area soon became a teaming mass of people cutting, folding and taping card into weird a wacky shapes.
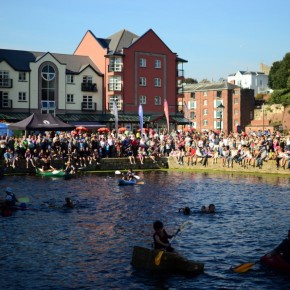
As building finished, a parade of boats (if you can call some of them that) let head judge Ben Hedden from Haven Banks Activity centre scrutinize designs, before giving the entrants the go ahead to proceed. By now the banks were lined with spectators and, amidst the expected carnage, boats set off to try and get around a marker buoy.
Success was not widespread with some who’d put creativity in front of water tightness literally falling at the first splash. However the crowd began to roar as the first ‘floaters’ made it around the buoy and back on the home straight. At best many made one lap, including an ingenious catamaran design from the local deaf school, but as cheers continued a junior and senior race winner soon became obvious, as they were the only ones still afloat. Congratulations to Sea Hare and Back-to-Front, winners of the first ever Exe Cardboard Canoe Race!
Tea and medals swiftly followed and the tiring task of packing it all away began.
It was a great event, fulfilling the aims of the Big Paddle by showcasing the sport to new participants and widening the scope for those who already take part, all in aid of charitable causes, which for the Exe event were Devon Hospice care and the Canoe Foundation.
Events such as this are only possible with the dedication and help from volunteers. So to AS Watersports, Canoe England, Haven Banks, Exeter Canoe Club, Globe 360, CKUK the Palm team, and all of you who attended – a Big Paddle thanks.
Look out for the full report in the December issue of Canoe Kayak UK Magazine. Until then, we hope you enjoy these shots. Massive thanks to Daniel Bewsey for capturing the event for us. For the whole gallery see Dan’s Big Paddle Flickr Album.
Have you ever seen a forest fire up close? Well we hadn’t until this past week. On Tuesday as we left Hill Island Lake, we could see smoke toward the south but we figured that it was a long ways away. On Wednesday, the plumes of smoke grew closer and closer as we paddled south on the Tazin River.
By lunch time we were pretty sure that the fire was near our route. The view upriver was one thick, low-lying cloud of smoke. We called the ENR (Environment and Natural Resources) in Fort Smith to see if they knew of any fires in our area. We found out that there were three fires not very far away from us. The one of concern was burning near the Northwest Territories, Saskatchewan border.
We were about five miles from the border. We proceeded with caution, but only made it another couple of miles after lunch. The eastern side of the river was on fire. Not only did we see thick clouds of smoke billowing up from the spruces, but we saw patches of flames here and there. Fortunately for us, the wind was blowing the smoke away from us.
A gravel bar provided us with a perfect spot to stop and watch what was going on upriver. We waited there for several hours. We set up our tent and ate dinner as we observed the smoke and flames creep ever closer to the eastern shore of the river. After several hours the fire had reached the river’s edge and a small stand of Jack Pine ignited in a plume of flames and smoke. In less than a minute the ¼ mile section of the river near us had erupted in flames. The raw energy of the fire became very real as we felt the heat and listened to the inferno. All we could to is stand in awe.
Within 10 minutes the flames were gone, leaving a giant stand of black smoking tree trunks. We decided the fire was getting too close for comfort so we packed up the canoe and retreated north, hoping the fire would die down overnight and let us pass in the morning.
As we slept the fire jumped the river and continued burning to the west. Small fires burned on both sides of the river and the smoke-filled river channel was not very inviting. We called the ENR again and learned that they were sending a helicopter out later in the day to get a look at the fire. So we decided to take it easy and wait. Around 3 PM we heard the drone of the chopper and watched as it came in for a landing on the gravel beach 100 feet from us. Two ENR officers in yellow jumpsuits hopped out and explained that the fire had burned out along most of the river and that the “head” of the fire had moved several miles west of the river. They advised that we paddle through the recently burned area right way because the winds were predicted to change overnight.
We casually chatted for a few minutes and then they hopped back in the helicopter and flew way. We were left a little dumbfounded, but excited about continuing our journey. As we paddle through the smoke filled channel, we marveled at the blackened trees and patches of green left by the fire. Small fires still burned on both sides of the river, but we never felt in danger. We paddled well into the night talking about the natural phenomenon we had just witnessed, finally stopping to pitch out tent many miles from the fire at 1 AM.
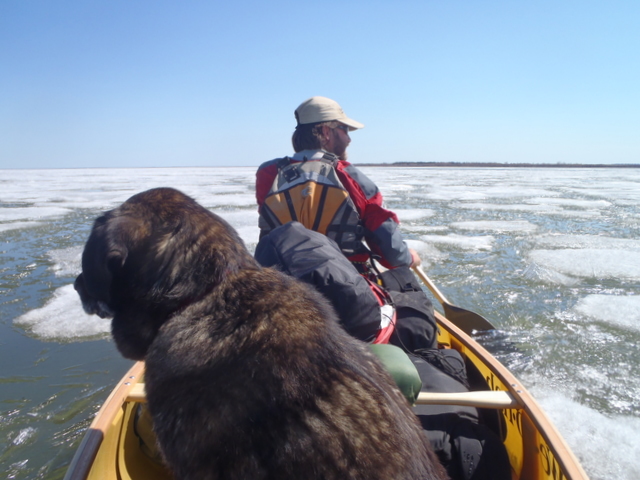
It turns out that the end of May is a little too early to start paddling on Great Slave Lake in the Northwest Territories. Ice stretched to the horizon and much of our time was spent wading and dragging the canoe through shallow open water and pushing, prying, and breaking our way through the candle ice. It was sort of fun for a few days, but mostly it was a lot of work.
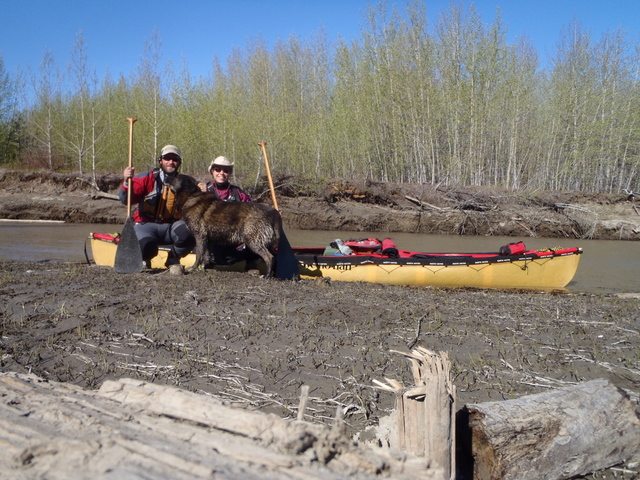
On Earth Day (April 22) of 2010 Dave Freeman and I began a three year, 11,700 mile journey across North America by kayak, canoe and dog sled. Our goals are to increase awareness and promote conservation of North America’s waterways and wild places while actively engaging over 100,000 elementary and middle school students in the journey though our website and live school assemblies.
The odyssey began by kayak on the Pacific Coast studying temperate rainforests and marine life of the Pacific Northwest, but this was just the first in a series of six stages on their quest to highlight North America’s wildest places.
After kayaking 1,400 miles from Seattle, Washington to Skagway, Alaska, we progressed over the history-studded mountains in the footsteps of the Klondike Gold Rush, to the Mackenzie River delta. From there, we dog sledded south and are currently canoeing from Great Slave Lake toward Ontario. Then we will kayak through the Great Lakes and follow the annual whale migration past the salt marshes and sea turtles of the Atlantic Coast, finishing in the mangroves and coral reefs of the Florida Keys.
As you read this, we are somewhere in central Canada, working our way south and east in our canoe with our travel companion and favorite sled dog Fennel. To follow our progress and virtually immerse yourself in the expedition, check out www.NorthAmericanOdyssey.com. We are very excited to join the Palm Equipment Team and we will post regular updates on the blog.
Outfitting your Open Canoe and giving it that personal touch is what truly gives it an identity and really makes it your own. This can however appear quite a daunting task and a mini adventure in its self, especially when starting from scratch and when a new boat is involved. So after having recently fitted my latest boat, I thought I would share my experiences and offer some of my thoughts and guidance.
My first tip would be to spend some time planning it, considering how and what you are intending to use your boat for. Are you going to use your boat solo or tandem, on open or white water, for short trips or expeditions? All of these have certain common elements but also have very different needs. Have a look around at other boats you may have seen or used, and see what others have done, then ask yourself if it will suit your intended use. Remember just because it works for one person doesn’t necessarily mean it will work for you!
There is no quick fix for outfitting your boat so be prepared to put in some hours, in order to achieve the best results and maximum satisfaction from all your hard work. Time well spent fitting your boat out initially, will hopefully lead to many hours of enjoyment rather than having to make lots of alterations and adjustments.
I have fitted out a number of boats over the years and have what I feel is good set up for the type of paddling I enjoy. I paddle both open and white water and a lot of solo expeditioning or journeying, so the style of outfitting I choose reflects this. There is no single right or wrong way of doing this; the most important thing is that it works for you.
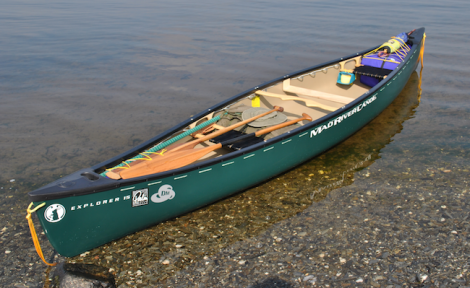
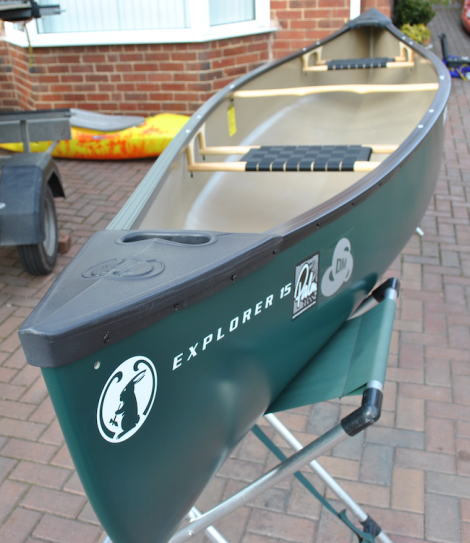
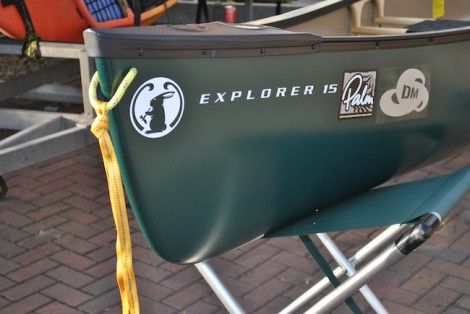
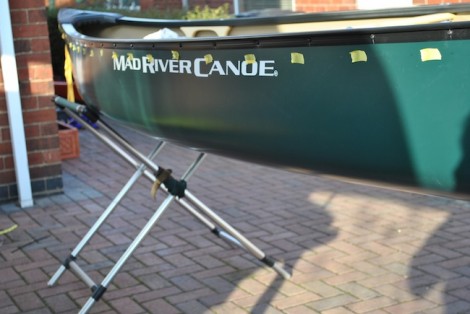
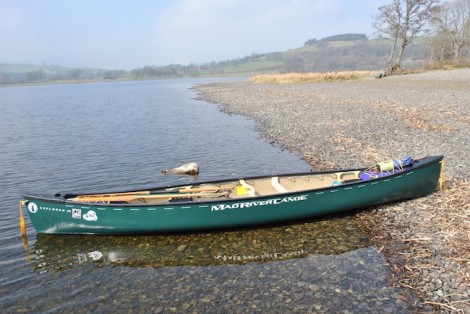
In this instance I have chosen a Mad River Explorer 15 in Royalex. Originally designed by Jim Hendry this is a good all-rounder, with its shallow “V” hull giving good tracking performance, and is stable with a dry ride in various challenging conditions even when loaded for a trip.
What you might need.
Next stage is to gather everything you need for the task ahead. For my outfitting I used the following:
10m of 5mm cord Rope cutter
5m of 4mm cord Electric drill & drill bits
5m of 4mm shock cord Spanners
2m of 10mm Kermantle rope Phillips screwdriver
Zip ties Pliers
5m of 5mm plastic tubing Sand paper
2 X 32” air bags Set square
1 X kneeling thwart kit Ruler
2 X 2” D-rings Pencil
Vinyl bond glue
Vinyl mast foot
Mast bracket
Ok so you have decided on your set up and you’ve got your tools and every thing else you may need, next stage is to get started.
Grab loops.
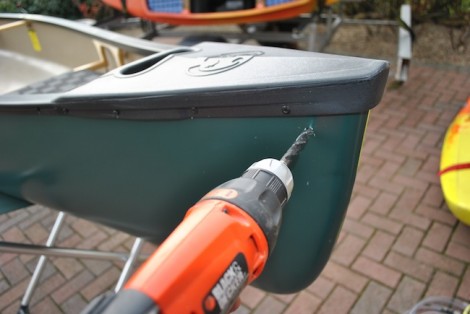
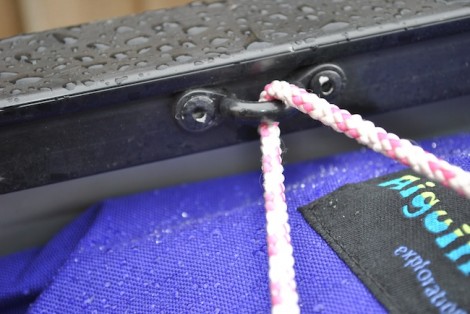
A good starting point is with the grab loops. These will form a secure attachment point for painters, swim lines etc and therefore need to be strong. A common error I see quite often is the practice of attaching things such as painters to the boats deck plates, this is not a good idea as they are not designed to take a load and will pop off when you least want them to. For mine I have used some 10mm Kermantle rope.
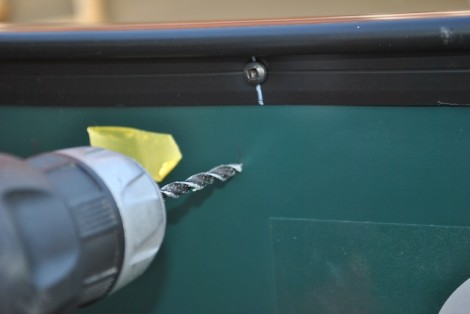
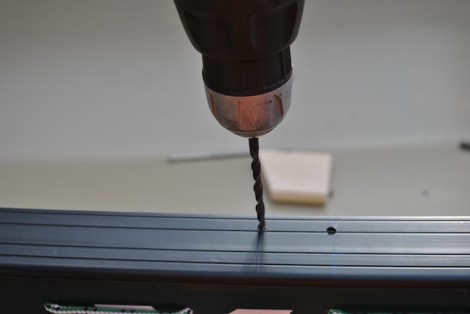
Take a deep breadth and drill!!
Start by drilling a hole just large enough for your rope on either side at both the bow and stern. I have chosen to drill my holes around 6-8 cm back from the bow and 6cm down from the top of the deck plate. At this point remember the old adage, measure twice, drill once! Or in my case measure, measure, measure and then measure some more before taking a deep breath and drilling!
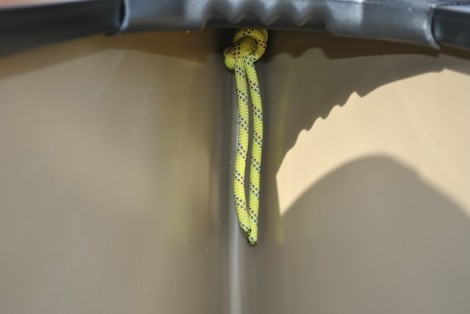
Once drilled and cleaned out, thread your rope through so that both ends of the rope end up inside of the bow and below the deck plate.
At this point I make sure that the loop on the outside is snug to the hull before tying a overhand knot on the bight close up to the inside.
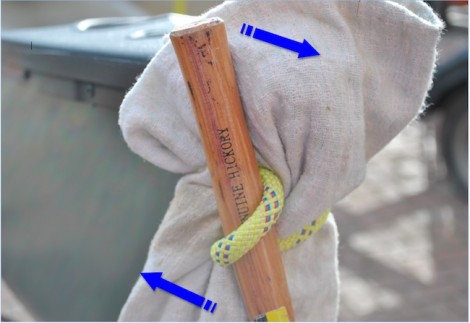
I now turn my attention the loop on the outside, which is at the moment flush to the hull. Taking a cloth to protect my boat I take the handle from my hammer and ease it between the boat and the loop. It will take some levering and time, but be patient. Once the handle is in the loop I then twist it around as in the picture above. The result of this little challenge is that loop should become slightly larger whilst the knot inside pulls tight up against itself. The idea being to create a loop just big enough to take painters etc, and not being too big i.e. big enough to get your hand through as it could become and entrapment hazard. Not only that, but from experience large loops have a habit of getting caught and snagged up on trees, branches and anything else that presents itself. Now re-visit the knot on the inside and use a couple of zip ties to secure the ends.
To finish off with I tie a short length of webbing tape (just long enough to reach the water) through the loop to act as swim tails. I find these have a number of uses including as a quick grab for self rescues, carrying and should I have to approach a casualty in the water, I would rather that they grabbed these than the gunwhales as they do not have such a capsizing effect as someone pulling down on the sides.
Finally secure the remaining ends with a couple of zip ties.
The finished article above with the swim tail fitted. Note the small size of the grab loop. If you are going to attach painters remember that they go through this loop, and can be either permanently attached or removable for transporting. As for length then it is again very much down to personal choice and how/where you will be using your boat. I would suggest as a minimum, a boats length of floating rope. If you choose longer then consider how you will manage and store the line in the boat when it is not being used, as ropes and water are not a good combination with a possible risk of entanglement or entrapment. Now simply repeat this process at the other end of the boat.
Floatation/Buoyancy
Irrelevant of what type of paddling you are intending to take part in, some form of floatation is critical. As it is says this will aide the boats buoyancy should it become swamped or in the event of a capsize.
Floatation or buoyancy can take a number of forms ranging from solid (polystyrene) to inflatable air bags and are normally fitted in both the bow and stern and sometimes in the centre. Solid blocks although initially more expensive are more robust, certainly wont burst and require less maintenance. However as they are solid they don’t always fit perfectly to the shape of the hull, leaving voids around them, which can fill with water and may there fore require some shaping to ensure a better fit. Air bags however, although cheaper do run the risk of being punctured and at £30 -£50 per bag can be a costly option. They can however be protected with foam matting or by using protective bag covers. Also because they are inflatable they will fit the contours of the hull better, leaving little if any of the surrounding area unfilled. Do remember however to let some air out of them when storing them or if they are in the sun for a period of time.
Solid blocks tend to be limited to around 32”; airbags however come in a wider range of sizes meaning that for a solo paddler who would not normally use the area in front on the bow seat they could choose a longer air bag up to the seat adding more floatation. If they then decide to use the bow seat for tandem paddling, then simply deflate the bag a little and roll up the spare out of the way. Just measure from either end of your boat up to where you want the air bag to end and then get a bag that fits closest to your needs.
How you attach your buoyancy is important, as you don’t want it to pop out when swamped or capsized. The best way to achieve this is with a criss-cross cord lashing over the bag/block to the gunwales together with some form of strap that goes over the top of it and secures into the bottom of the boat.
I have chosen 32” air bags bow and stern as most of my paddling is solo, however I may require the option of tandem. As previously mentioned I choose to use protective fabric bag covers, which I think are an excellent addition and are available from Aiguille Alpine.
In order to lash my bags in I have two options. Either to drill into the gunwales and attach some form of P-clip system along the length of where the air bag sits or alternatively drill a number of holes through the side of my boat just below the gunwale , then thread cord through making lashing points (drill & lace). I prefer the later as I find this stronger and I can continue the lacing throughout the length of the boat giving me lots of options for lashing and attaching equipment etc.
Above an example of a P-clip with cord lashing and a protective air bag cover visible.
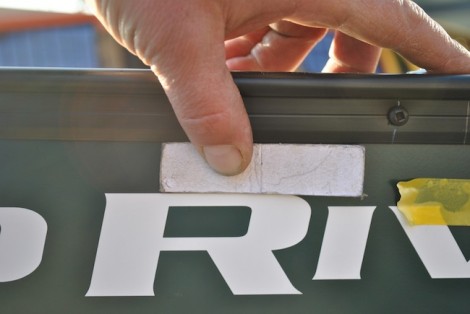
Using a piece of card as a template
I make a start by firstly deciding on the spacing between the holes, and how far below the gunwales they should be. I normally use a spacing of around 8cm between holes and about 2 cm below the bottom of the gunwale. Next I make a small card template to help with the job of marking it all out.
Holes marked and spacing with tape
As I intend to lace the entire length of the boat I start at the center of the boat marking holes either side of the ends of the Yoke. I then continue this process down both sides of the boat and to each end marking where the cord loops will be on the outside with yellow tape. Remember to make sure that the end of the cord should end up inside the boat at the last hole.
Once happy I drill the holes, remembering measure twice, drill once!!
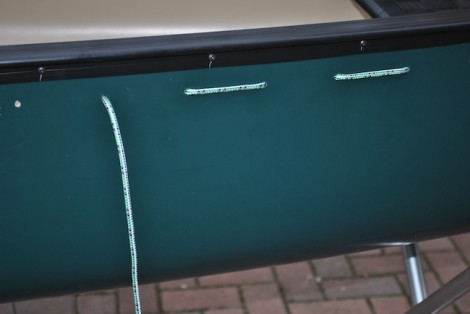
View of the lacing from the outside
I used a 5mm drill bit so that the cord (also 5mm) is a snug fit. With the holes drilled I start at one end, and secure with a knot on the inside then begin to lace down the sides of the boat using 5mm cord. I personally would not use anything less than 5mm cord for the lacing as it could slice through the plastic like a cheese wire.
Inside view of lacing with plastic tubing to make clip in points
On the inside I use short lengths of 5mm plastic tubing, slid over the cord to provide convenient loops for attachment. I find these a lot easier to clip and tie into than when the cord is fitted flush to the boat. I don’t fit these throughout, only where I think they will be of most use for lashing and securing kit. To help slide the tubing over the cord I soak them first in boiling water to soften them and then use a piece of very thin cord/twine to pull the thicker cord through. You may need to remove the seats to allow threading of the cord/lacing and replace once completed. I make sure the cord is pulled tight as I go and finish at the ends on the inside again with an overhand knot.
View of lacing with shock cord also threaded through
Once I’ve completed both sides I use 5mm shock cord and weave this through the loops on the inside, as in the photo above. This adds a convenient and secure way for storing things that I may want to access quickly like my sponge or the grip on a paddle.
Note also the floating line secured on the side of the seat. This is my bridle for tracking and lining. These are pre-measured and a knot tied in the centre. One side is permanently attached, when I need to use it I simply unwrap it from the seat and pass it under the boat before securing the other end onto the opposite side of the seat. The result being that the knot ends up under the boat and exactly in the centre without all the fiddling and adjusting that can be associated with attaching a bridle.
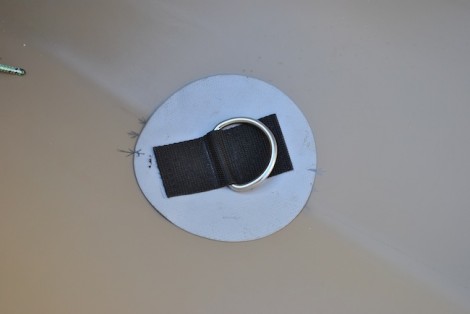
Next I glue in some D-rings to the bottom of the boat in order to secure the strap, which will pass over the top of my airbag ensuring a secure fitting. The airbag covers I have chosen have a strap built in. If you don’t have these then a roof rack strap will do the same job. Remember to pass the strap through the grab loop on the inside of the boat before passing over the bag and securing.
The D-rings should be positioned underneath your bags or blocks rather than in front of them. This will ensure any tension on the D-ring will have a forward pull rather than an upward one, which could lead to the ring being pulled out.
I use my inflated air bags to work out exactly where I want the rings and draw round them. I have used large 2” rings for this job. Note the angle I have had to set the rings at in order to accommodate the shallow ‘V’ of the hull.
Next I use sandpaper to roughen the surface of the hull where the D-ring will be glued and also the back of the ring. I then clean both surfaces with meths and allow to dry prior to applying the glue. I have used Vina (Mondo bond & River bond similar products) bond and apply this to both surfaces then leave until touch dry.
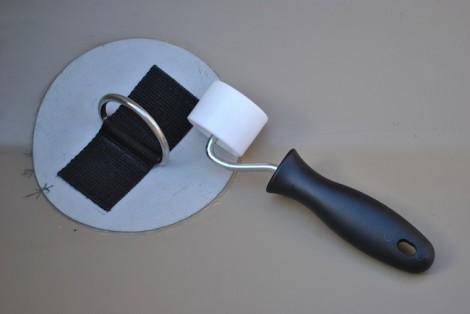
As above once dry to the touch I carefully position the ring in the pre-prepared area and use to small hand roller to remove any air bubbles and ensure that the ring is firmly pressed down, paying attention to the center area around the ring and the edges of the patch.
I must point out that in this article I am referring to the guleing of D-rings etc into a boat made of Royalex and provided I use the technique mentioned I have not had any issues with them sticking or falling out. If however you have a non Royalex boat then you may encounter some issues with regards the glueing of items. I have had some success using Evostick but the surface really does have to be well prepared and in some cases some gentle heat is applied in an attempt to de-polarize the plastic and aid adhesion. Remember to test a small area with the glue first. You don’t want to melt a hole in your prized possession! Any doubts contact the manufacturer.
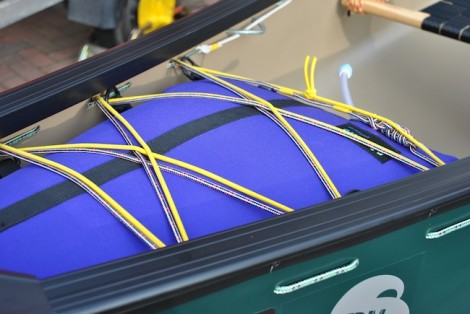
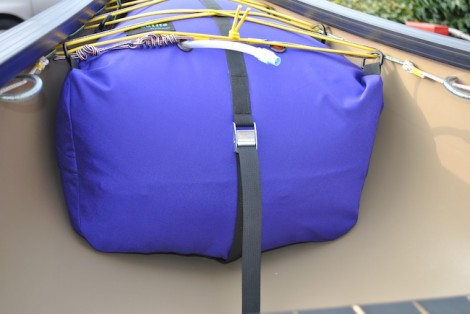
Once the rings are dry I put the air bags back in place and thread the strap through, then finish off by using a criss cross lashing of 4mm cord over the bags and through the cord loops on the inside of the boat.
Air bag fully lashed and shock cord added
I have also added some shock cord over the bags for tucking a spare paddle and swim lines etc under. Note I don’t recommend using only shock cord to secure your airbags as this will allow too much movement in the bags, possibly resulting in the air bag being popped out when swamped.
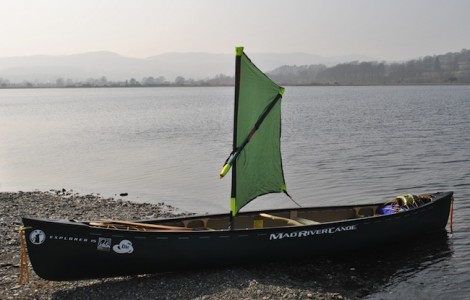
As I will be using the boat for some solo sailing I use the same gluing technique to fix a vinyl mast foot into the bottom of the boat.
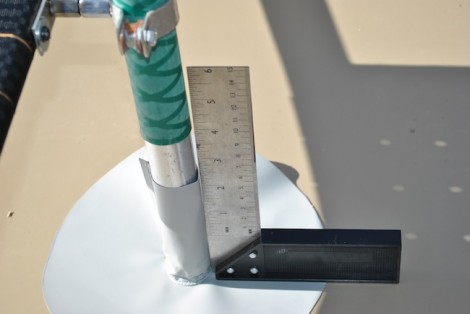
Using a set-square to ensure mast, mast foot and clamp are all aligned
I particularly like the vinyl mast foot as it folds flat when loaded with kit or when the seat area is being used. Generally I position the mast foot etc in the area to the rear of the front seat. Note the removable bracket I have used on the seat to hold the mast securely and the set-square I have used to ensure everything is square.
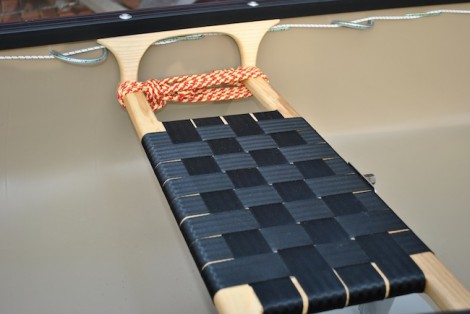
Kneeling thwart
For some this may be as far as your outfitting goes and your boat is now ready for paddling tandem. If however you intend paddling your boat solo then you may want to consider fitting a kneeling thwart. This will greatly aid your connectivity with your boat leading to better stability, control and overall performance. For some the idea of having your feet and lower legs slid underneath a wooden bar may give the feeling of being trapped and take people out of their comfort zone. If this is the case then maybe consider using some form of closed cell foam saddle, that could either be loose so as to move it either around or from boat to boat, or secured in some way.
Deciding where to place your thwart is down to personal choice but generally they are fitted as near to the centre of the boat as possible (i.e the yoke), as this will then form the pivot point around which the boat will turn. This really highlights safety concerns so it is really important that you ensure you have enough room to move and escape if needed should a capsize occur.
Another consideration is how you want your boat to be trimmed. For me personally I look for my boat to be slightly bow light when un-laden, then when I paddle with my kit bag I can achieve a more neutral trim very easily if required. One way to achieve this is to move around in the boat and have someone provide you with feedback as to how the trim looks. Better still have someone armed with a camera who can take pictures of you in the boat, then you too can actually see the effect of your positioning. You will need to have the bar from your thwart with you to enable you to identify its planned position in relation you.
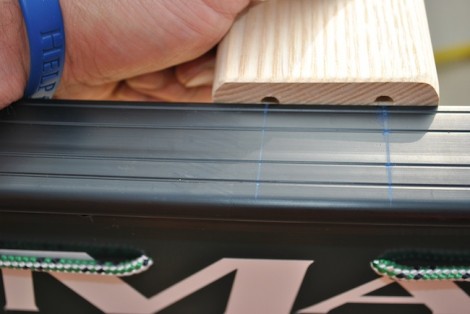
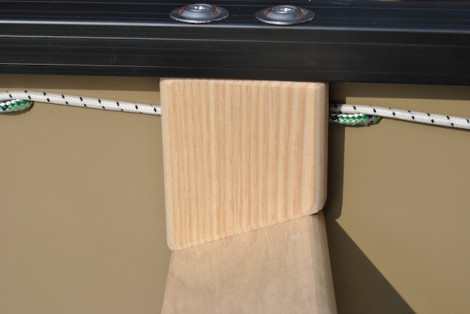
Decision made its now time to fit your thwart. I use the riser blocks to start marking out where I need to drill my gunwales. By offering up the riser block to the gunwale I can mark the distance between the holes, then using my set square mark across the gunwale. Noting the exact position in relation the bolts on the yoke I mark out the opposite gunwale as well.
Marking out using a set-square
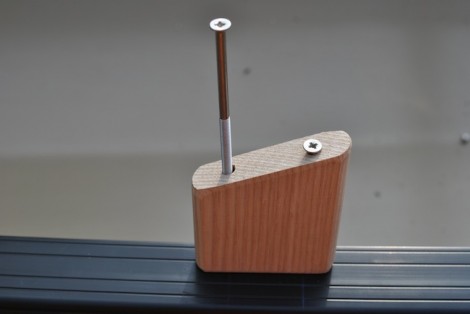
Using a riser block to check the location of holes.
Now using the riser block again, but upside down and making sure it is flush with the inside of the gunwale, I start to screw the supplied bolts in. When I then remove the blocks I will have the position of the holes marked and ready for drilling.
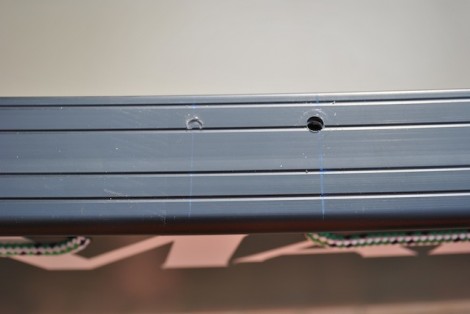
In the picture above a drilled hole can be clearly seen along side the mark created by screwing the bolt through the riser.
Remembering to measure twice and drill once repeat the procedure on the opposite side. Once completed fit your riser blocks in position, up the correct way and with the longest edge towards the front. This will allow you to check their position and help you with determining the correct length to cut the bar.
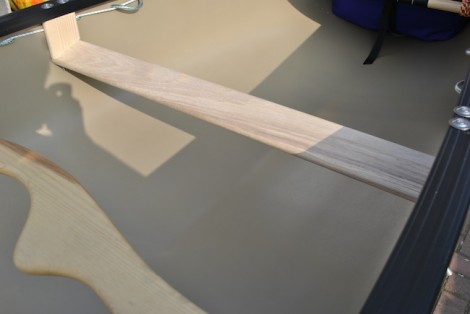
You now need to determine the length of the cross bar, remembering to take your measurement from the bottom of the riser blocks, allowing for some excess on either end and then cut to length. Using the same technique mentioned above mark out the location of the holes in the cross bar. When drilling the holes remember that they will need to be at an angle (appprox 15-20 degrees) to allow for the bolts to pass through the angled cross bar.
Before finally assembling your thwart it is a good idea to give all the wooden parts, especially where you have trimmed them a good couple of coats of Boiled Linseed oil. For this I use a 50/50 mix of Boiled Linseed and White Spirit. Leave each coat to soak in and then buff vigorously with a cloth before completely dry in order to remove any excess. The heat generated by the rubbing will also help the oil soak in.
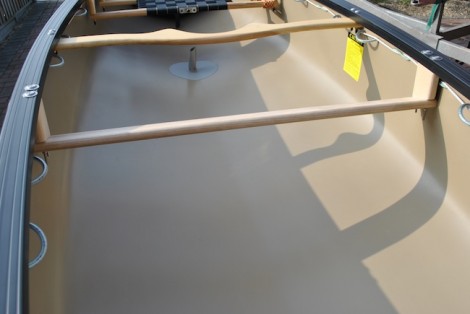
Be careful not to over tighten the bolts, and use the correct size screwdriver so as not to damage or strip out the heads of the bolts as the stainless is quite soft.
Again going back to safety concerns it is a good idea now to try the thwart and make sure that you can get your feet in and out from under it safely. If not, trim 1 cm at a time from the top of the riser blocks on both sides until you are happy. This can be revisited at later date and more adjustments for comfort or safety can again be made.
With your boat now fitted out, you can head off on your adventures and look forward to many hours of happy paddling.
This was never meant to be the definitive guide to outfitting a canoe. It is merely some of my thoughts and advice I would like to share with you and hopefully it will help you with your outfitting.
Remember there are lots of ways of doing this and I have only covered some of them. Just because it works for me doesn’t mean it will work for you!
Big thank you to the guys at Palm and Desperate Measures for their help and support in my ventures.
This article is available todownload and print out as a PDF document to help you with your outfitting. Good luck and I hope you find this of use.
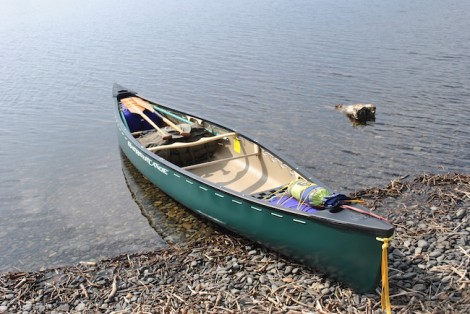
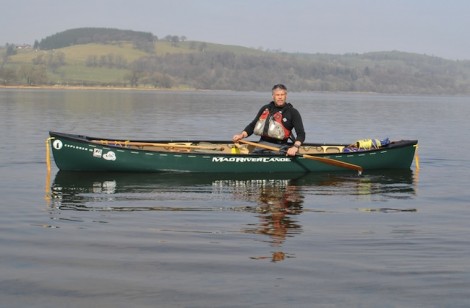
I would like to leave you with some pictures of my newly out fitted boat.